In this module, the companies and suppliers that provide one or more services to the company are managed.
Company Creation
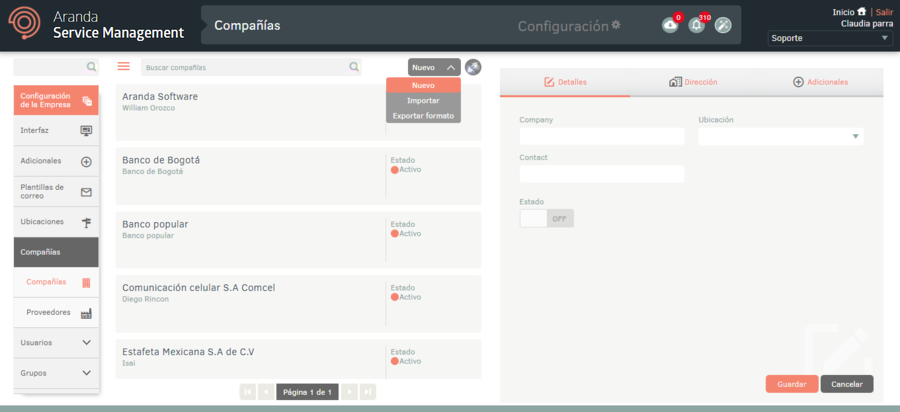
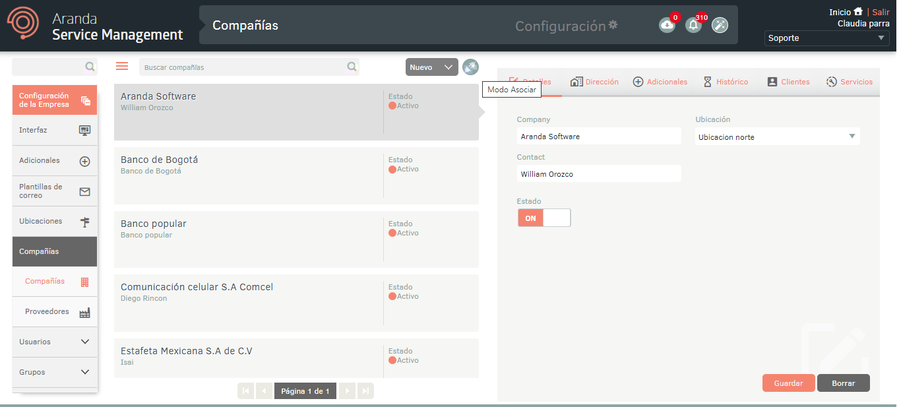
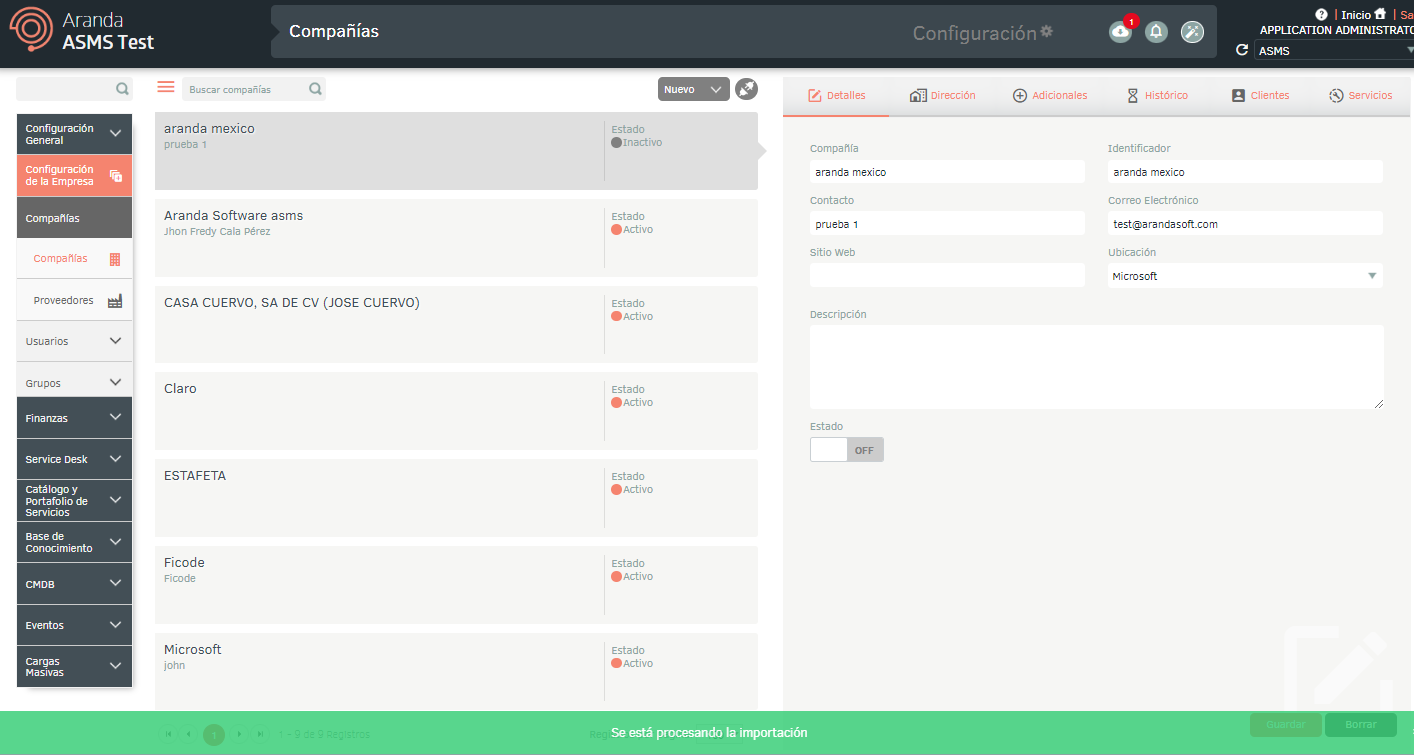
1. To create companies, log in to the ASMS Admin Console, in the Company Setup from the main menu, select the Companies and the category Companies. Define a project, and in the information view, select the New and in the detail view, fill in the general data of the company and enable its status (Active/Inactive).
2. In the Company Detail View in the ASMS Admin Console, select the Address, where you can enter the information corresponding to the company’s physical address.

3. In the Company Detail View in the ASMS Admin Console, select the Additional, where you can enter the additional information if you have set up additional fields for companies. See Additional.
4. When you finish setting up the basic information for the companies, click Save to confirm changes made; in the Detail View of the ASMS console, tabs are enabled Historical, Clients and Services. On the Details The Geolocation.
Manage geolocation and other settings in companies
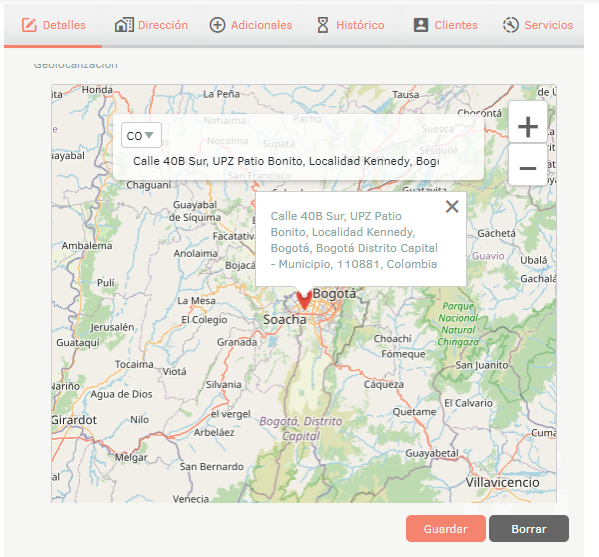
5. In the Detail View of a chosen company in the ASMS Admin Console, select the Details to display the field Geolocation, where the administrator will be able to select the location on the company map, using tools such as zoom and the search field.
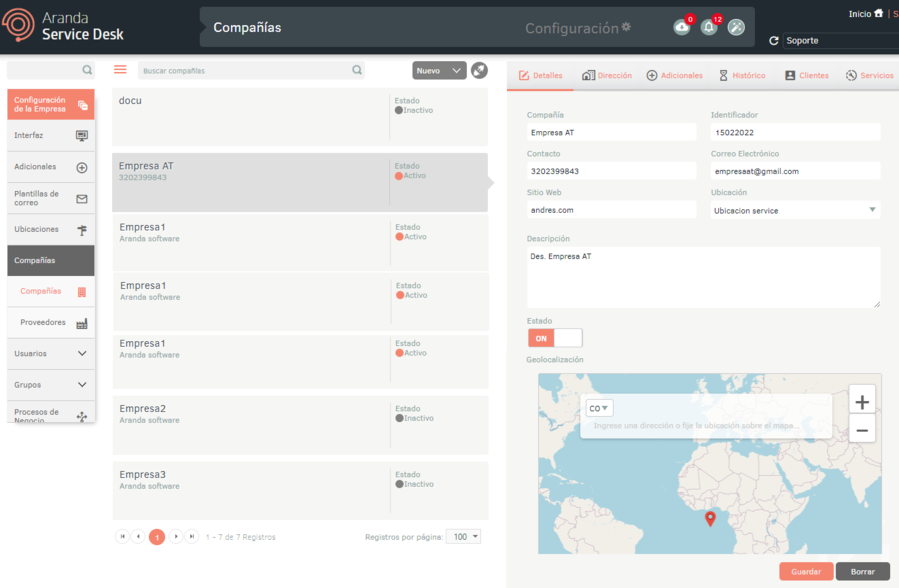
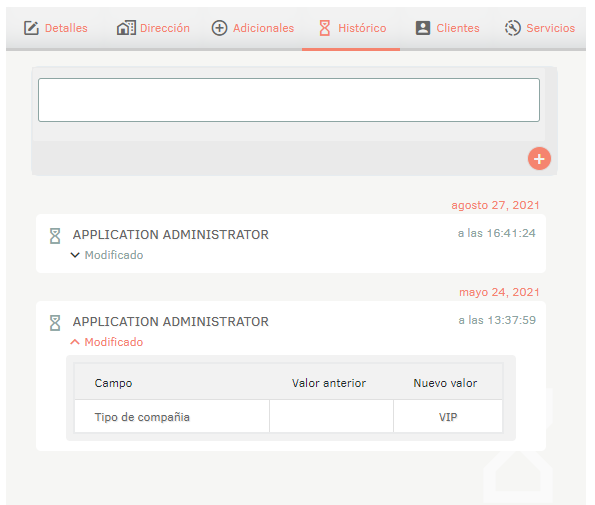
6. In the Company Detail View in the ASMS Admin Console, select the Historical, where you can view the modifications that have been made in the Details, Address, and Additional tabs of an already created company. You can also add notes manually.
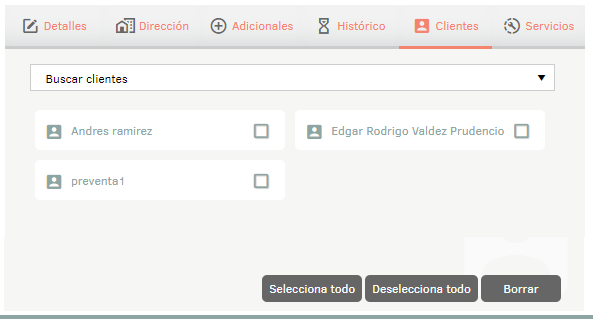
7. In the Company Detail View in the ASMS Admin Console, select the Clients, where you can search for and associate customers with their respective companies. Customers must be previously associated with the project. View Customers.
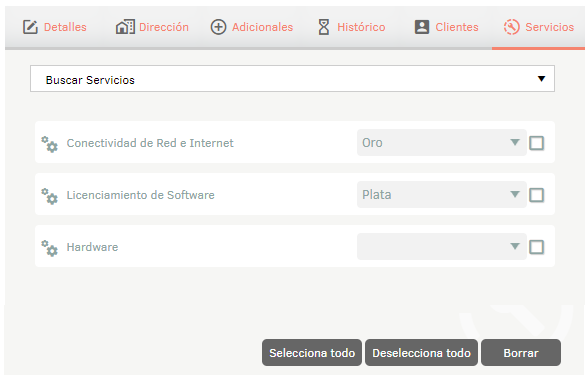
8. In the Company Detail View in the ASMS Admin Console, select the Services, where you can search for and associate services with the company. These services must be created beforehand. View Services.
9. When you finish setting up the company, click Save to confirm the changes made.
Supplier Creation
1. To create a provider, log in to the ASMS Management Console, in the Company Setup from the main menu, select the Companies and the category Suppliers. Define a project, and in the information view, select the New and in the detail view, fill in the general data of the supplier and enable its status (Active/Inactive).
Then, follow the same steps outlined in the previous point to create a company.
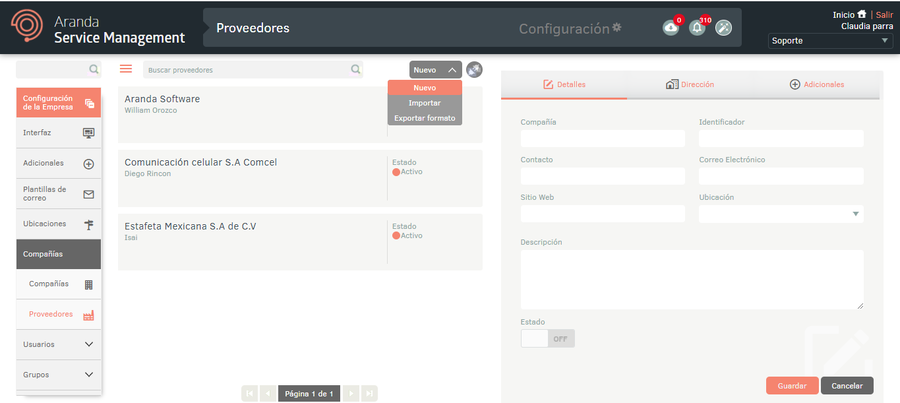
2. In the Vendor Detail View in the ASMS Management Console, select the Address, where you can enter the information corresponding to the provider’s physical address.
3. In the Vendor Detail View in the ASMS Management Console, select the Additional, where you can enter additional information if you have set up additional fields for vendors. See Additional.
4. When you finish setting up the basic vendor information, click Save to confirm changes made; in the Detail View of the ASMS console, tabs are enabled Historical and Services.
5. In the Vendor Detail View in the ASMS Management Console, select the Historical, where you can view the modifications that have been made in the Details, Address, and Additional tabs of an already created vendor. You can also add notes manually.
6. In the Vendor Detail View in the ASMS Management Console, select the Services, where you can search for and associate services with the provider. These services must be created beforehand. View Services.
7. When you finish configuring the provider, click Save to confirm the changes made.
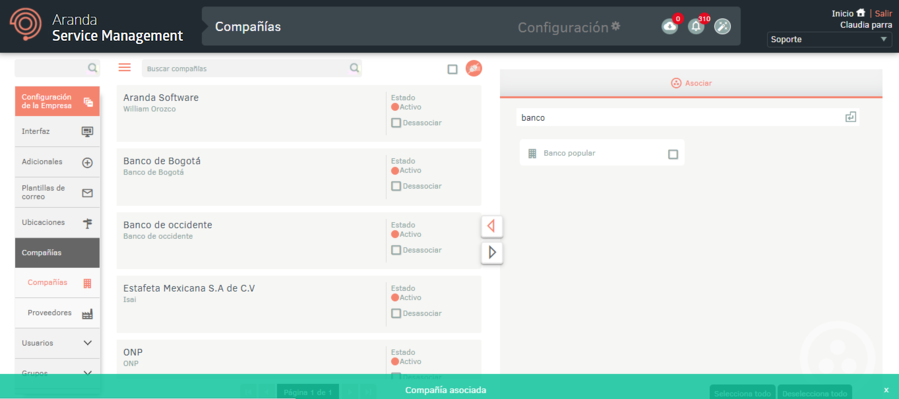
Associating companies or suppliers to a project
1. To associate companies and vendors with a project, go to the ASMS Admin Console in the Company Setup from the main menu, select the Companies/suppliers and the category Companies/Suppliers. Define a project, and in the information view, select the Associate Mode; This option will allow you to associate companies or vendors from other projects with the project that is selected.
2. When you enable Associate Mode, the Detail view of the ASMS Configuration Console enables the Associate where you can consult the company or supplier by name and associate it with the project, by checking the checkbox and then the Associate.
3. You can also disassociate a company or supplier by checking the checkbox and then the Disassociate.
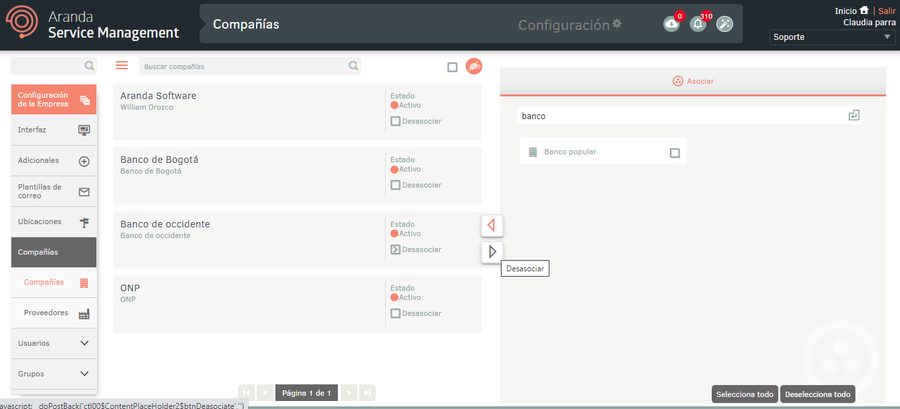
4. If you want to disassociate companies or suppliers in bulk, click the checkbox at the top and click Disassociate.
Bulk Loading of Companies and Suppliers
1. To export company and supplier information, log in to the ASMS administration console, in the Company Setup from the main menu, select the Companies/Suppliers and the category Companies or Suppliers. Define a project, and in the information view, select the New/Export Format; This option will allow you to export the information with or without data for updating and/or creating companies or suppliers.
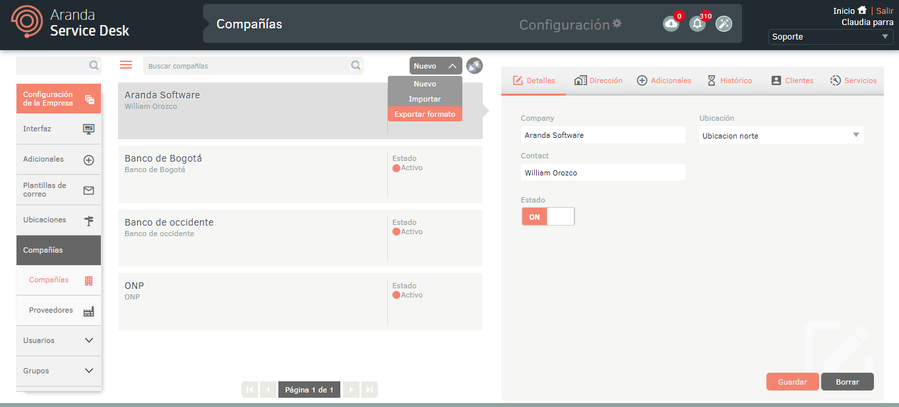
2. The window is enabled Export format where you must select whether you need to export the empty format (creation of companies/suppliers and relationships) or with data (updating of companies/suppliers and association of concepts). Click Export Format.
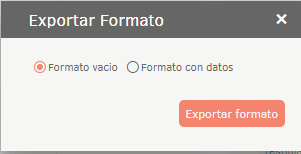
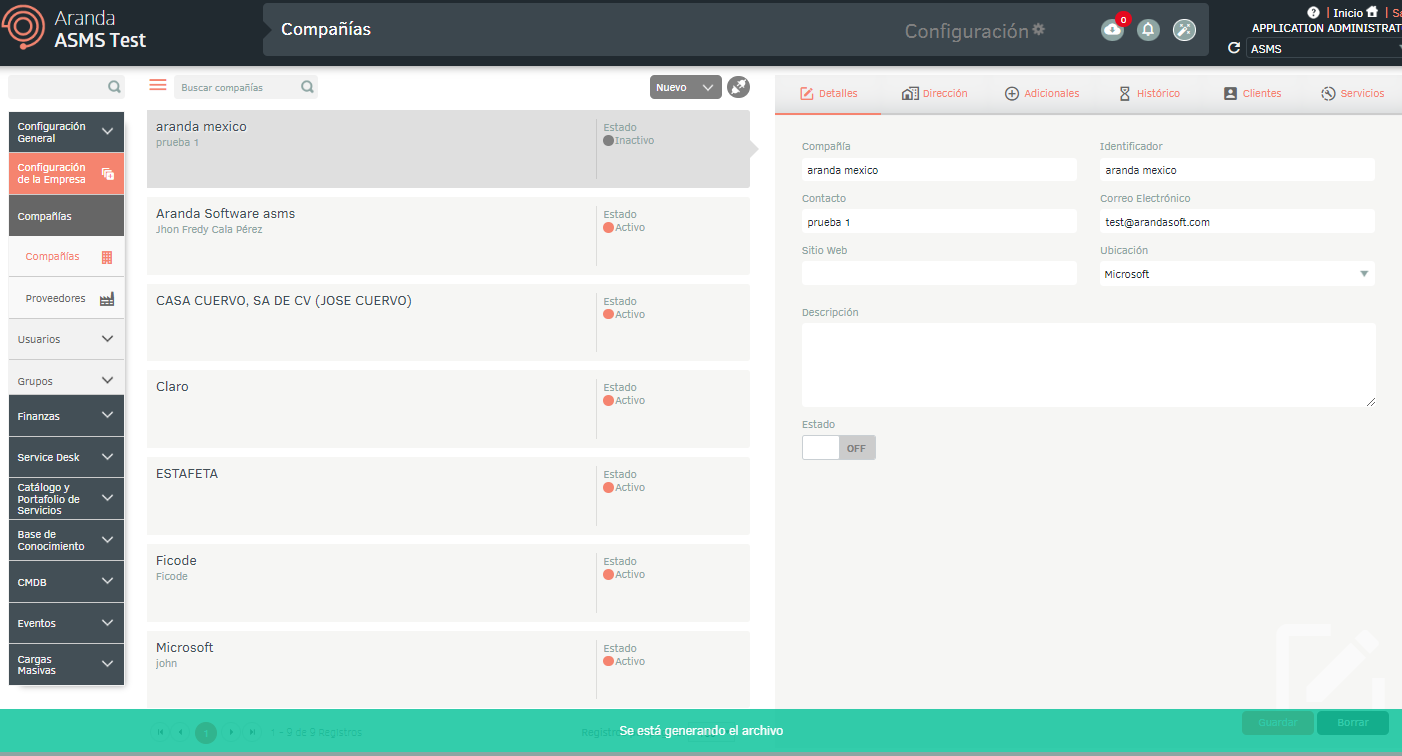
3. If you download the empty format, a file in Excel format is automatically generated. If you downloaded the form with data, the file is scheduled for download, generating an informative message at the bottom of the screen.
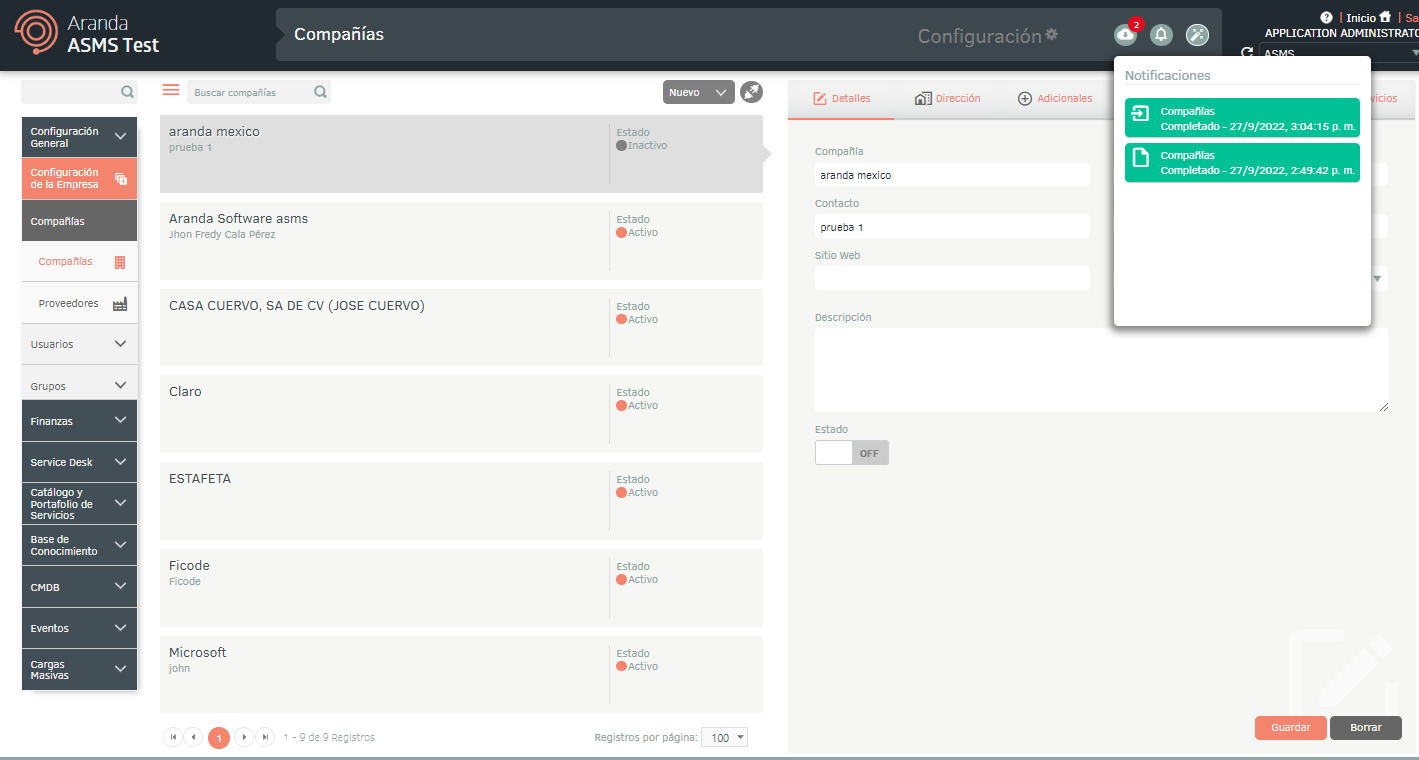
4. From the Admin console header menu, select the Notifications option.
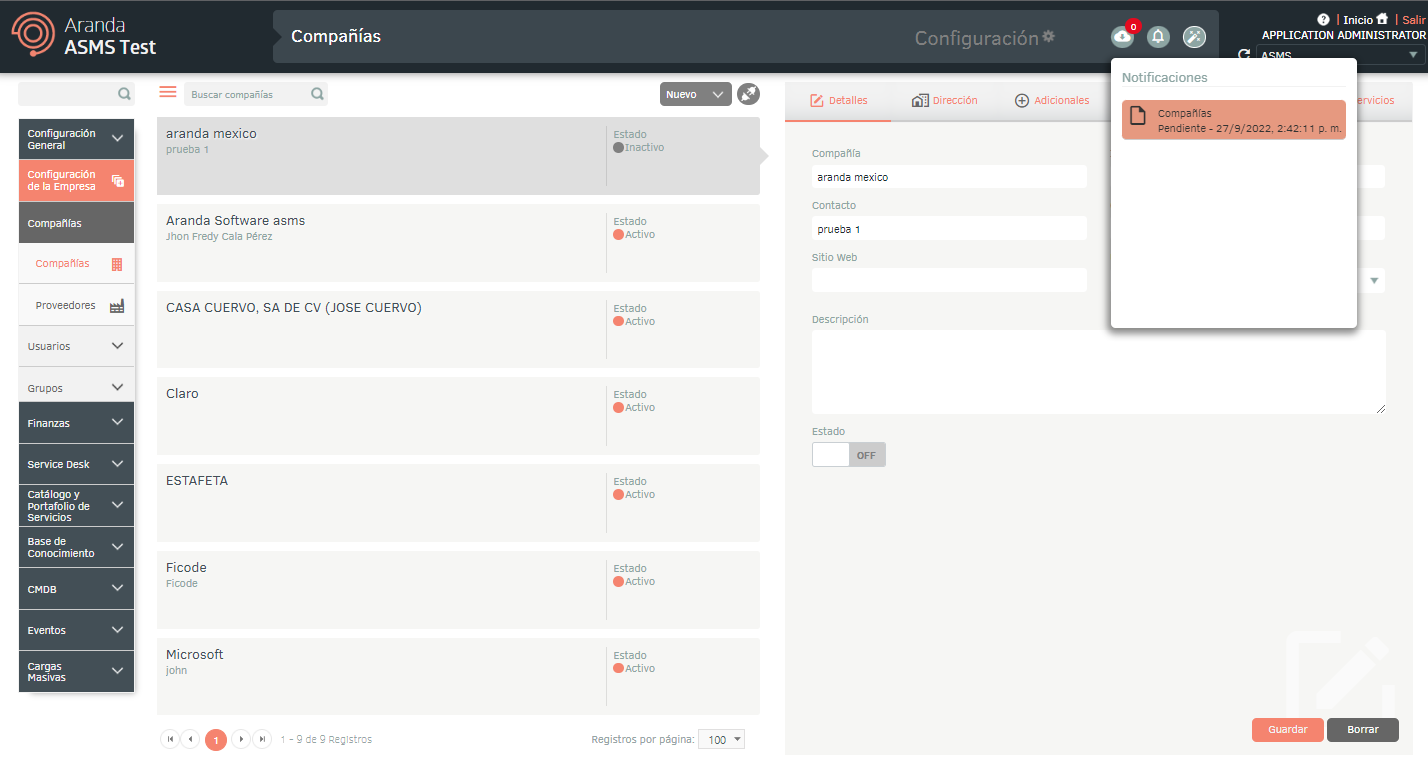
⚐ Note: In the Notifications option you will be able to view the generated format in Pending status (Orange color) and once the export process is finished, it will change to Completed status (Green color) with the download date.
5. Click on the notification to download the file.
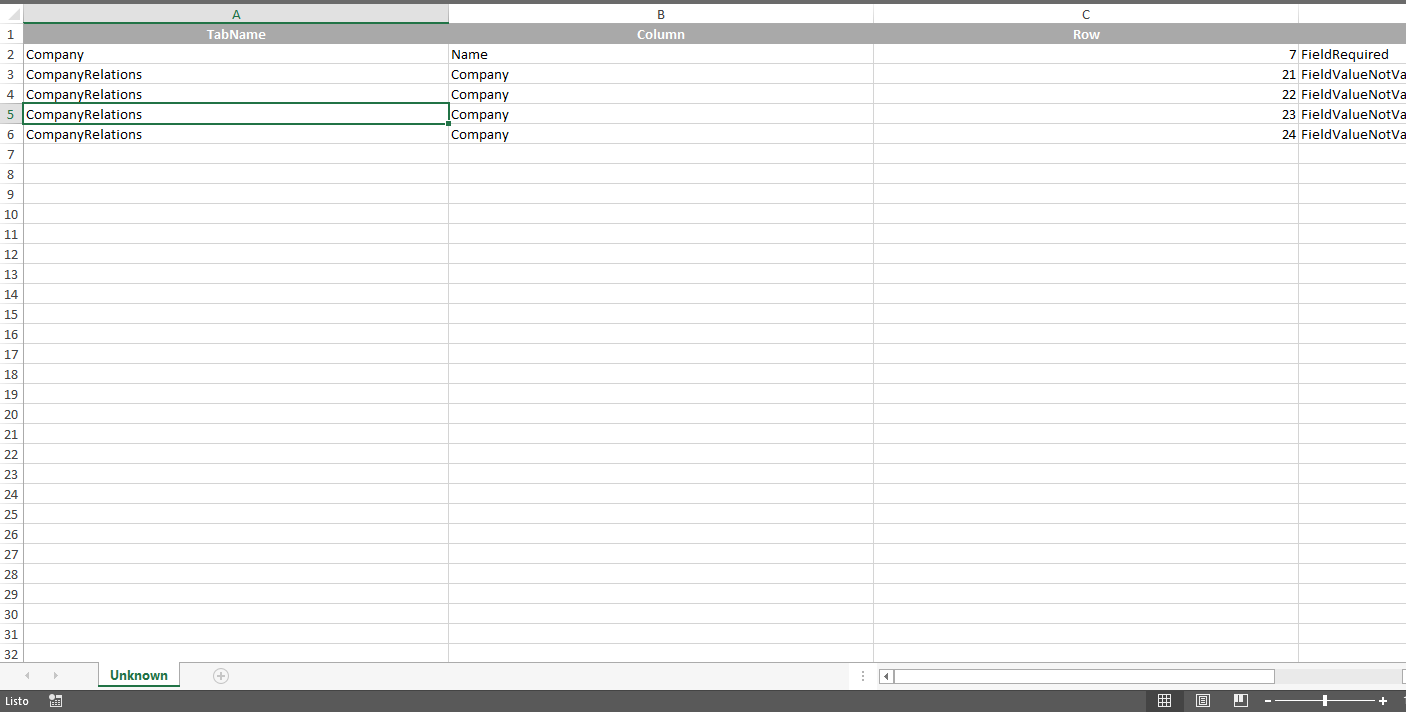
The downloaded file includes all the fields of the companies and suppliers, including additional fields; You will also find the fields necessary for the creation and/or updating of companies, suppliers and their relationships.
The Info tab describes in detail the obligation and information to be filled in on each field.
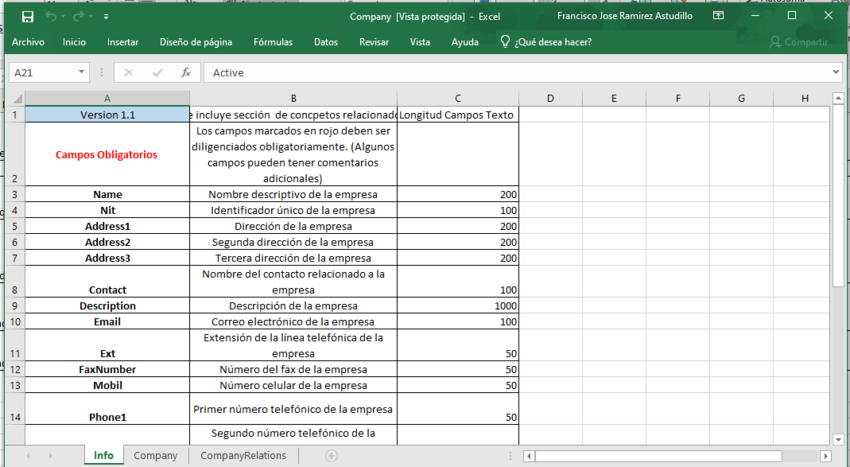
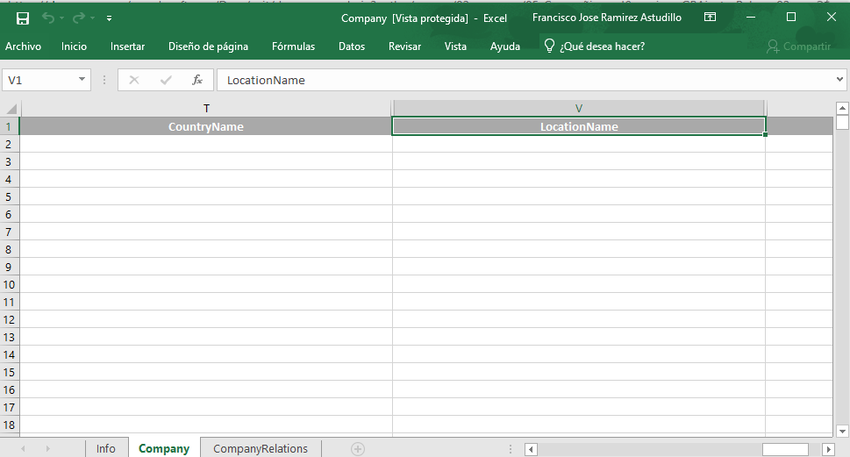
In the bulk import file of companies/vendors, you will be able to perform the bulk association of locations. In the Company tab, the LocationName field has been added, which is of type list and the locations associated with the project from which the file was downloaded will be displayed.
Import Format for Companies and Suppliers
1. Once the form is completed, enter the ASMS administration console, in the Company Settings section of the main menu, select the option Companies/Suppliers and the Companies/Suppliers category. Define a project, and in the information view, select the New/Import Format.

2. In the window Import, upload the file, and click the Save.

3. By clicking on the save button to start the import or update of companies and suppliers, the file will be scheduled for import, informed with a message at the bottom of the screen and added in the notification panel.
4. When the import is complete, the corresponding notification will change from orange to green, indicating that it has been completed.
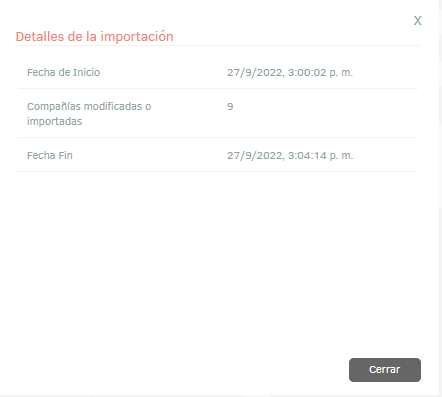
5. When you click on the notification, a window will be displayed where you can view the details of the import.
6. If during the import the file generated an error in one or more of its records, when viewing the import details it will be possible to download a file with the details of the records that generated error.
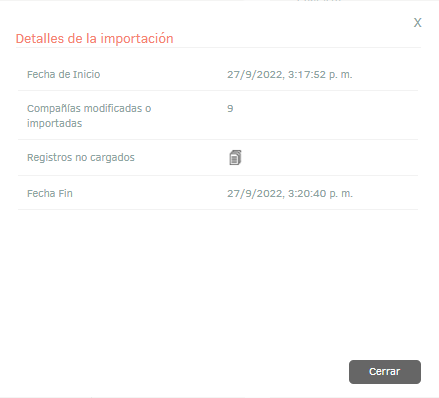
7. In the import details window, by selecting the unloaded records icon, you will be able to download an Excel file with the details of the errors generated during the import.