
A project is a grouping of help desk services, which allows you to receive and categorize requests from users in your organization.
Creating a Project
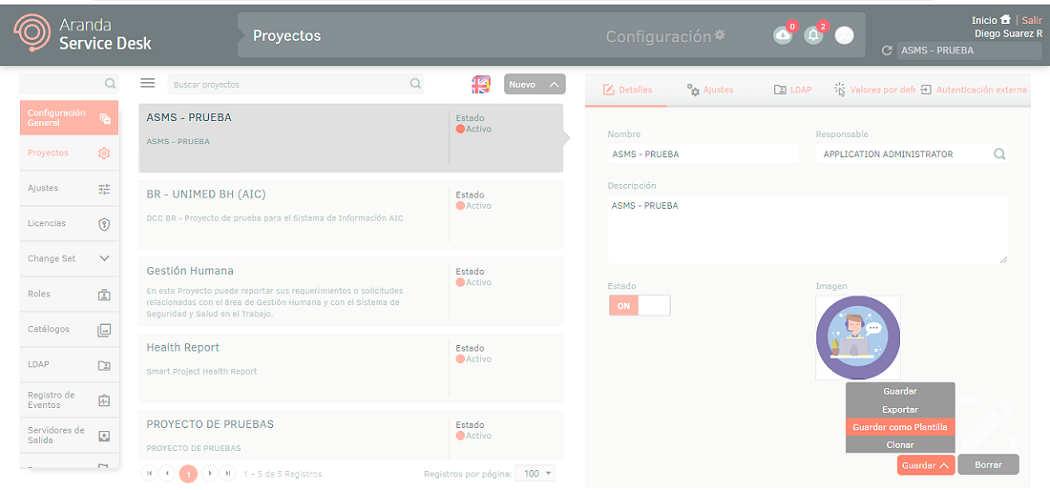
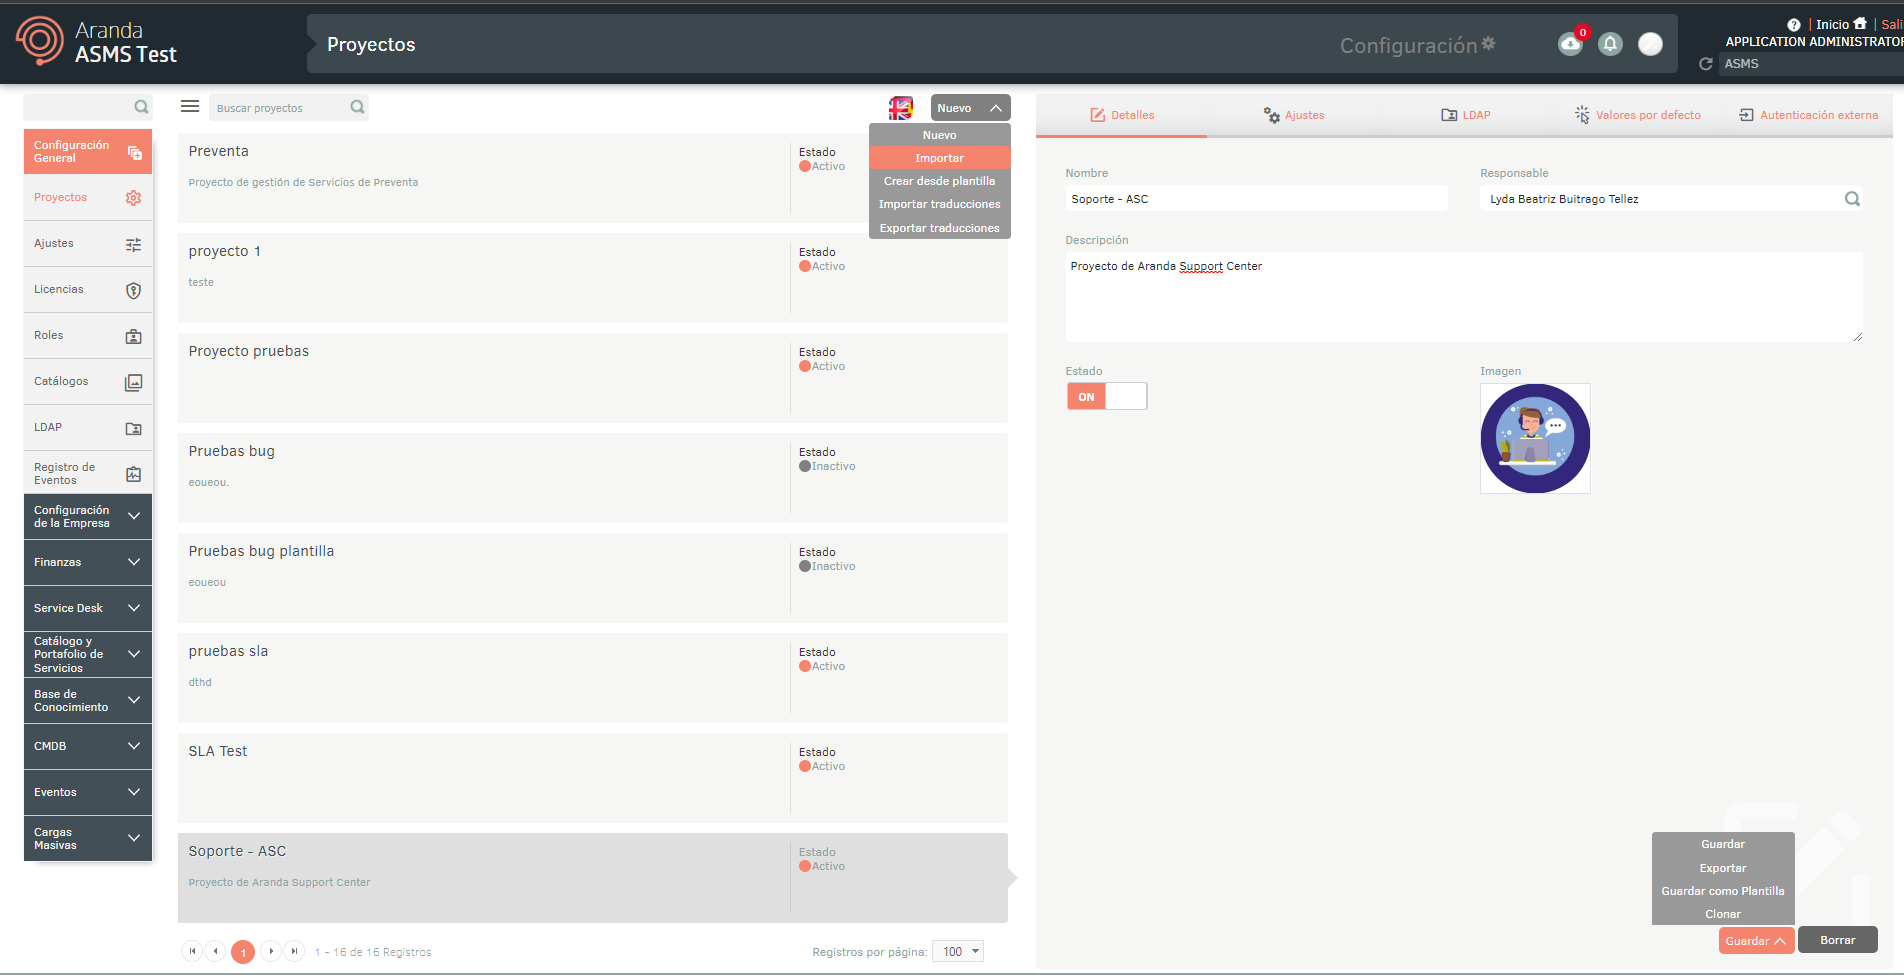
1. To create a project, log in to the ASMS Admin Console, in the General Settings from the main menu, select the Projects. Define a project, and in the information view, select the New and choose whether to create a new project, import it, or create it from a template.
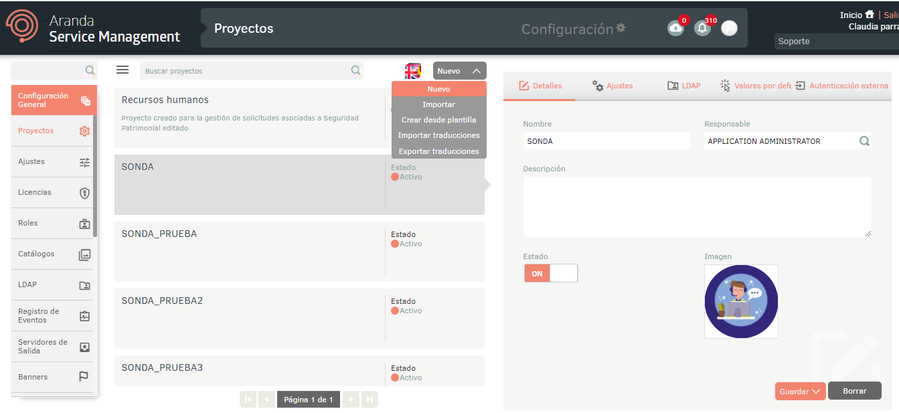
2. When selecting the New project, in the detail view three tabs will be enabled: Details, Settings, LDAP, Defaults, and External Authentication.
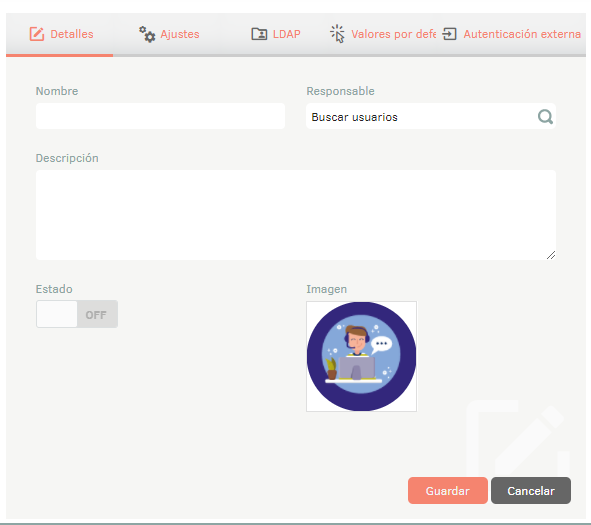
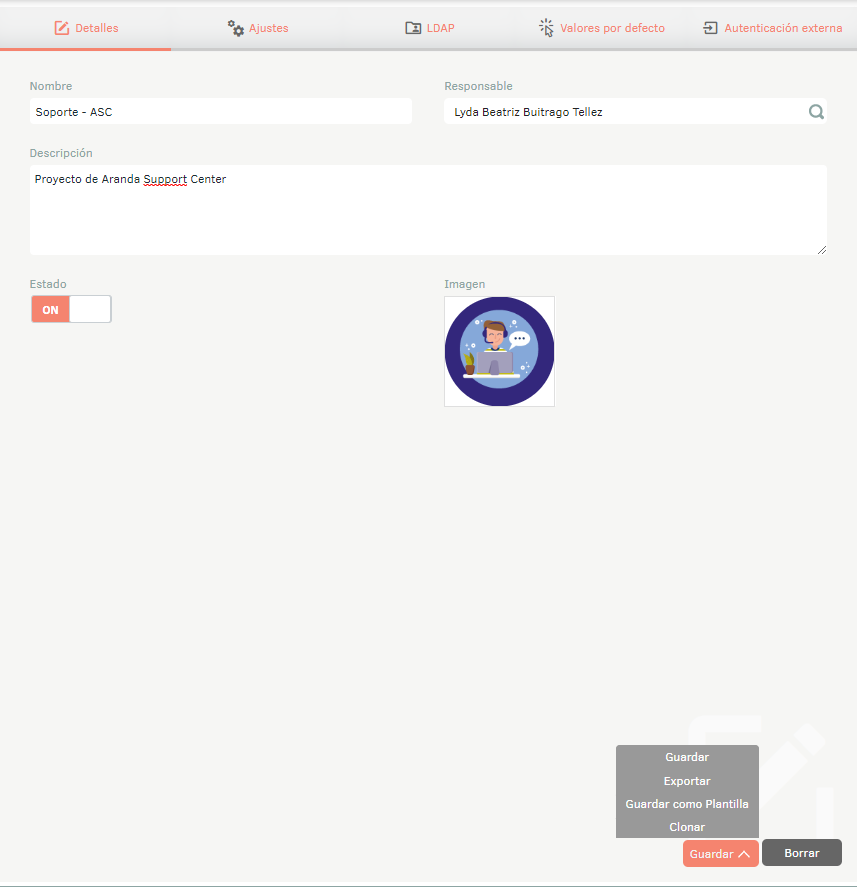
3. In the Project Detail View in the ASMS Admin Console, select the Details, where you can fill in the following information:
| Fields | Description |
|---|---|
| Name | Enter the name with which the project will be identified, e.g.: Support, Administration, Human Resources, IT, etc. |
| Responsible | Search for and select the user who will be responsible for the project. Options are obtained from the list of users imported from the active directory or manually created users. View LDAP and View Users. |
| Description | Enter a brief description of the project. |
| State | Turn on the options ON (active) or OFF (inactive) as required. |
| Image | Add an image that identifies the project (optional). |
4. When finished, click Save and the project will have been successfully created.
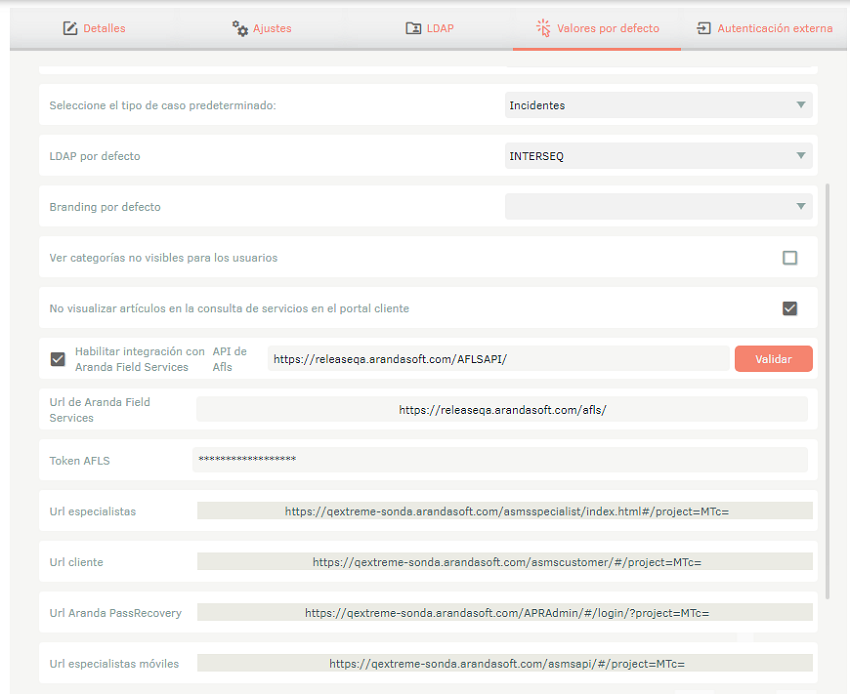
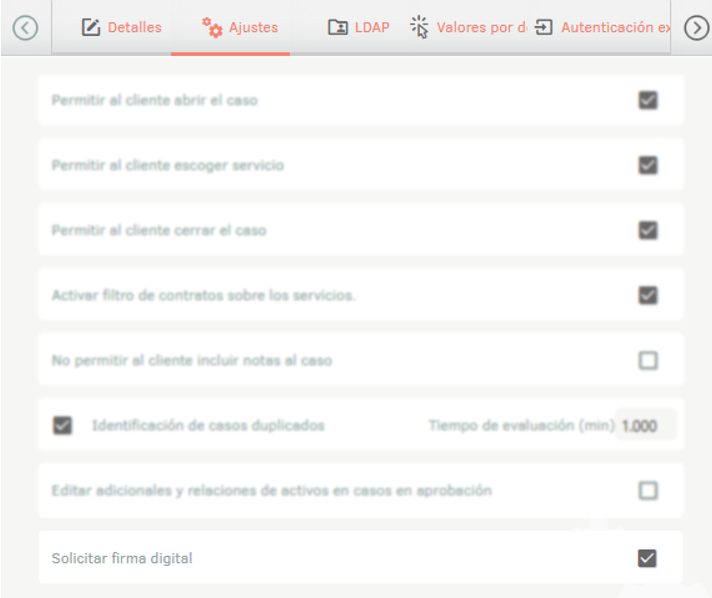
5. In the Project Detail View in the ASMS Admin Console, select the Settings, where you can complete information according to the type of case selected (Incidents, problems, changes, service requirements, releases, maintenance, Tasks)
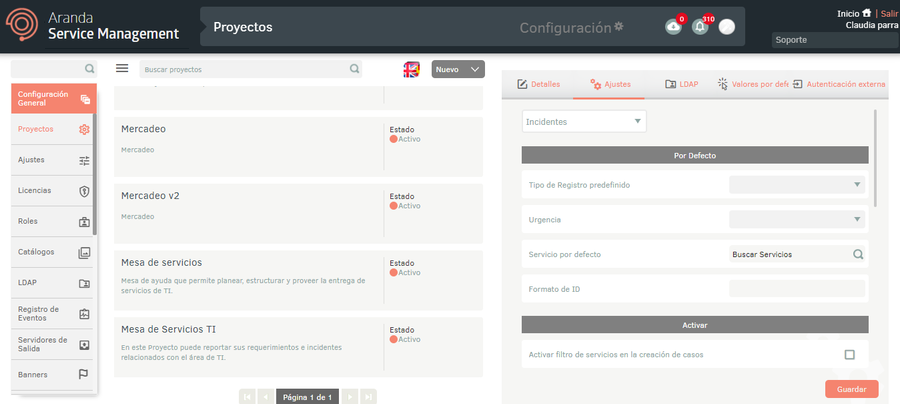
The following are the fields to be completed for the type cases Incidents:
Default:
| Fields | Description |
|---|---|
| Predefined Record Type | Choose the means by which user requests will be received. Options are obtained from the catalog Record Type pre-configured, See Catalogs. |
| Urgency | Select a default urgency for requests. Options are obtained from the catalog Urgency pre-configured, See Catalogs. |
| Default Service | Choose one of the services that you have previously configured, See Services. |
| ID format | An ID format is made up of prefixes and suffixes depending on the business need. If not specified, the default ID format will be a row of the project ID. |
Example: type of case: IM; project (ID), global ID (unique identifier). IM-{{ProjectId}}-{{id}}-{{IdbyProject}}
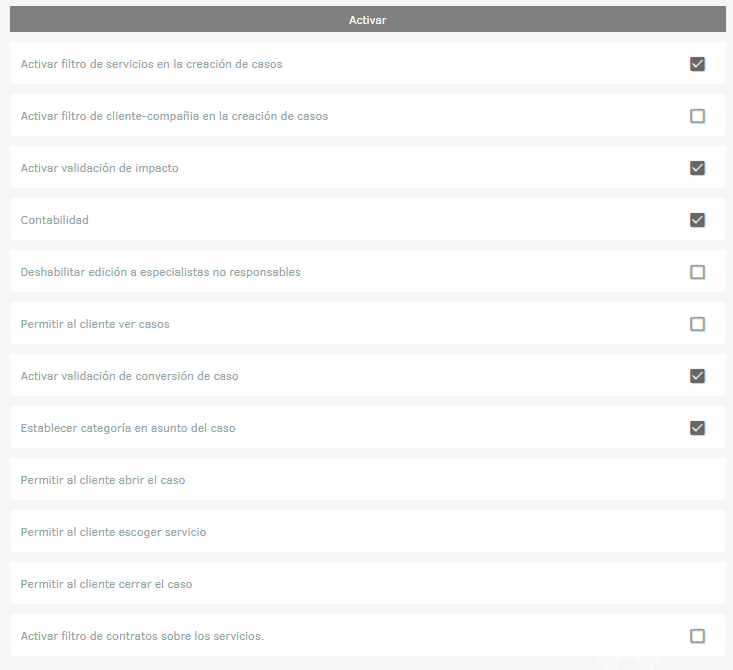
Activate:
Check each box according to preferences (not all boxes are enabled for all case types).
Duplicate cases:
The time that will be used as a reference to detect duplicate cases must be completed.
Edit Additional and Asset Relationships:
Allows editing of additional fields and asset relationships in cases that are in the process of active approval.
⚐ Note: If the option is activated Set Category in Case Subject, at the time of creating a case from the client console, the Subject and Description fields will be filled in with the selected service and category data.
Assign:
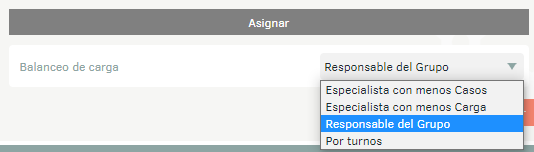
| Fields | Description |
|---|---|
| Load balancing | Define the criteria for automatically assigning the specialists responsible for the cases. The options are: - Specialist with the fewest cases: Assigns the case to the specialist who has the fewest open cases within the group to which it is to be assigned; taking into account the group, the project and the type of case for its assignment. If the user is associated with more than one group and/or project, only the group and project in the case are considered. - Specialist with less burden: Assign the cases to the specialist in the group that has the lowest load (measured in minutes) at that time. Keep in mind that the burden of a specialist can vary constantly and is reduced as soon as cases are resolved. Load is calculated by taking the time configured on a case-by-case basis in the SLA and subtracting the elapsed time from each case. - Group Leader: Cases are assigned to the specialist configured as responsible for the default group to which the service belongs. - By turns: Cases are assigned equally to all specialists in the group, in turn, in the same order in which cases are received for balancing. |
⚐ Note: All balancing is done on the project and the type of case on which the configuration is made. When balancing for tasks, it is done taking into account whether the task was created automatically or manually. If the creation was automatic, they are assigned to the first group associated with the profile defined in the task settings; If the creation was manual, it will be assigned to the default group of the service associated with the case.
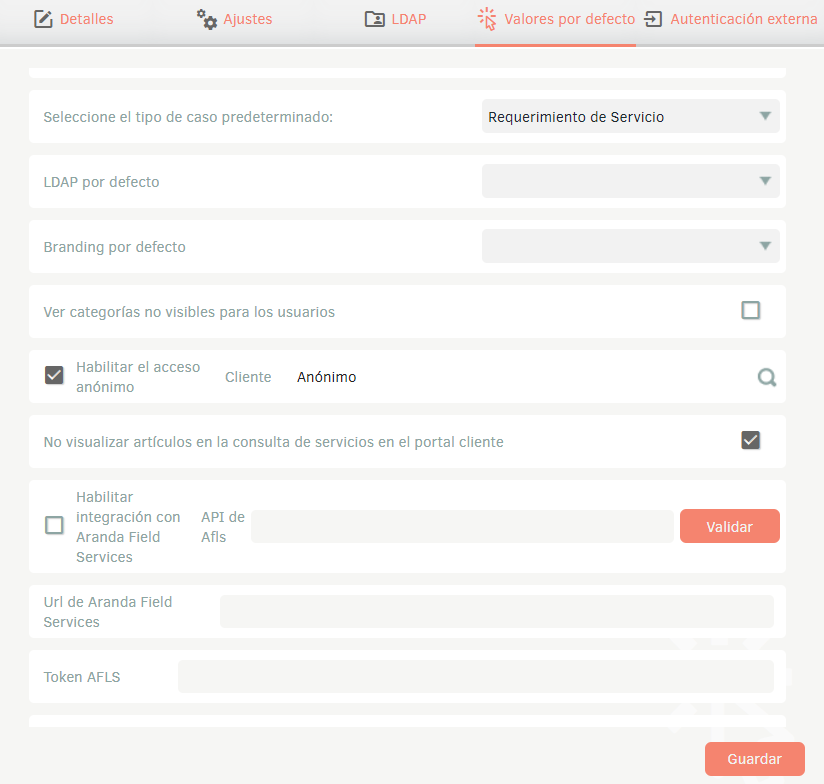
6. In the Project Detail View in the ASMS Admin Console, select the Defaults, where you can choose the default values for project requests. The list of options for the fields Mail Server, LDAP by default and Branding by default they must be pre-configured. View Output Servers, View LDAP and View Designer.
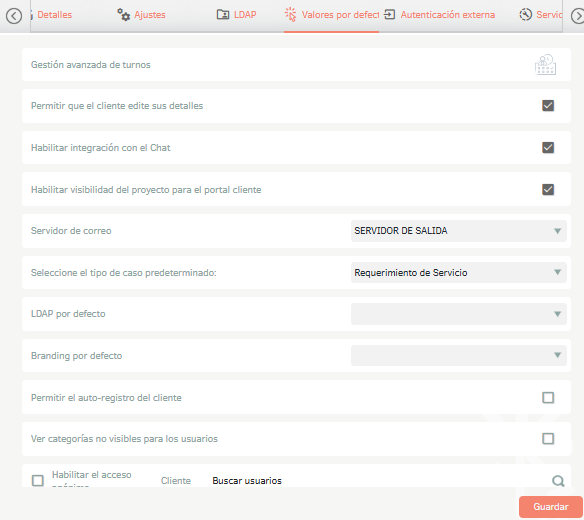
⚐ Note:
- The View categories not visible to users check box has an effect on the client console to display parent categories that are inactive in the service or that do not have the Category visible to users box checked, causing the child categories to be grouped in it.
- The Option Advanced Shift Management will only be visible, if in the Settings > ASMS The setting AdvancedShiftManagement is active. View Advanced Shift Management
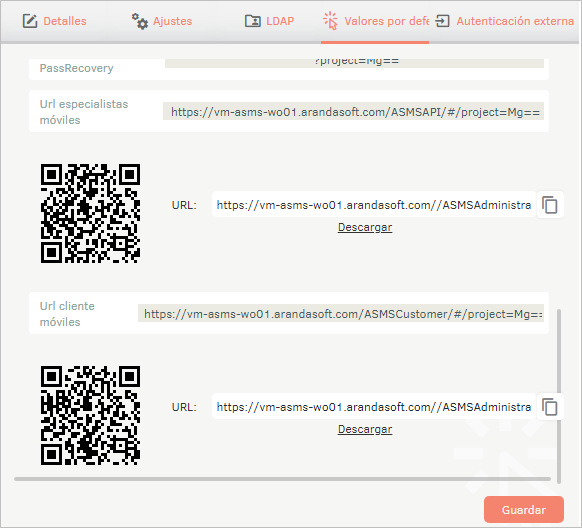
The specialist and client URLs are built automatically and give access to the consoles by loading the LDAP and branding configured by default in the project.
URLs for the client and specialist mobile consoles are also available by project and additionally the QR codes, which can be obtained through the hyperlink or by downloading them directly from the console; when you scan the QR code you will get the URLs by project for mobile consoles.
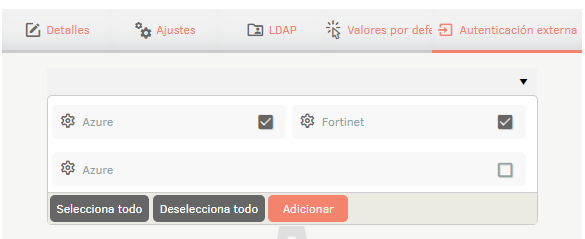
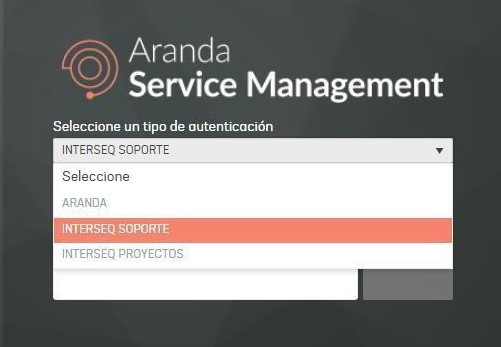
8. In the Project Detail View in the ASMS Admin Console, select the External Authentication, where you can select one or more authentication types
Export AMDL Format
1. In the Project Detail View in the ASMS Admin Console, select the Details; on the Save You will have the following options enabled:
- Save- This option allows you to save changes made to the project.
- Export- This option allows you to export (AMDL format) the project.
- Clone: This option allows you to clone the project.
Create Project with Template
1. To create a model template from an existing project, log in to the ASMS Admin Console in the General Settings from the main menu, select the Projects In the information view, select a project from the existing listing.
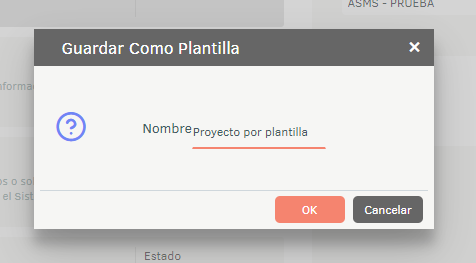
2. In the Project Detail view, click the Save; In the options that are enabled, select the Save as Template; Enter the name of the template and click OK
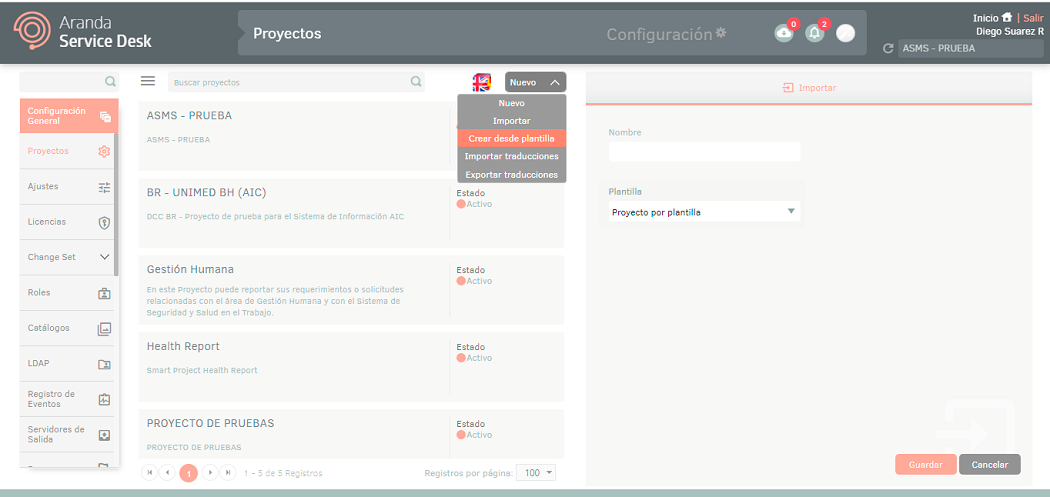
3. To create a project from a template, log in to the ASMS Admin Console in the General Settings from the main menu, select the Projects and in the information view, select the New/Create from Template.
4. In the project detail view, enter a name, select a template, and click the Save
Import AMDL format
1. To import in AMDL format and create from templates, enter the ASMS administration console, in the General Settings section of the main menu, select the option Projects. Select the New/Import .
Associate LDAPS by Project
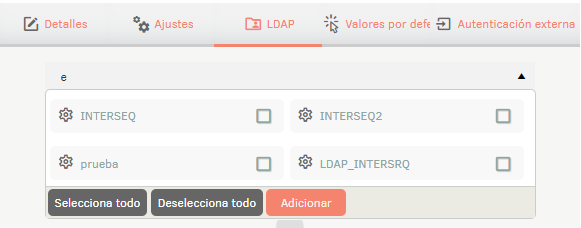
1. In the Project Detail View in the ASMS Admin Console, select the LDAP, where you can associate LDAPs by project. In the Search field, you can associate the available LDAPs. Check the checkbox and click the *Add.
2. In the Project Detail View in the ASMS Admin Console, select the Defaults, select an LDAP, and click Save
3. When entering the ASMS specialists and/or client console, the authentication type will be displayed where the LDAP’s associated with the project will be displayed.
Enable anonymous authentication
1. In the Detail view in the ASMS Management Console, select the Default Values tab, select the check box, select the “Enable anonymous access”, select the “anonymous” user, and click Save.
2. When accessing the customer console via the project link, the option to authenticate anonymously in the console will be displayed.
Enable customer self-registration
1. In the Detail view of the project, within the ASMS admin site, select the Defaults and check the box “Allow customer self-registration.

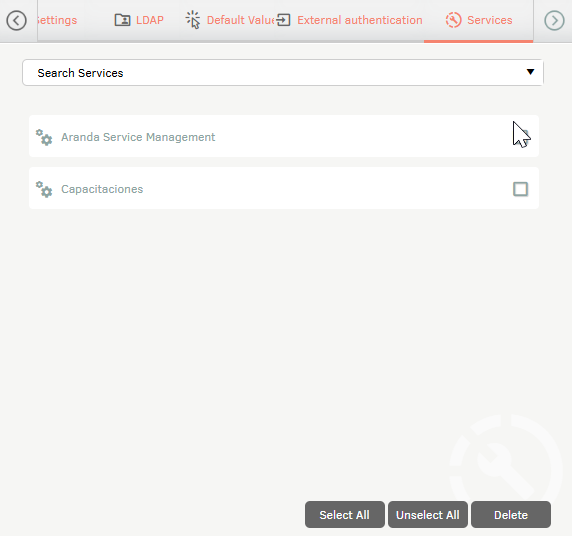
2. On the Services, search for and select the services that the user will be automatically associated with when they complete their registration in the user portal.
3. Once self-registration is enabled, when accessing the user portal with the project URL, the registration option will be displayed. At the end of the process, the user will be associated with the previously defined services.

Enable currency type and thousands separator
1. In the Detail view of the project, within the ASMS admin site, select the Defaults and display the list of available values in Currency Type.
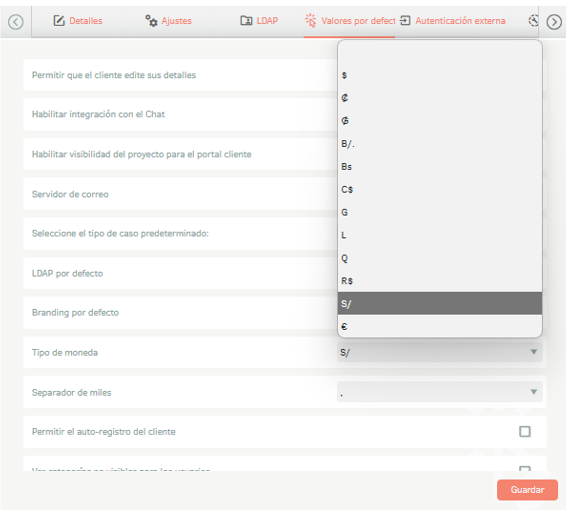
2. Select the type of currency to be configured. The types available are:
| Symbol | Coin |
|---|---|
| $ | US dollar (or other currencies that use $) |
| ₡ | Costa Rican colon |
| ₲ | Paraguayan Guarani |
| B/. | Panamanian Balboa |
| Bs | Venezuelan Bolivar |
| C$ | Nicaraguan Cordoba |
| G | Haitian Gourde |
| L | Honduran lempira |
| Q | Guatemalan Quetzal |
| R$ | Brazilian Real |
| S/ | Peruvian Sun |
| € | Euro |
3. In the Detail view of the project, within the ASMS admin site, select the Defaults and display the list of values in Thousands separator.
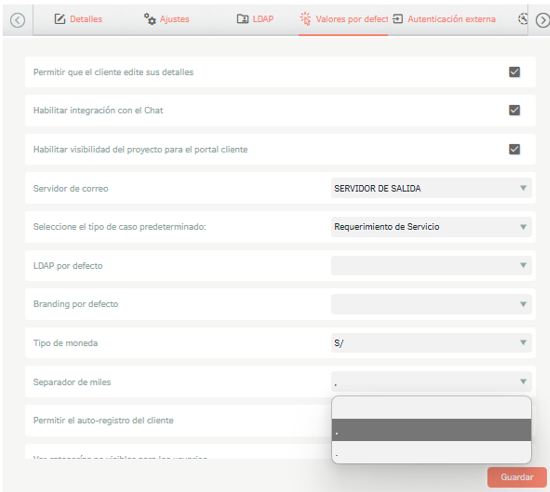
4. Select the type of separator you want to configure: Period (.) or comma (,).
⚐ Note:
- It is possible to configure only the Currency Type or the Thousands Separator, without one being dependent on the other.
- Currency type settings apply in ASMS consoles Administrator, Specialist, Customer and CMDB in fields where currency values are configured.
Enable Digital Signature Request
1. In the Sight Project Detail, on the ASMS administration site, select the Settings and select the check box Request Digital Signature.
Application Behavior and Conditions
2. The digital signature request is triggered by combining two settings:
- Digital Signature Setting: Must be active in the Settings of the project.
- End-state behavior: The final state of the case flow must have the behavior configured Closed by Default.
3. Only when both settings are active, at the end of a case in the ASMS Mobile App, the system will request Compulsory the digital signature.
⚐ Note: The digital signature is only requested in the ASMS Mobile App. In the web console of ASMS Specialist, no digital signature is required and it is possible to close a case even if the signature setting is active and the status behavior is set to Closed by Default. This restriction applies only to the mobile version of the app.
Multilanguage
To set up the multilanguage option in projects, you must take into account the documentation for translations. View Multilanguage.