This module allows the creation and/or bulk updating of locations.
Creating and/or Updating Locations
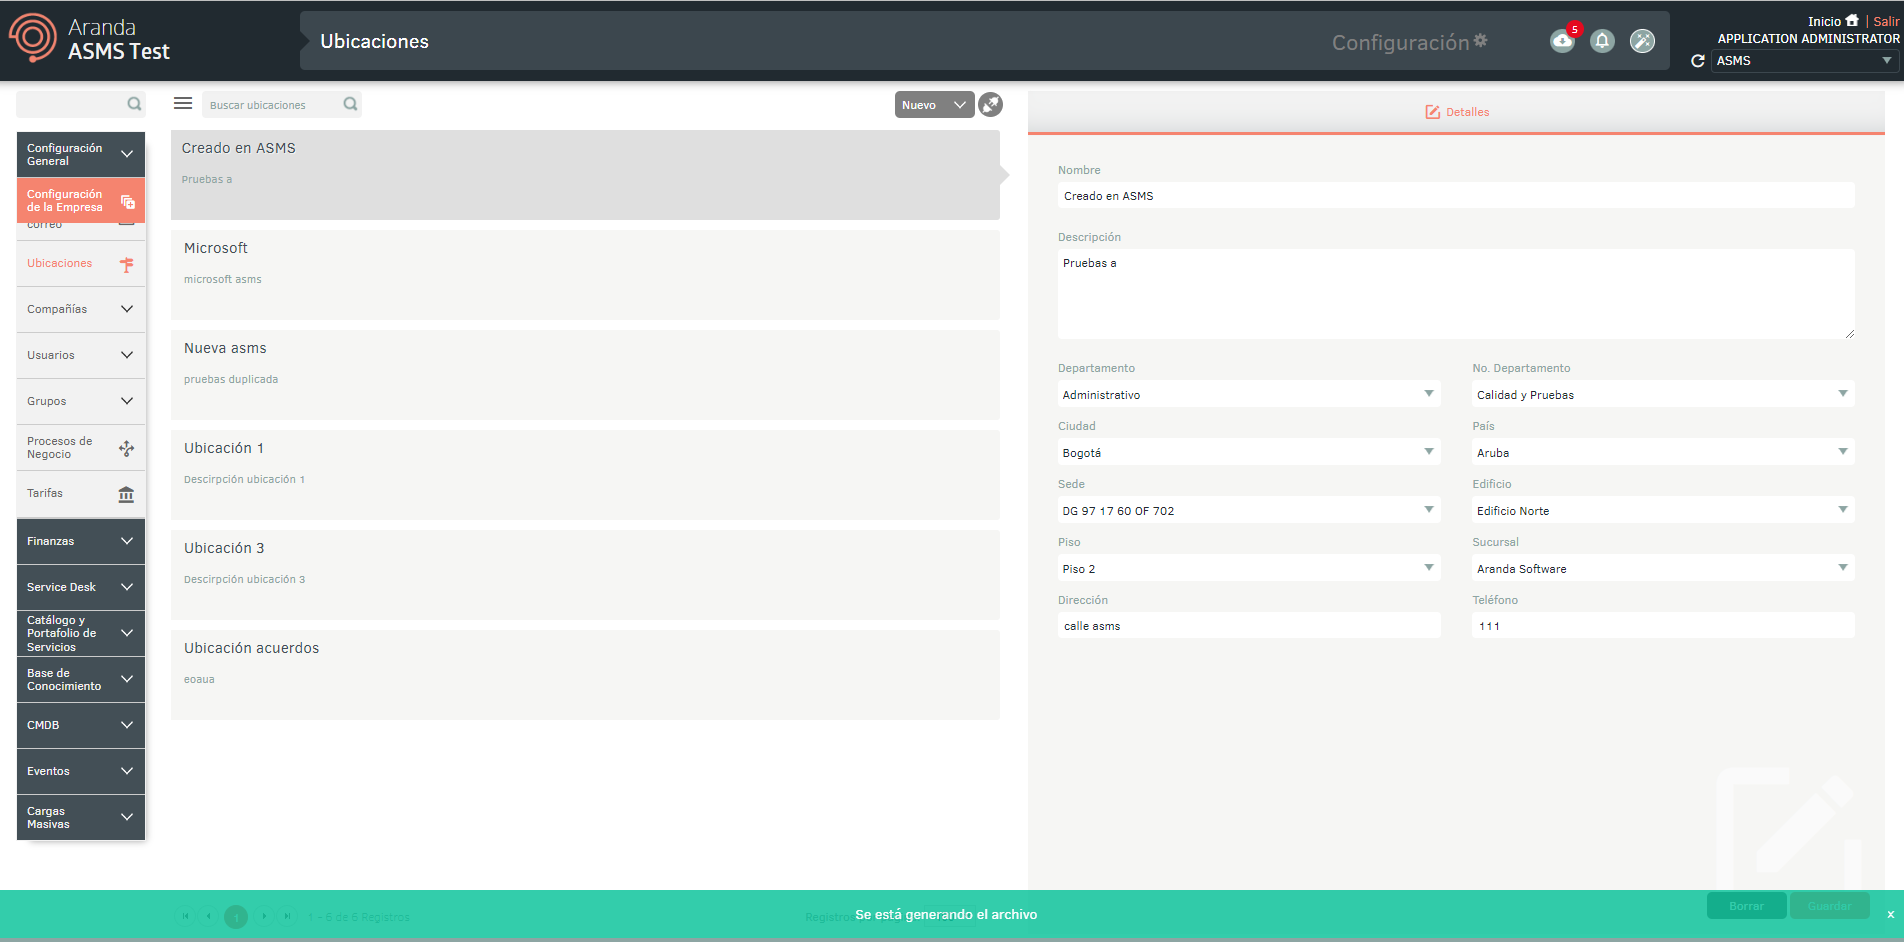
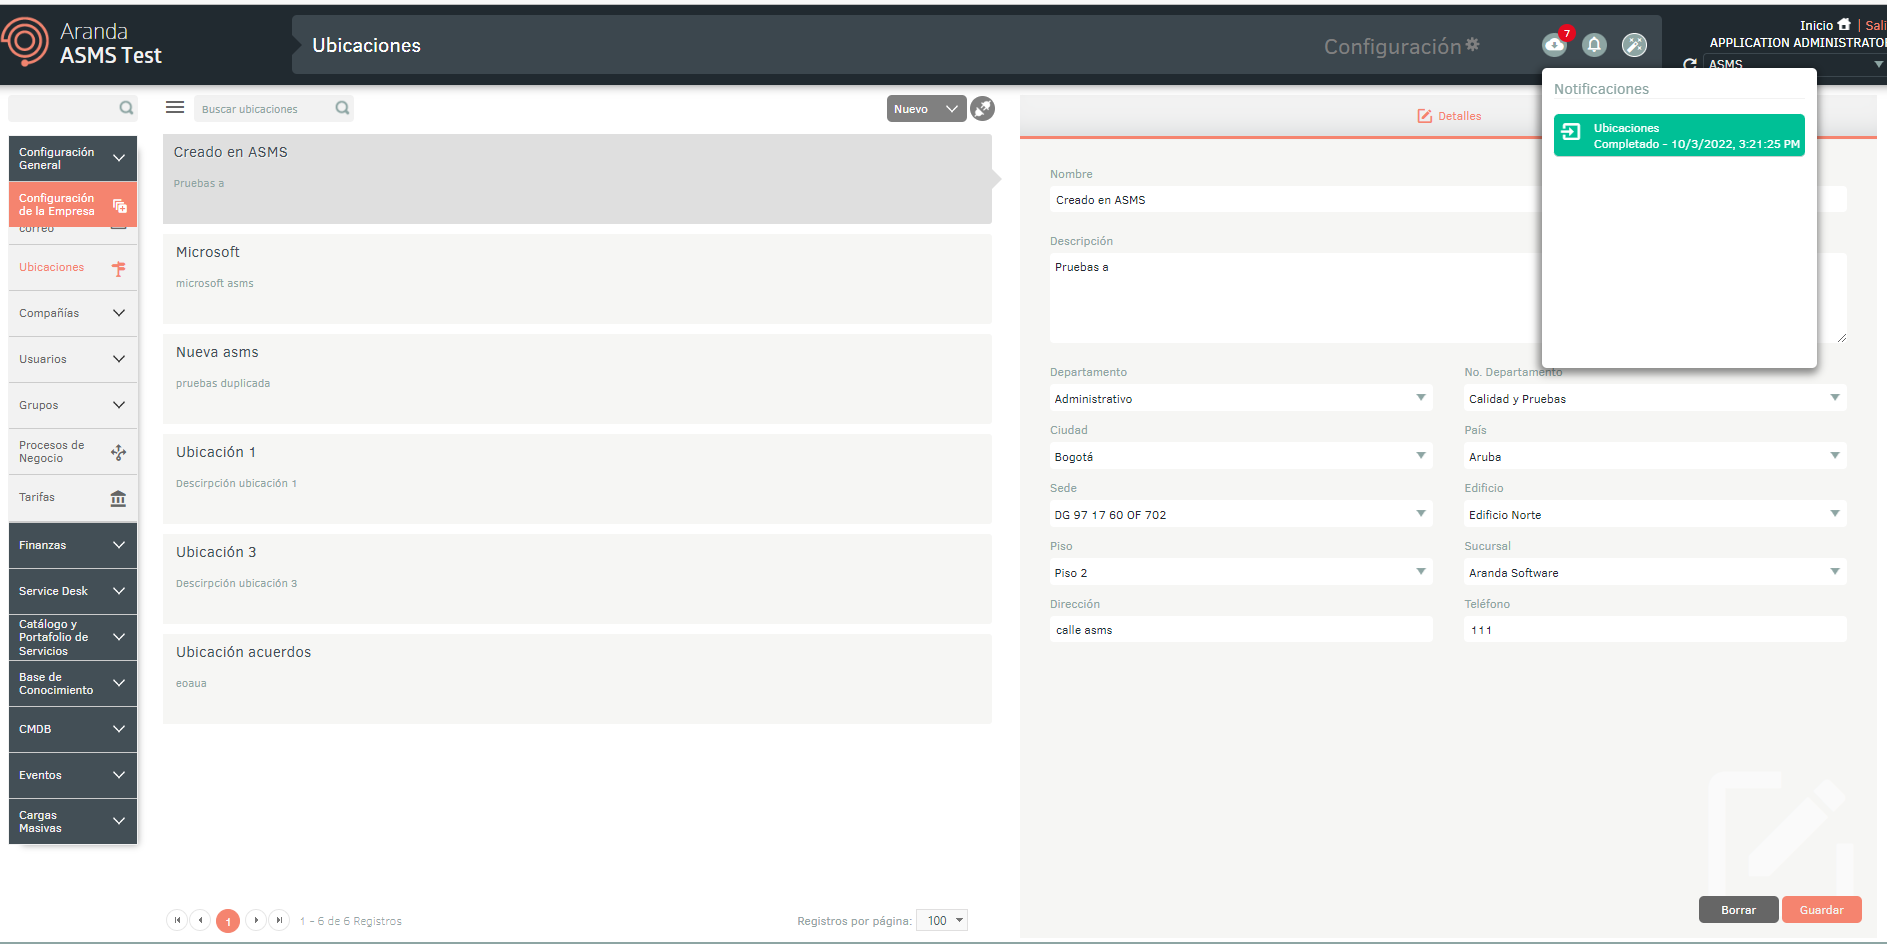
1. To configure company locations, log in to the ASMS Management Console in the Company Setup from the main menu, select the Locations. Define a project, and in the information view, select the New. In the detail view you can configure location information such as name, description, department, city, country, headquarters, building, address.
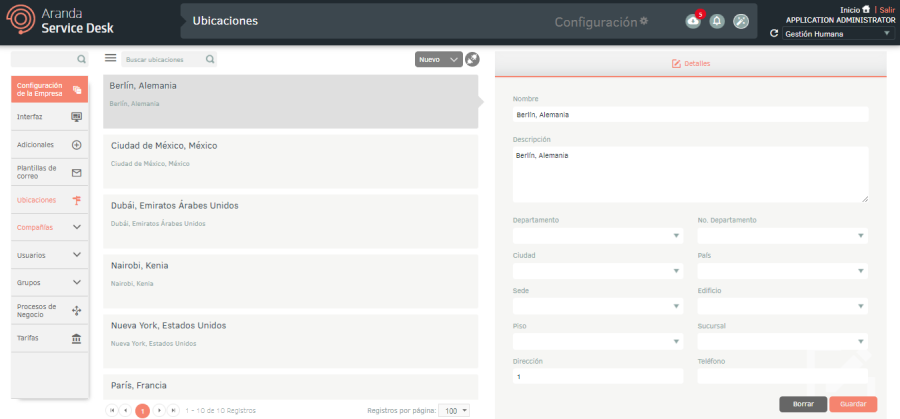
2. To edit a location, in the information view, select a record from the list of existing locations, and in the detail view you can modify the required information.
3. To delete a location in the information view, select a record from the list of existing locations, and in the detail view select the Erase to delete the associated information.
4. When you finish setting up the location, click Save in the Detail view of the ASMS Management Console to confirm the changes you have made.
5. To perform a location search, in the information view select the query field, and enter the location or location information; press the Enter key or the corresponding button. The search engine tracks by name and description the locations that are available according to the criteria entered.
Bulk Upload of Locations
1. To export location information, log in to the ASMS Admin Console in the Company Setup from the main menu, select the Locations. Define a project, and in the information view, select the New/Export Format; This option will allow you to export the information with or without data for updating and/or creating locations.
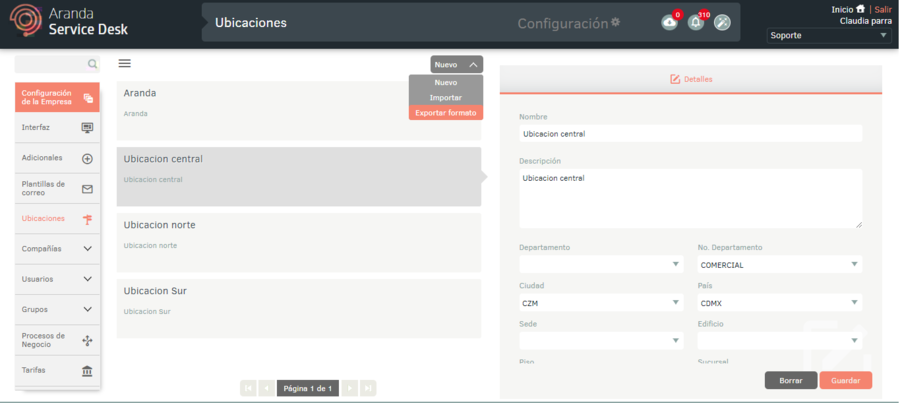
2. The window is enabled Export format where you must select whether you need to export the empty or data-filled format. Click Export Format.
3. If you download the empty format, a file in Excel format is automatically generated. If you downloaded the form with data, the file is scheduled for download, generating an informative message at the bottom of the screen.
4. From the Admin console header menu, select the Notifications.

⚐ Note: In the Notifications You will be able to view the generated format in the Earring (orange color) and once the export process is finished, it will change to status Completed (green color) with the date of discharge.
5. Click on the notification to download the file.
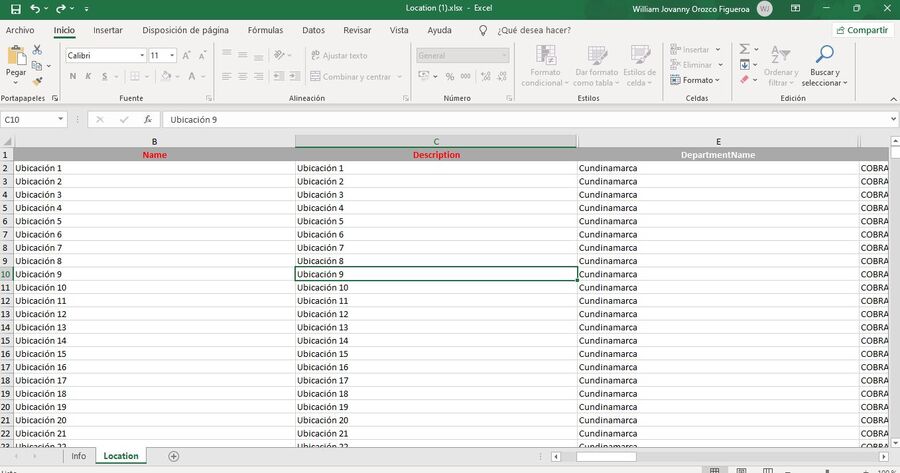
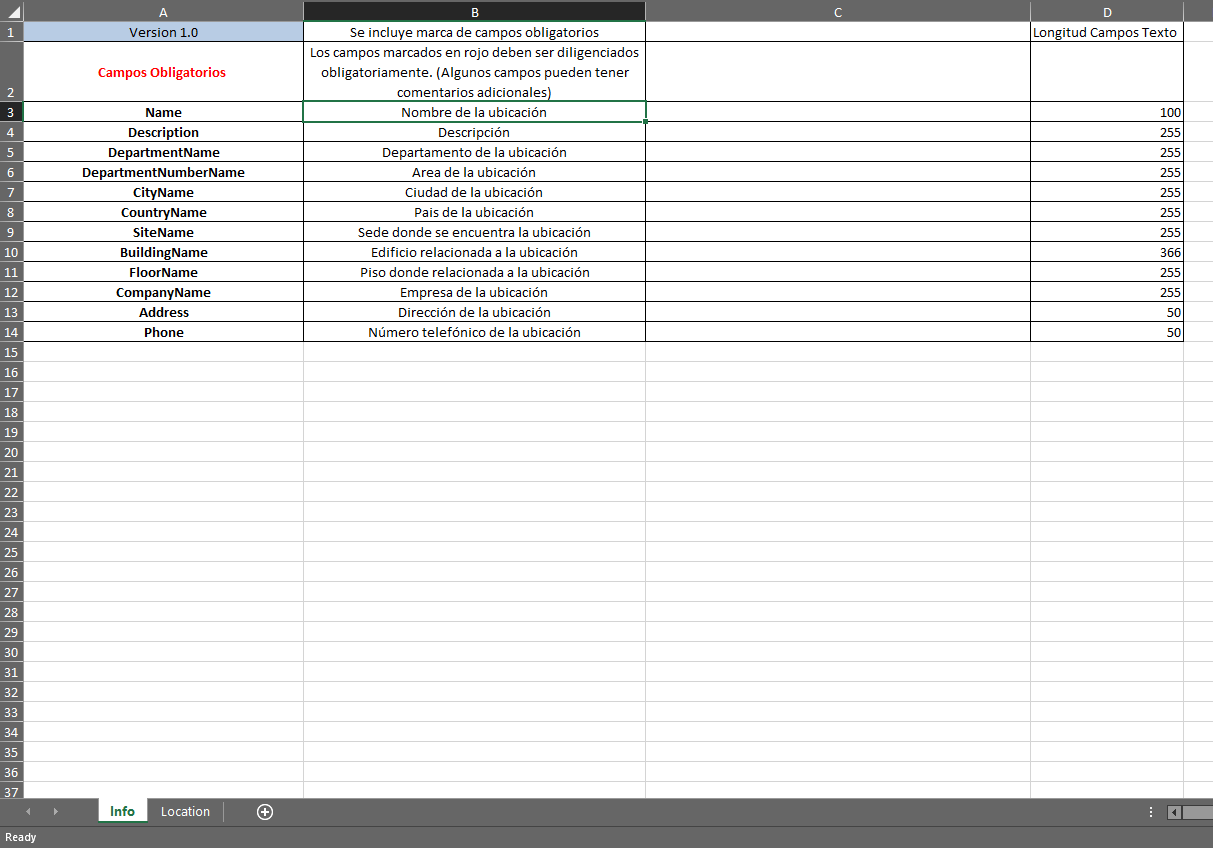
The downloaded file includes all the fields of the locations; You will also find the fields required for creating and/or updating the locations.
On the Info The obligation and information to be filled out on each field are described in detail.
Import Format for Locations
1. Once the form has been completed, enter the ASMS administration console, in the section Company Setup from the main menu, select the Locations. Define a project, and in the information view, select the New/Import Format.
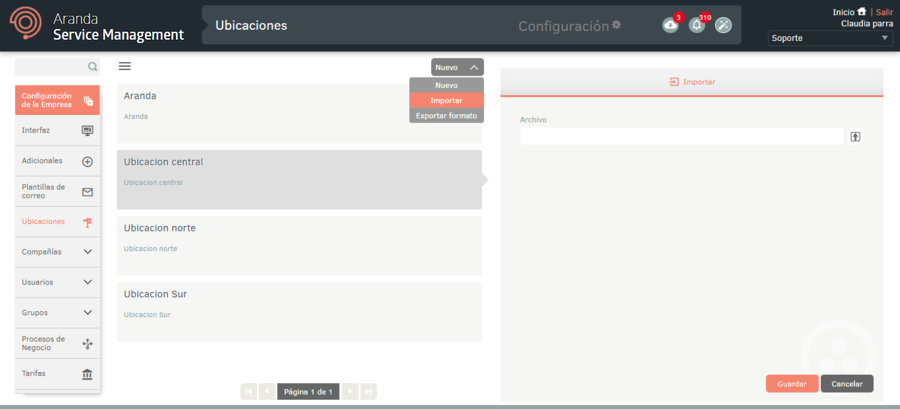
2. In the window Import, upload the file, and click the Save.
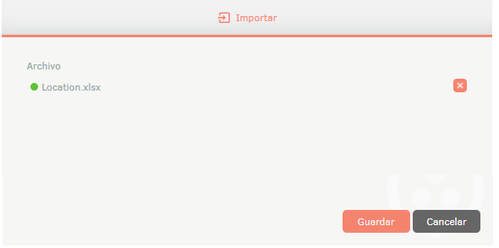
3. By clicking on the Save To start importing or updating locations, the file will be scheduled for import, prompted at the bottom of the screen and added in the notification panel.

4. When the import is complete, the corresponding notification will change from orange to green, indicating that it has been completed.
5. When you click on the notification, a window will be displayed where you can view the details of the import.

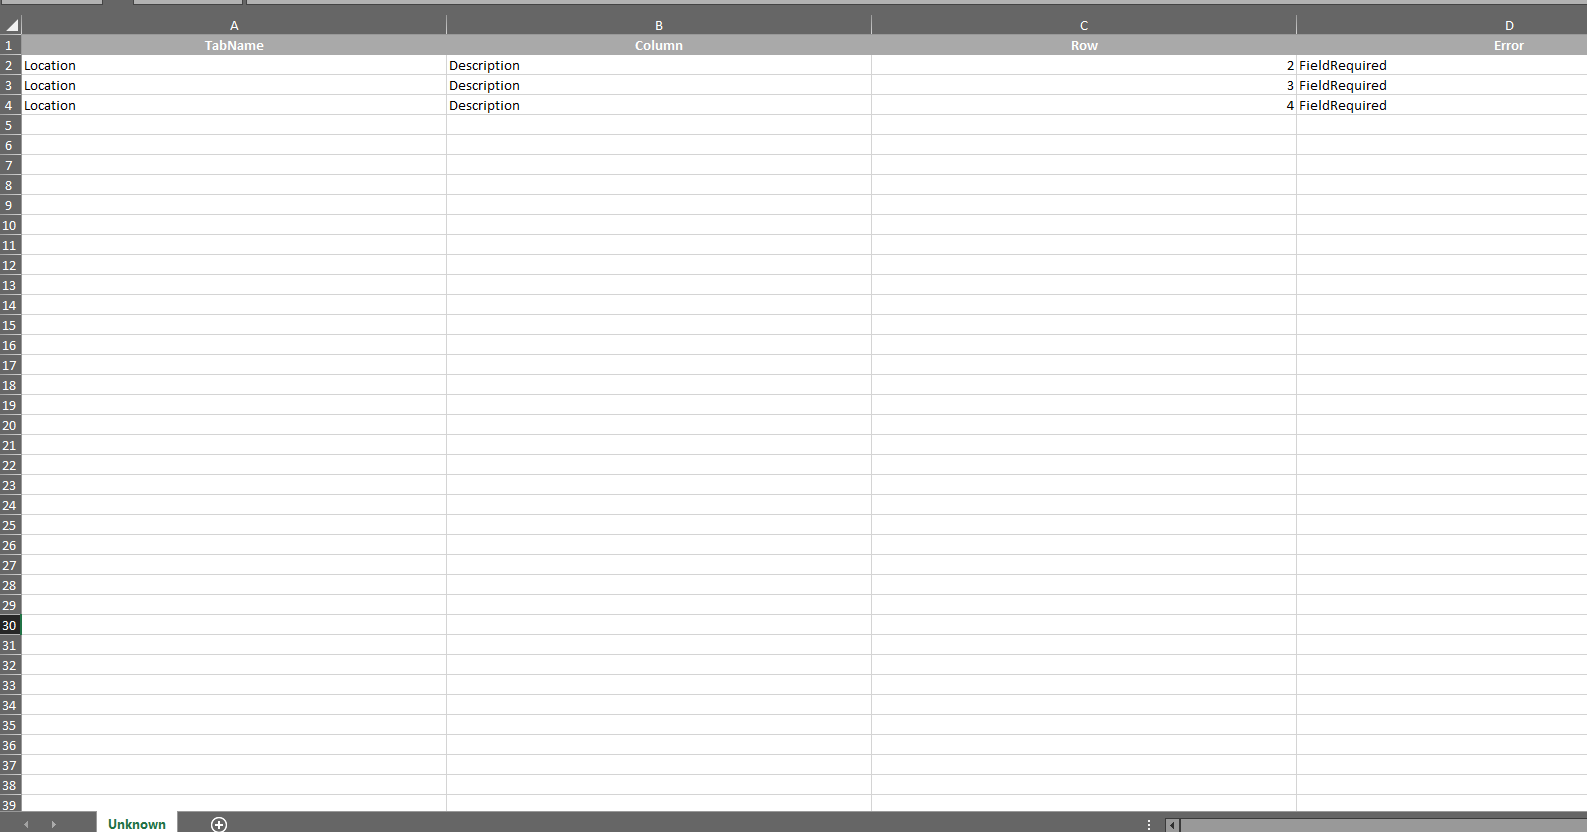
6. If during the import the file generated an error in one or more of its records, when viewing the import details it will be possible to download a file with the details of the records that generated error.
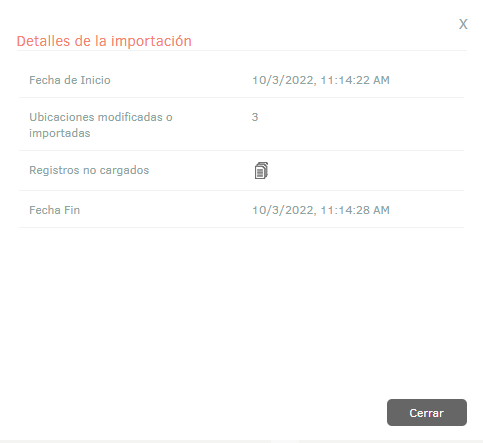
7. In the import details window, by selecting the unloaded records icon, you will be able to download an Excel file with the details of the errors generated during the import.