Specialist groups
In ASMS, groups of specialists are created according to their specialty to define the way in which they are involved in the care of reported cases.
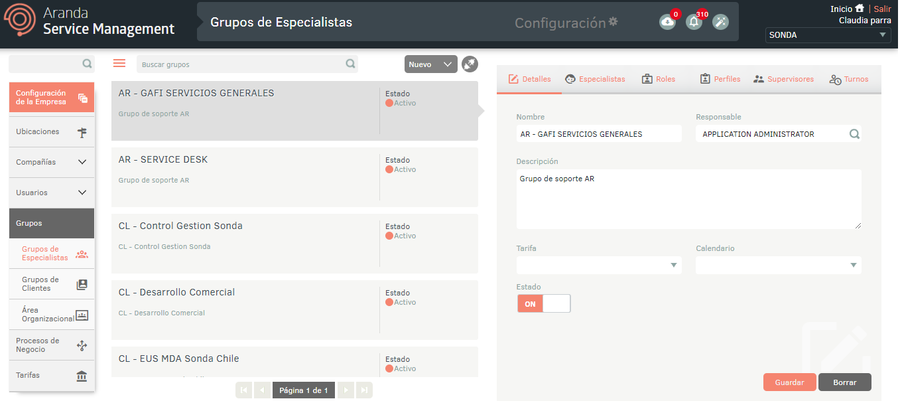
1. To create the Specialist Groups, log in to the ASMS Admin Console in the Company Setup from the main menu, select the Groups and the category Specialist Groups. In the information view, select the New and in the Detail View you can define the information for the groups.
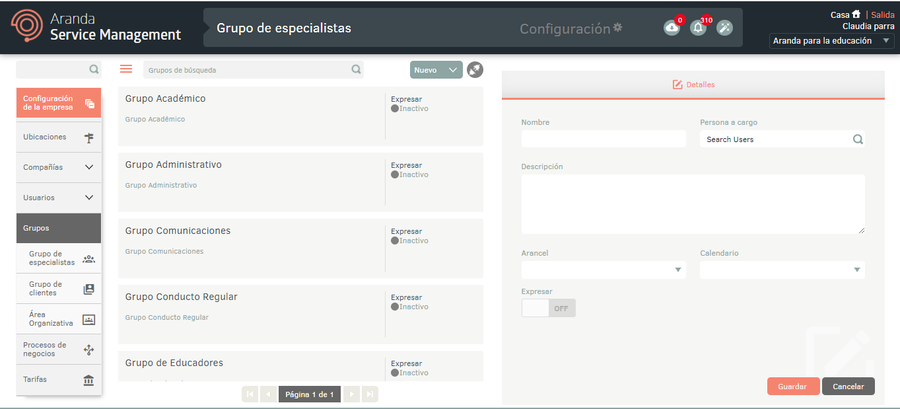
2. In the Groups Detail View in the ASMS Configuration Console, select the Details, where you can fill in the basic data to identify the group of specialists and whether their status is active or inactive.
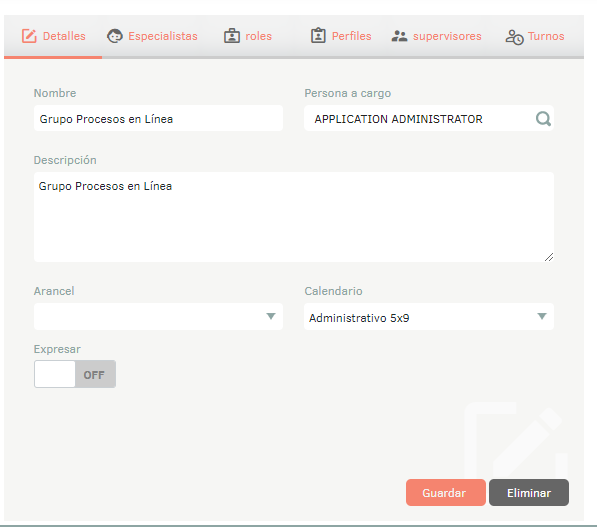
3. When you finish setting up the specialist groups, click Save in the Detail View of the ASMS Configuration Console to confirm the changes made. The Specialists, Roles, Profiles, Supervisors and Shifts sections will be enabled.
⚐ Note: If a specialist group is assigned in the ASMS system calendar, the behavior of the system during case assignment depends on the schedule configured for that group:
During defined working hours: When attempting to assign a case to the group, the system displays the complete list of specialists belonging to the group, allowing any of them to be selected according to availability or specialty.
Outside of group working hours: If you try to assign a case outside of the schedule schedule, the system will not display the full list of specialists. Instead, only the group leader will be displayed, who is the only one available to receive assignments outside of normal hours.
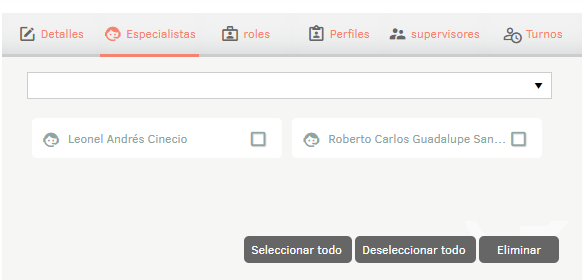
4. In the Groups Detail View in the ASMS Admin Console, select the Specialists, where you can search for and add specialists to the group.
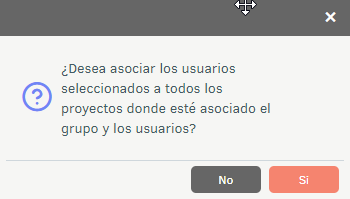
⚐ Note: When associating one or more groups to a user, a window is enabled to confirm or reject the type of association of users to projects.
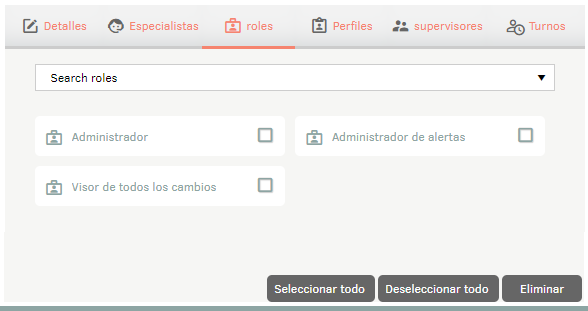
5. In the Specialist Groups Detail View, select the Roles, where you can search for and add roles to the specialist group. View Roles.
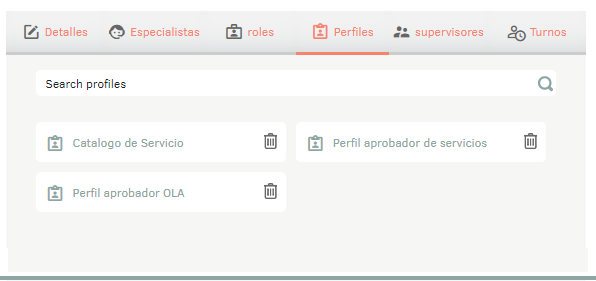
6. In the Specialist Groups Detail View, select the Profiles, where you can search and select the profiles that the group will have. These profiles must be pre-created.
View Profiles
7.5 Profiles, 8.4 Profiles.
Example: If you create a specialist group responsible for approving items or services, you must associate the respective approver profiles with the group.
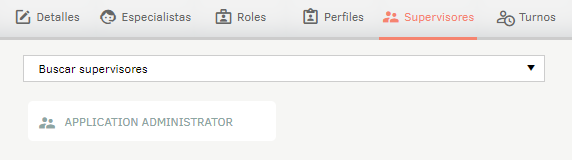
7. In the Specialist Groups Detail View, select the Supervisors, where you can search for and assign one or more supervisors to the specialist pool.
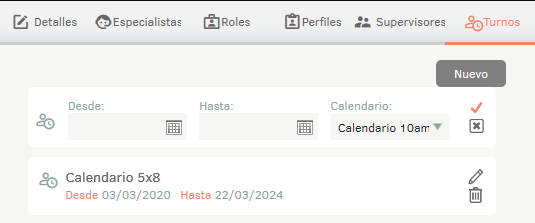
8. In the Specialist Groups Detail View, select the Shifts, where you can set up and set a work shift for the group of specialists. Click the New in the upper right corner and the following configurable parameters will appear:
- Since: Date on which the shift begins.
- Until: Date on which the shift ends.
- Calendar: Pre-configured. View Calendars.
Customer groups
In ASMS, customer groups are created so that they can be assigned an SLA that fits the particular requirements of the group. E.g.: setting better service times only for priority customers.
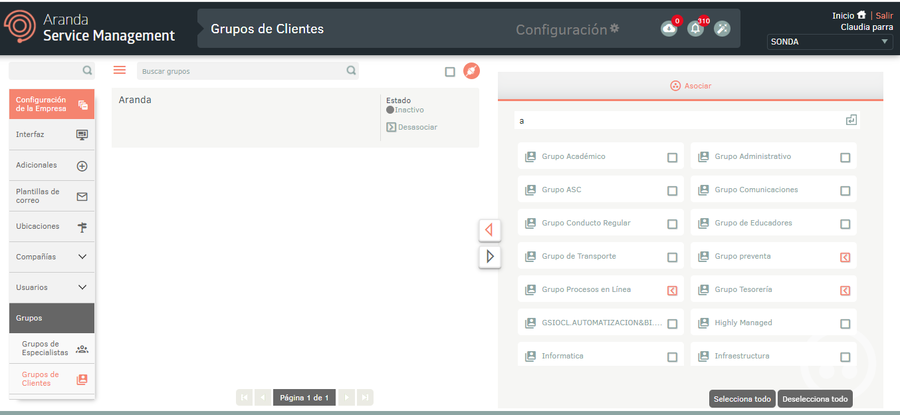
1. To create the Customer Groups, log in to the ASMS administration console, in the Company Setup from the main menu, select the Groups and the category Customer Groups. In the information view, select the New and in the Detail View you can define the information for the groups.
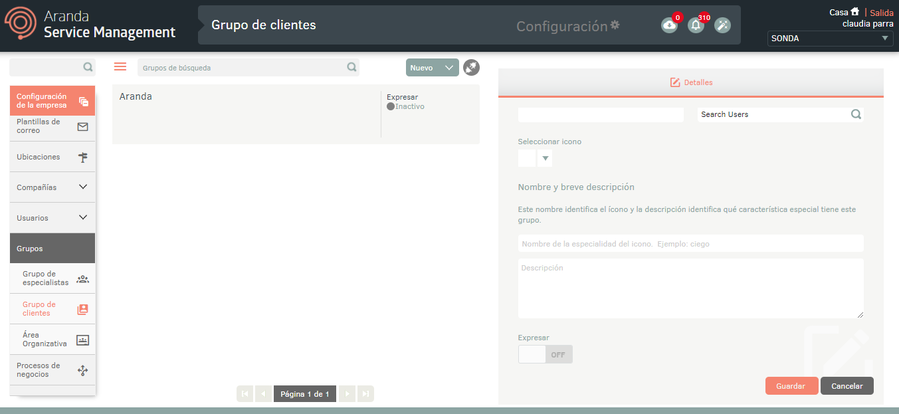
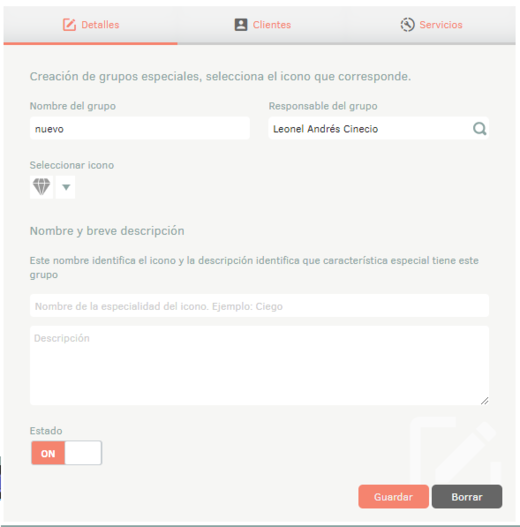
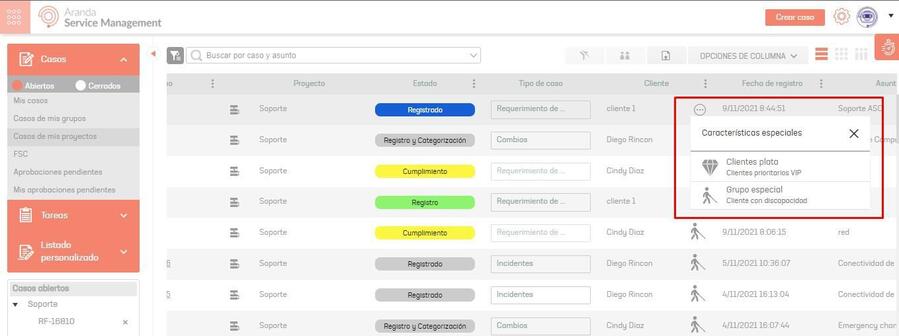
In the Groups Detail View in the ASMS Configuration Console, select the Details, where you can fill in the required data such as name and group leader, and an icon to identify customers with special characteristics, their name and description from the specialist console.
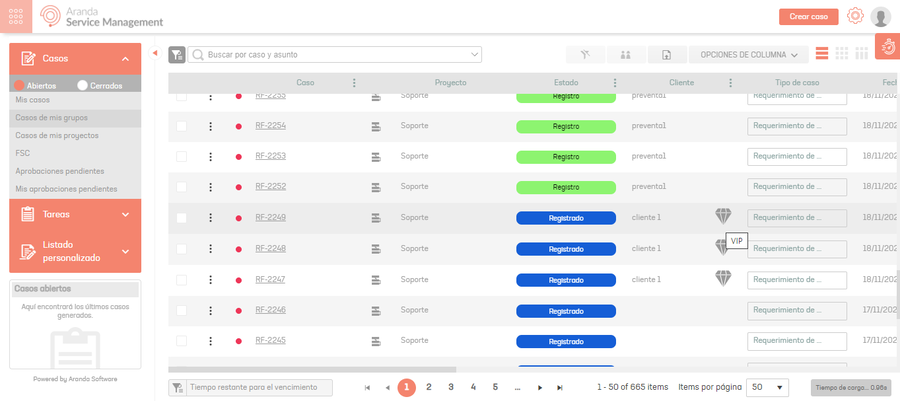
This configuration can be viewed from the ASMS specialist console; in the list of cases, in the Customer column, you will find the icon with the description defined in the administration console.
When the customer belongs to two or more customer groups, an icon will be displayed by default, and when clicked, a window will be displayed with the special characteristics of each group.
2. When you finish setting up the customer groups, click Save in the Detail View of the ASMS Configuration Console to confirm the changes made. Tabs will be enabled Details, Clients and Services.
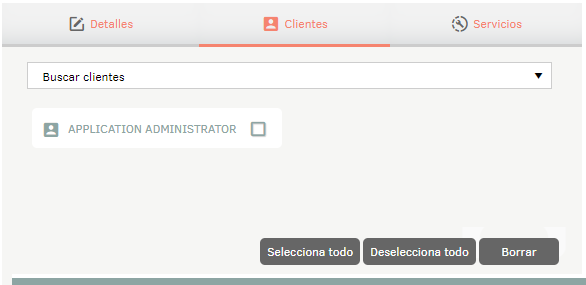
3. In the Groups Detail View in the ASMS Admin Console, select the Clients, where you can search for and add customers to the customer group.
⚐ Note: When associating one or more groups to a user, a window is enabled to confirm or reject the type of association of users to projects.
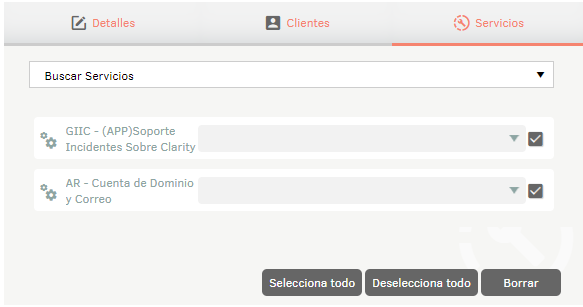
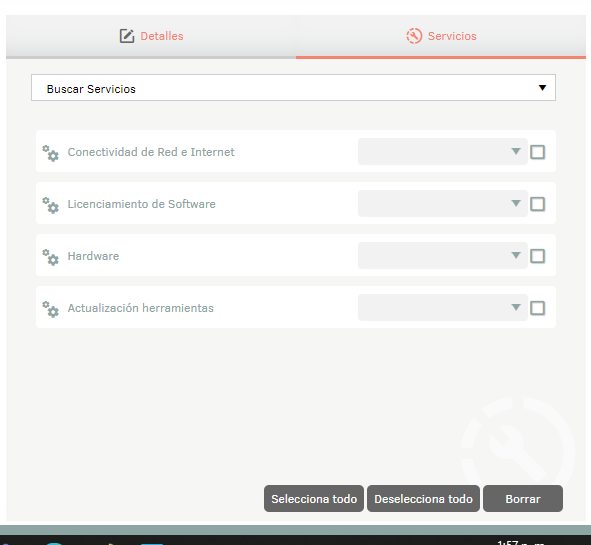
4. In the Groups Detail View in the ASMS Admin Console, select the Services, where you can select the services to be provided to the group and that are included in the SLAs agreed with the customer group. View Services.
5. Finally, activate the customer group in the Details and click the Save.
Organizational Area
Organizational areas are departments that support the operation of an organization. E.g.: accounting, human resources, marketing, etc. In ASMS it is possible to manage SLAs by organizational areas, according to the needs of each of them.
1. To create an organizational area, log in to the ASMS Admin Console, in the Company Setup from the main menu, select the Groups and the category Organizational Area. Define the project in the header menu, in the information view, select the New and in the Detail View you can define the basic information of the organizational area.
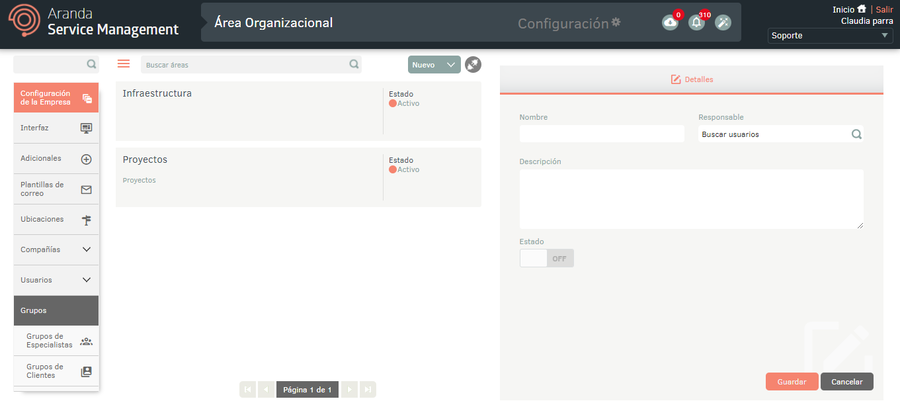
2. When you finish setting up the organizational area, click Save to confirm changes made; in the Detail View of the ASMS Management Console, the Services, where you can associate the services that will be provided to the organizational area. These services must have been created previously. View 6.10 Services.
Associate groups or areas with a project
The ‘Associate Mode’ button located at the top, will allow you to associate Specialist groups, Customer Groups or Organizational Areas from other projects, to the project that is selected in the upper-right corner.
Clicking on it will change the status and the section will be enabled Associate on the right side of the screen; There search for the group or area by name and associate it by checking the checkbox and then the Associate.
You can also disassociate one or more groups or areas from the project by checking the checkbox and then clicking the Disassociate.
Import Format for Client and Specialist Groups
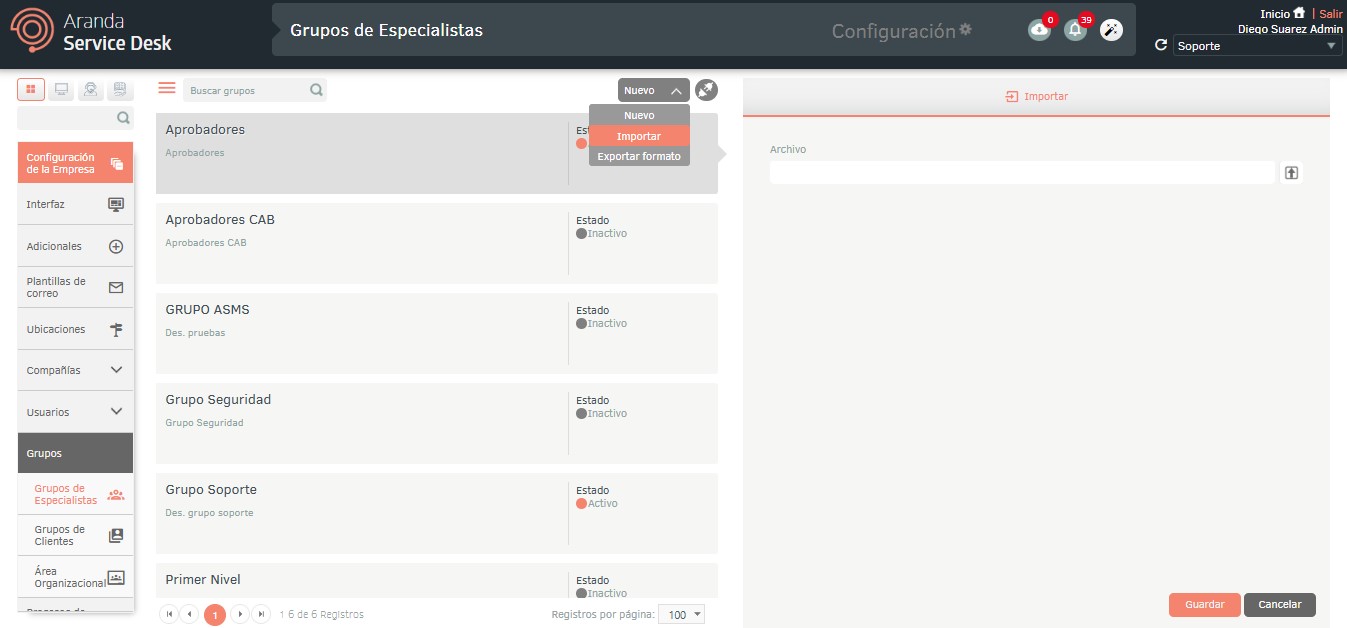
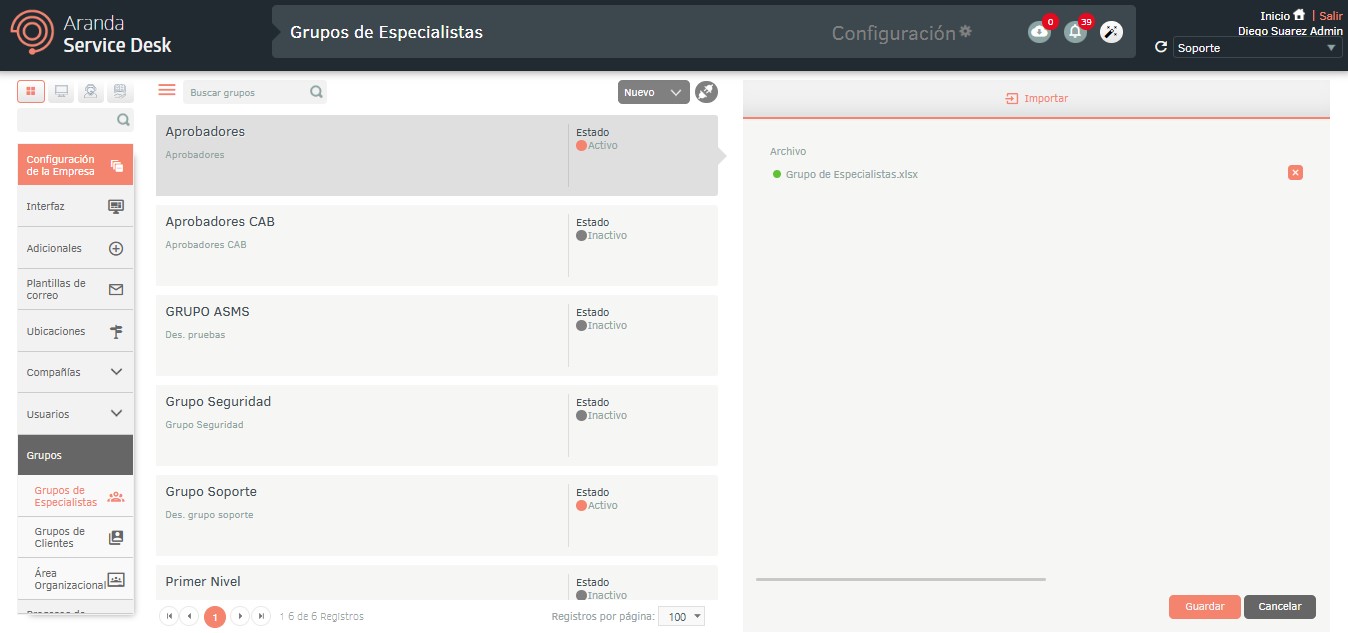
1. Once the form is completed, enter the ASMS, in the Company Setup from the main menu, select the Groups and the category Specialist Groups or Customer Groups. Define a project, and in the information view, select the New/Import.
⚐ Note: To download the template, click New/Export Format
2. In the Import window, upload the file and click the Save.
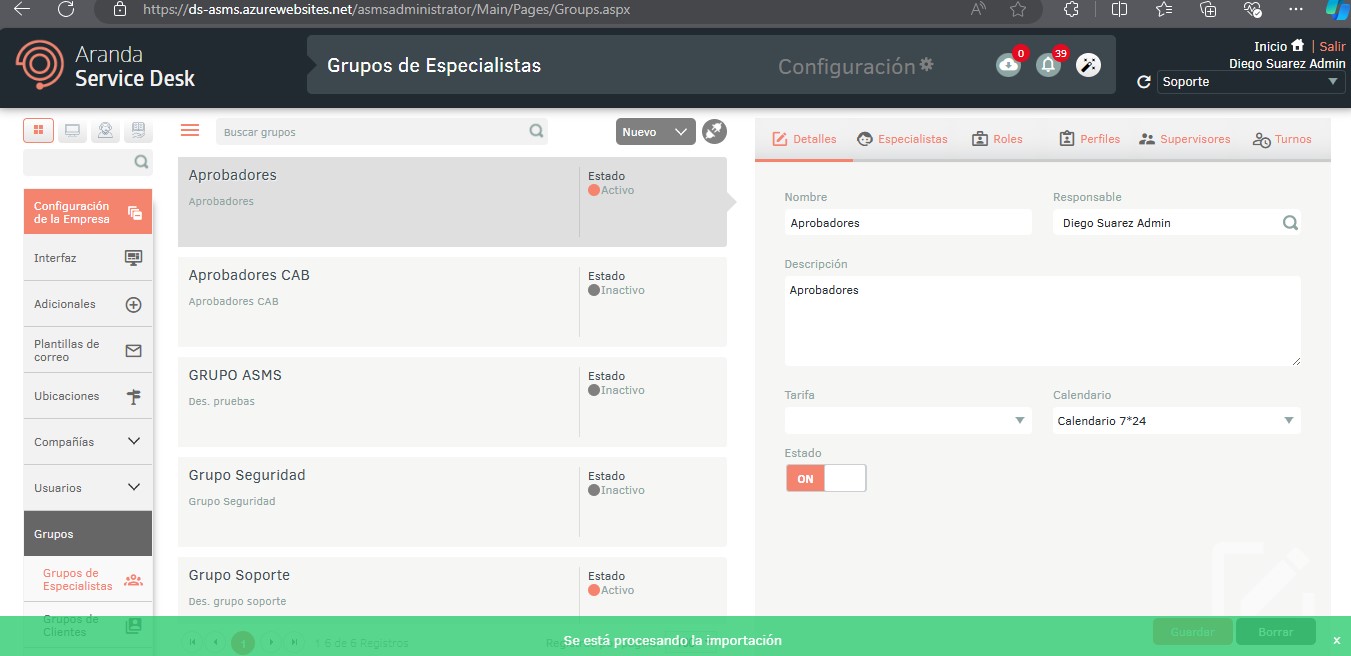
3. Clicking the save button to start importing or updating groups will schedule the file for import, prompted at the bottom of the screen and added to the notification panel.
4. When the import is complete, the corresponding notification will change from orange to green, confirming the action.
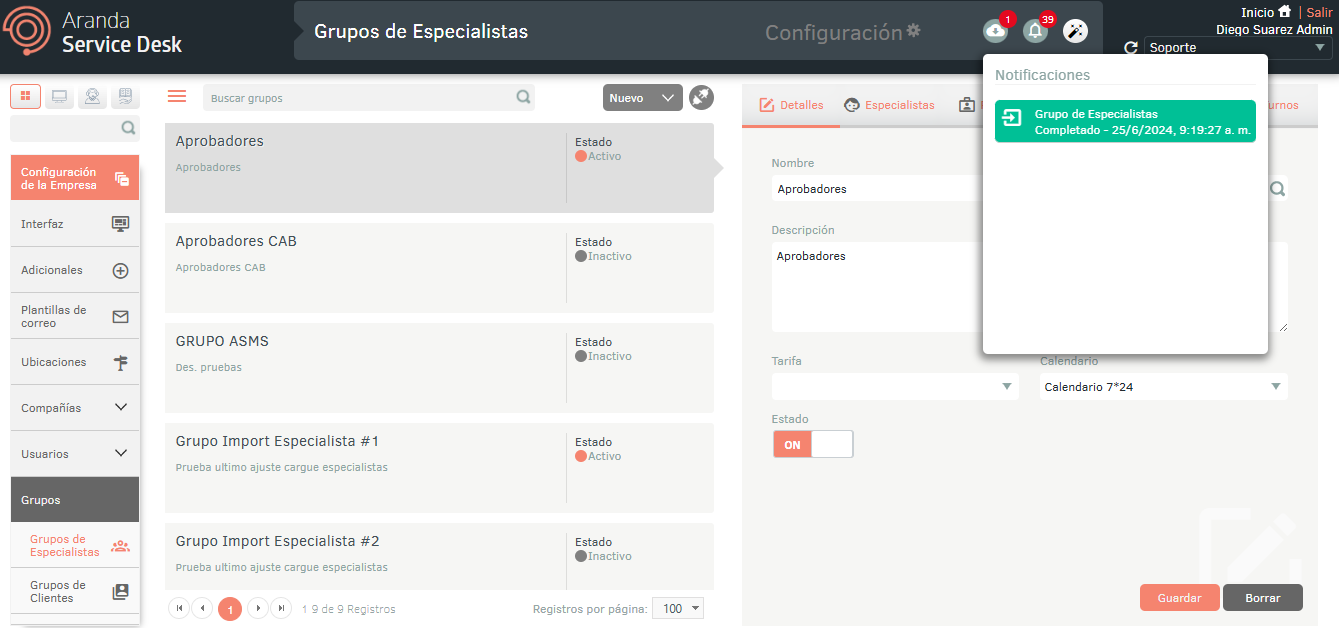
5. Selecting the notification enables the window, where you can view the import details.
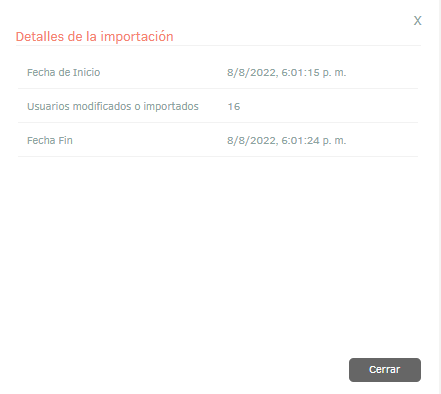
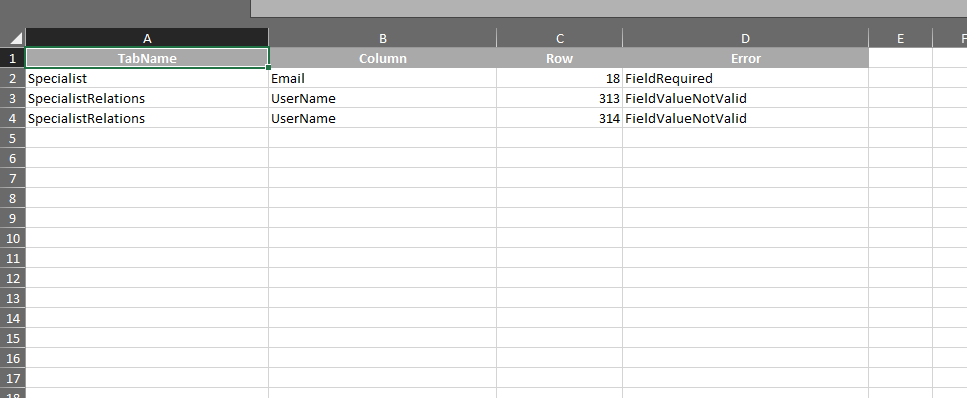
6. If during the import the file generated an error, in one or more of its records, in the import details you can download a file with the information of the records that generated error.
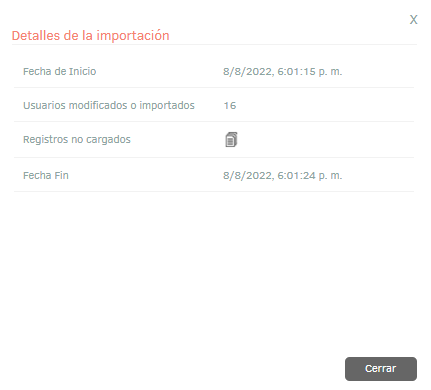
7. In the import details window, by selecting the unloaded records icon, you will be able to download an Excel file with the details of the errors generated during the import.