The templates make it possible to speed up the registration of cases that are repetitive or have similar characteristics. With the use of templates, the impact, the type of record, the category, the service and the specialist can be predefined, avoiding having to configure them one by one when creating a case.
1. To create a Template, log in to the ASMS Admin Console, in the Service Management from the main menu, select the Templates. Define a project and/or management module on which you want to create the template; for case types such as Changes, Service Requirements, and Releases, the option to filter by template type is displayed (All, with scheduled action, and without scheduled action).
2. In the Templates information view, select the New and complete the requested information.
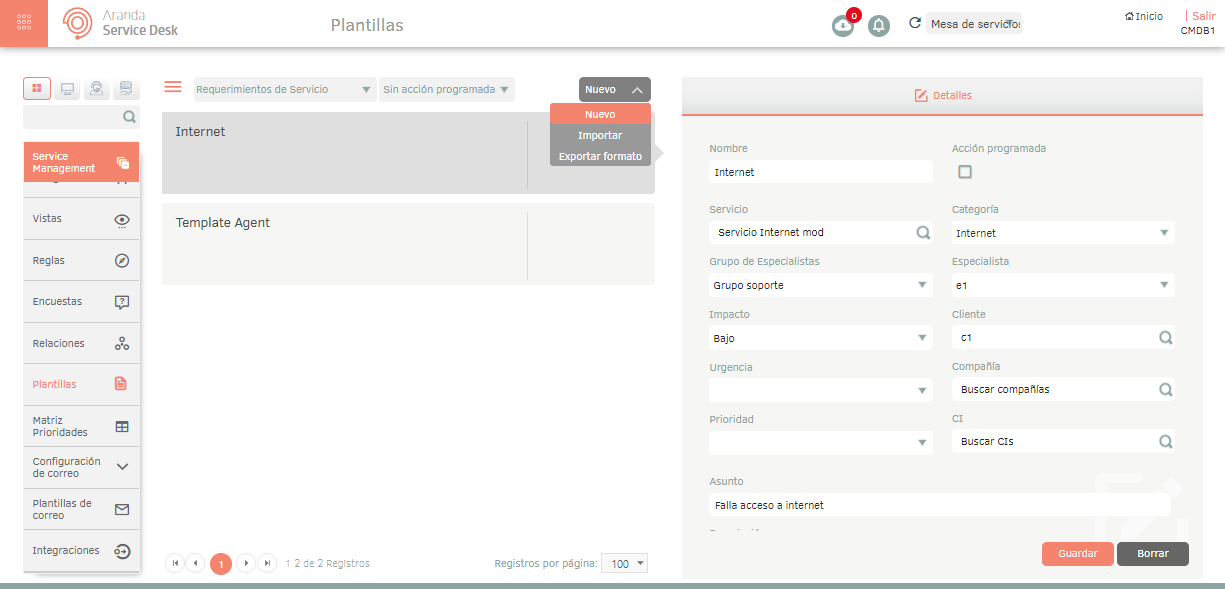
3. In the Templates detail view, on the Details Enter the required fields like this:
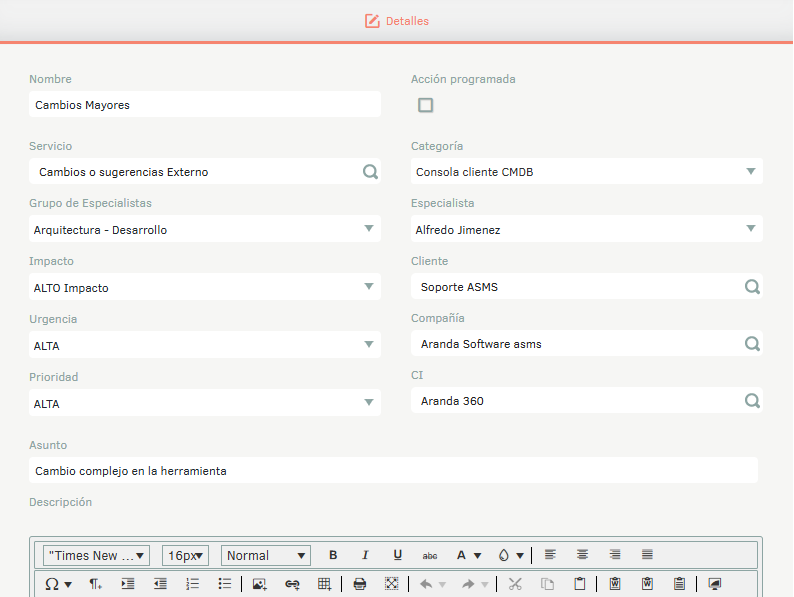
| Field Type | Description |
|---|---|
| Name: | Enter a name for the template. |
| Scheduled action: | Select whether the template will be scheduled action. |
| Service | Search for and select a service. See 6.10. Services. |
| Category: | Select a category. |
| Group of specialists: | Select a group of specialists. |
| Specialist: | Choose a specialist. |
| Impact: | Select an impact View 2.5 Catalogs. |
| Customer: | Choose a customer. See 3.5.1 Customers. |
| Urgency: | Select an urgency. See 2.5 Catalogs. |
| Company: | Choose a company. See 3.4.1 Companies. |
| Priority: | Select a priority. See 2.5 Catalogs. |
| CI: | Choose an IC. See 8.16 ICs. |
| Affair: | Fill out an issue. |
| Description: | Enter a description. |
4. When you finish setting up the template, click Save to confirm the changes made.
⚐ Note:
- Templates will not be visible in the Specialist Console for case creation via template when:
- They are marked as scheduled action templates.
- Have associated concepts that are not available for the creation of cases, these concepts are: service, category, group of specialists, specialist, client, company or CI.
Export Format
The export of this module will bring the Excel template without information and in it you can fill in the respective information for the import.