This module offers the possibility to create cases automatically through from an email sent. A mailbox is set aside, with the objective to receive the emails and create cases according to the configuration done.
Inbound Servers
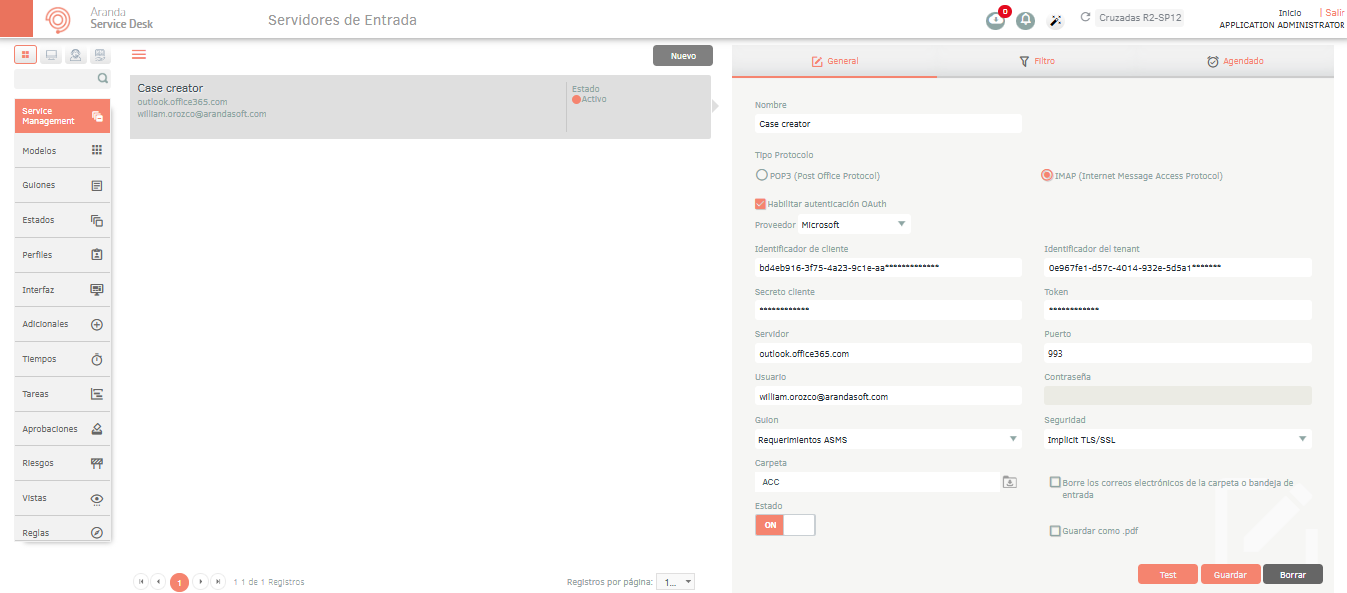
1. To configure the mail inbound servers, log in to the ASMS Management Console, in the Service Management section of the main menu, select the option Mail Settings and Inbound Servers. In the information view, select the New and in the Detail View you will be able to fill in the required server information.
⚐ Note: The number of connections per mail should not exceed 3 or 4 connections so as not to affect the performance of the application.
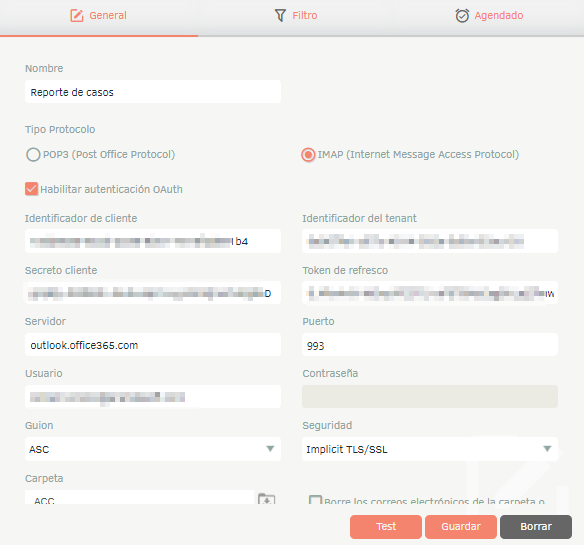
2. In the Input Servers Detail View in the ASMS Management Console, select the General, where you can fill in the following information:
| Field | Description |
|---|---|
| Name: | Enter an ID name from the mail settings. |
| Type of protocol: | Select Protocol (POP3 or IMAP) |
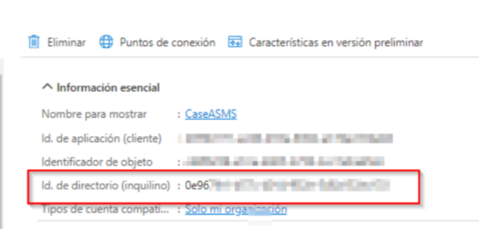
| Enable OAuth authentication: | Check this option if you are going to authenticate to the server through OAuth 2.0, choose the type of provider (Microsoft or Google) and fill in the following information in the fields that are enabled: - Customer ID. - Tenant ID (Required for Microsoft provider only). - Customer secrecy. -Token. For the above data, please refer to the following document Configuring for OAuth 2.0 Modern Authentication. |
| Server | Enter the IP address or name by which the e-mail server is identified for mail entry into the mailbox. |
| Port | Enter the enabled port on the mail server for mail entry. |
| User | Enter the email account for authentication in the inbox. - Note: The email or mailbox account must have access to POP or IMAP enabled depending on the type of protocol to be used. |
| Password | Enter the email inbox password. |
| Script | Select a script. View Email Template. |
| Safety | Select the email protocol security settings. |
| Save as PDF: | Define the type of document that will be attached to the case during email creation: EML with check inactive or PDF activating check. |
| State | Define whether the configured inbound server will be active (ON) or inactive (OFF). |
⚐ Note: The information in the “Tenant ID” field, during Oauth authentication, must be provided by the customer when configuring the application in Azure.
3. In the Input Servers Detail View, click the Test to test if the connection is successful. By clicking Save, the inbound server will have been successfully configured.
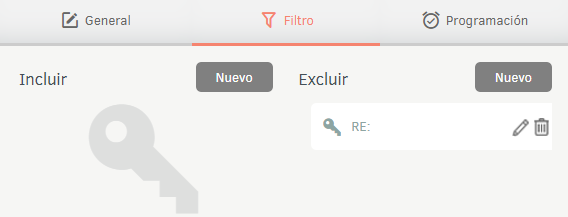
4. In the Inbound Servers Detail View, select the Filter, where you can include and exclude values for automatic case creation, these filters are not case sensitive.
The filters of Include you just need to add the text that contains the subject; if you add the wildcard (*), the filter will take the conditions of the Exclude filter.
The filters of Exclude They work as follows:
| Exclude Filters | Description |
|---|---|
| With the FW filter: | Do not believe that the matter is FW only. |
| With the FW filter* | Cases that the matter initiates with FW are not created, but cases that contain only FW in the subject are created. |
| With the filter *FW: | Cases that end with FW are not created, but cases that only contain FW in the matter are created. |
| With the filter *FW *: | Cases whose subject contains FW are not created. |
⚐ Note: When you have the Include option configured, only cases that match the entered values will be created.
If only the Exclude option is configured, all emails will be created, except those that match the values entered.
If the Include and Exclude filters are configured, the emails that match the Include filters will be taken and then the emails that match the Exclude filters will be deleted.
5. In the Inbound Servers Detail View, select the Programming and record the related fields.
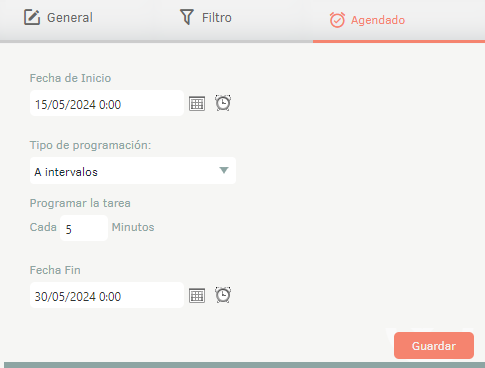
⚐ Note: In Cloud environments, the default time for reading emails is 5 minutes. It is recommended to allocate a longer time to ensure optimal operation of the tool.
Input templates
Input templates allow you to pre-configure all of the data in Case creation by email. When you receive an email in the mailbox of the defined account, the case is created according to the parameters configured in the input template.
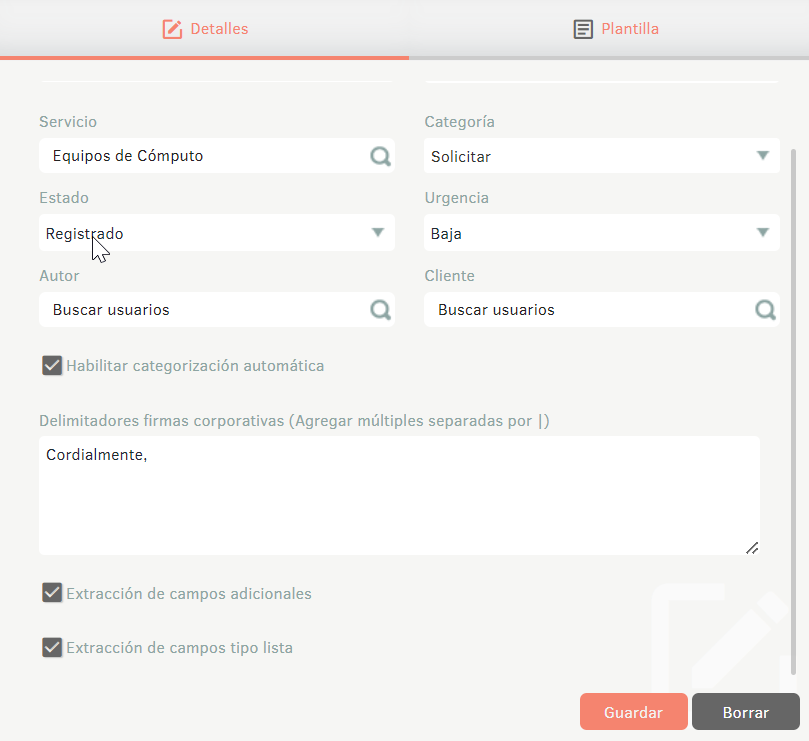
1. To configure the input templates, log in to the ASMS Admin Console, in the Service Management from the main menu, select the Mail Settings and Entrance Templates. In the information view, select the New and in the Detail View you will be able to fill in the required server information.
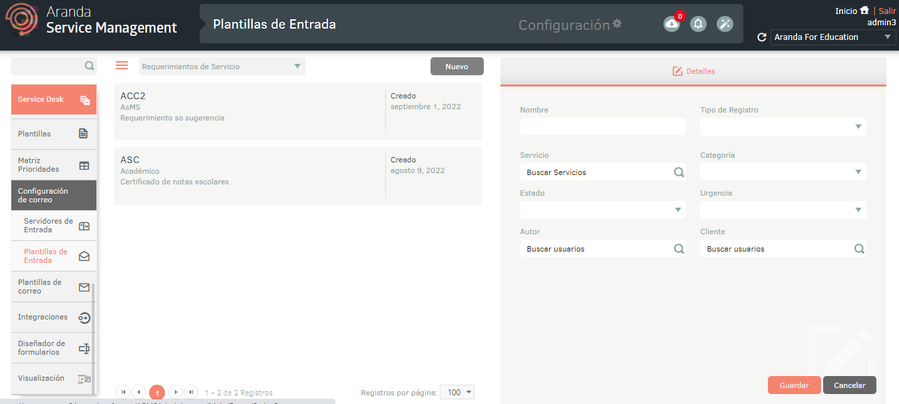
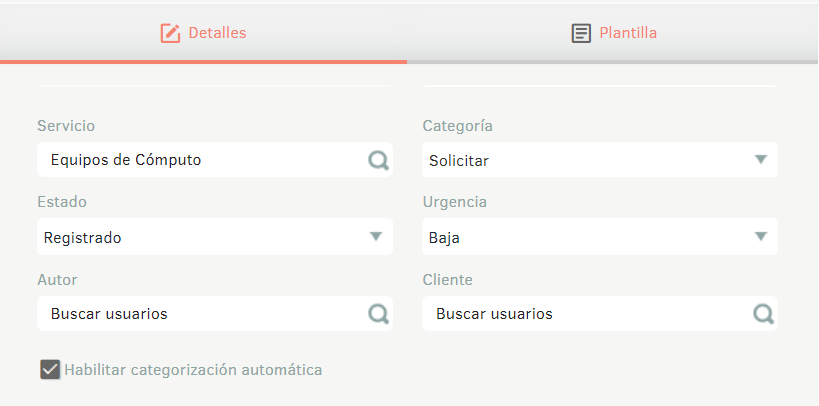
2. In the Input Templates Detail View in the ASMS Admin Console, select the Details, where you can fill in the following information:
| Field | Description |
|---|---|
| Name: | Enter a name for the input template. |
| Type of Record: | Select the type of record with which the case will be registered. |
| Service: | Choose the service with which the case will be registered. |
| Category: | Select the category with which the case will be registered |
| State | This field auto-completes with the initial state. |
| Urgency | Define the urgency with which the case will be registered. |
| Author | Select the author with whom the case is to be registered. |
| Customer | Select the client with whom the case is to be registered. |
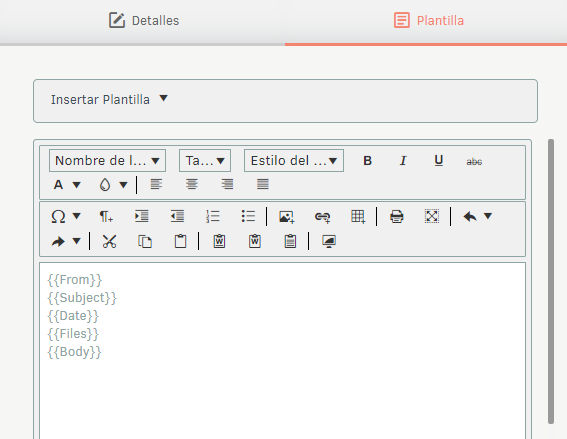
3. In the Input Template Detail View, when you click Save, the template will appear in the list of templates created and the Template. Fill in the script details there and click Save again.
Automatic categorization
Preconditions
- To ensure that automatic categorization works properly, it is essential to correctly configure models and endpoints. Otherwise, cases will be created using the default settings. View automatic categorization settings
This functionality makes it possible to categorize cases according to the training carried out on the model.
- To enable automatic categorization, go to the input template detail view in the Admin Console ASMS and select the Enable automatic categorization.
Define signature
This functionality allows you to configure the initial parts of an email signature in order to exclude the text from the signature and improve the effectiveness of categorizing cases.
- To delimit a signature with multiple separators, simply add the initial part of the signature followed by |. In this way, artificial intelligence will be able to categorize the case more effectively.
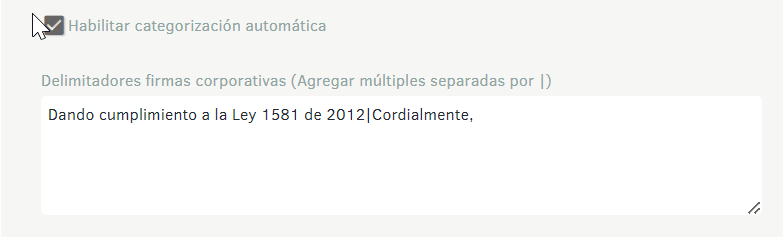
⚐ Note: If the configured mail includes a signature and the initial part is not associated in the delimiter field, the effectiveness percentage will be lower. This could affect categorization and result in the case being created with the default values.
Extracting additional fields
This functionality allows you to pigeonhole the values of additional fields where appropriate.
- For the extraction of additional fields, select the corresponding check box.
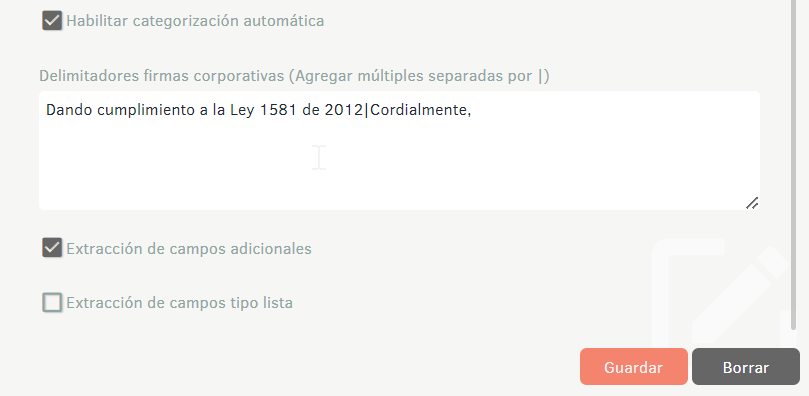
Extracting List-Type Fields
This functionality allows you to extract values for additional fields such as list and tree, note that you must have the “Extract values from list-type fields” action. See AI Settings