


Create a Zone
The configuration of zones allows you to delimit coverage areas to organize the operational care of specialists and providers.
1. To create a Zone, go to the AFLS configuration console, in the Administration from the main menu, select the Areas. In the information view, select the New and in the Detail View you can fill in Zone, Zone and Supplier Information.
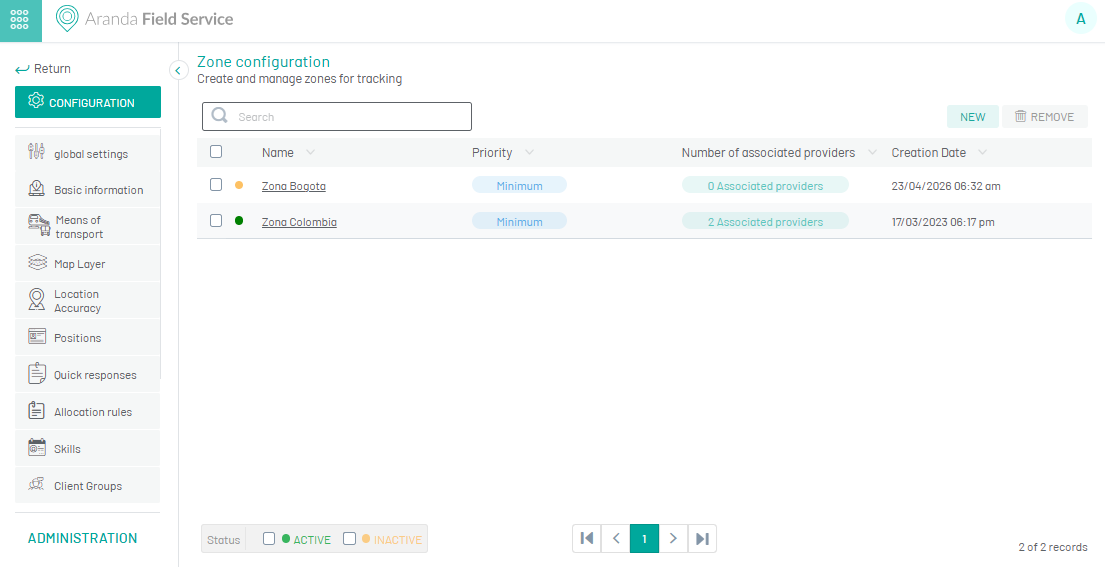
Area Information
2. In the Zone Detail View in the AFLS Configuration Console, select the Area Information, where you can enter the following fields:
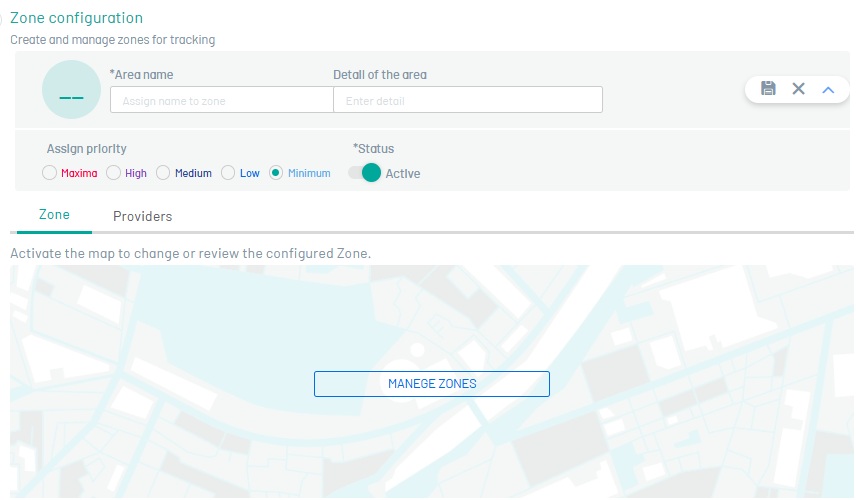
| Area Name | Name with which the coverage will be identified. Example: North Zone. |
| Detail of the area | Supporting text to identify the objective of the area. |
| Assign priority | It can be Min., Low, Medium, High, or Max. If the same address coincides in multiple zones, AFLS prioritizes the highest priority address. |
| State | Defines whether the zone is enabled (Active) or not. |
Delimit the area on the map
3. In the Zone Detail View in the AFLS Configuration Console, select the zone, click Manage Zones to open the map. Then, select Edit and draw the polygon that delimits the coverage area.
On the Zone tab, click Manage Zones to open the map. Once opened, click Edit first and then Manage Points to delimit. The Import Points window for the zone opens, where you can choose between Flat Import and Import by File.
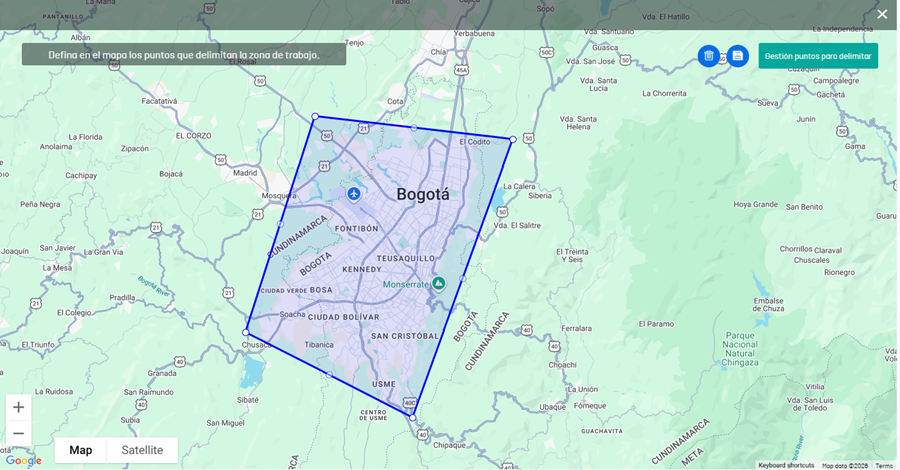
In the area work area you can use the tools available on the map
| Tools Zone | Description |
|---|---|
| Clear Zone | Delete the drawn polygon to recreate it. |
| Save area | Allows you to save the drawn polygon. |
| Management of points to delimit | Load points in bulk for GeoJSON file or flat import. |
⚐ Note: If you need to split a territory for multiple providers, create multiple zones and see Split Work Zone.
Associate suppliers
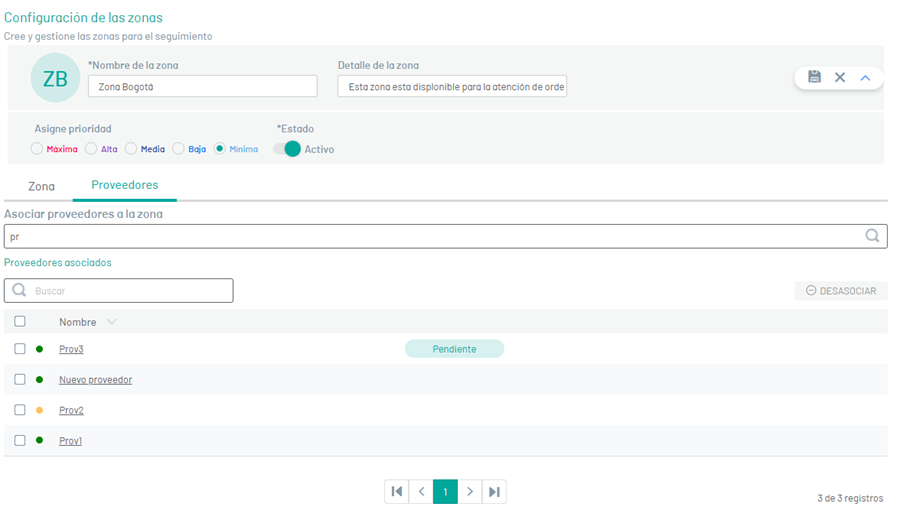
4. In the Detail View of the Accounts payable area, on the Suppliers, associate the providers who will serve the area.
⚐ Note:
1. Supplier partnership is optional.
2. You can only delete zones that are not associated with work orders.
A direction can belong to several zones, and a specialist can also be related to several zones depending on the operation.
5. When you finish configuring the Zones, Click Save in the Detail View of the AFLS Configuration Console, to confirm the changes made.
Edit Zone
6. To edit a Zone, in the information view, select a record from the existing zones and in the detail view you can modify the required information.
Delete Zone
7. To delete a zone, in the information view select a record from the list of existing zones and select the icon to delete the associated information.
Import Points
8. In the Zone Detail View in the AFLS Configuration Console, select the zone, click Manage Zones to open the map. Then, select Edit and click Management of points to delimit. The window will open Import points for the zone, where you can choose between Flat Import and Import by file.
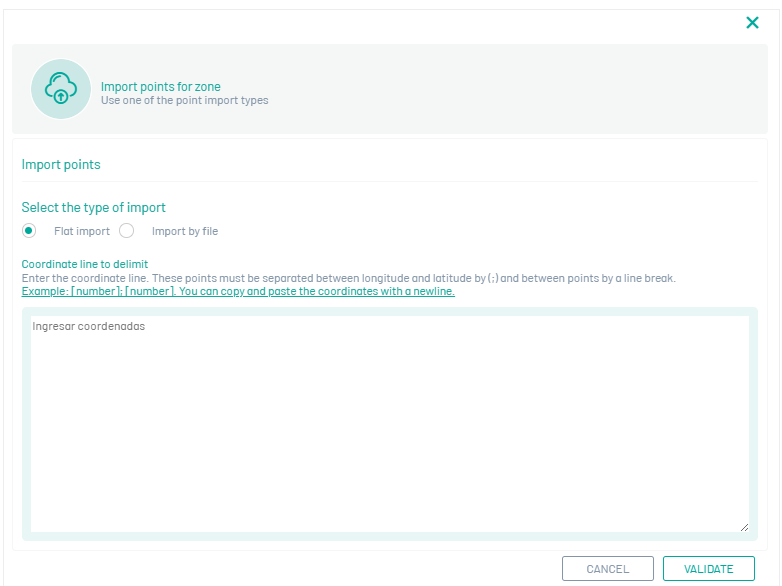
Flat Import
10. Use this option when you need to paste coordinates manually in bulk. On the Flat Import, copy the coordinates of the points.
⚐ Note: Each point must be formatted
longitud;latitud, and each point should go on a different line.
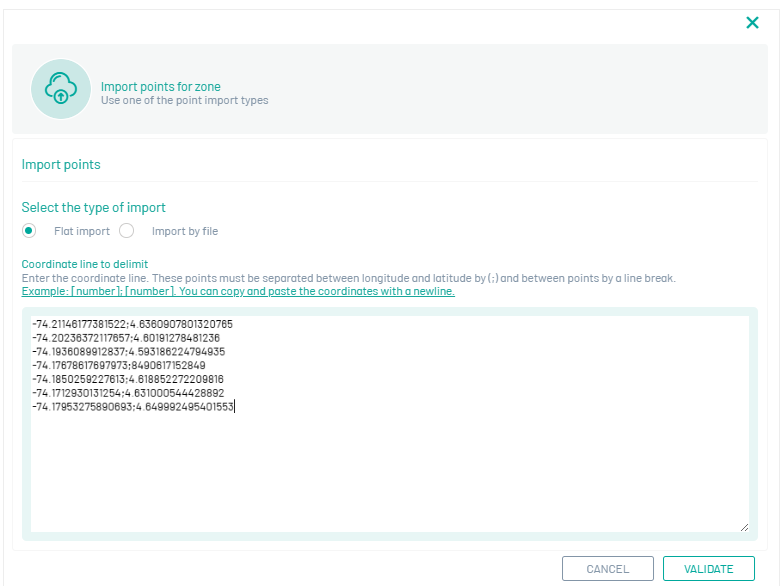
11. Click Validate for the system to review the content.
12. Review the validation result. The system indicates which points are valid and which have errors.
Correct or delete invalid points (for example, incorrect longitude and latitude coordinates). The import is not complete until you have purged those records.
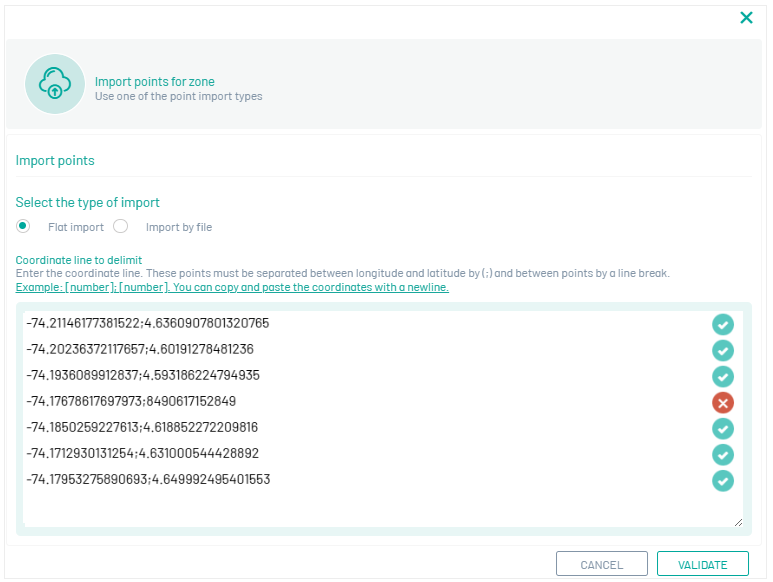
13. When the data is correct, click Import.
Import by file
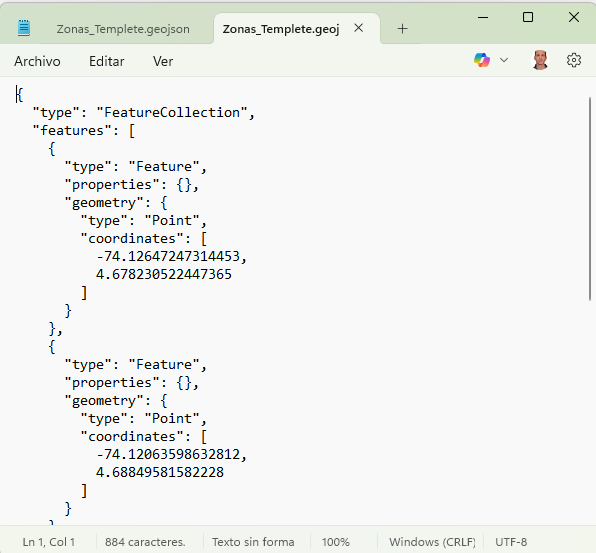
14. Use this option to upload a GeoJSON file with dots in bulk.
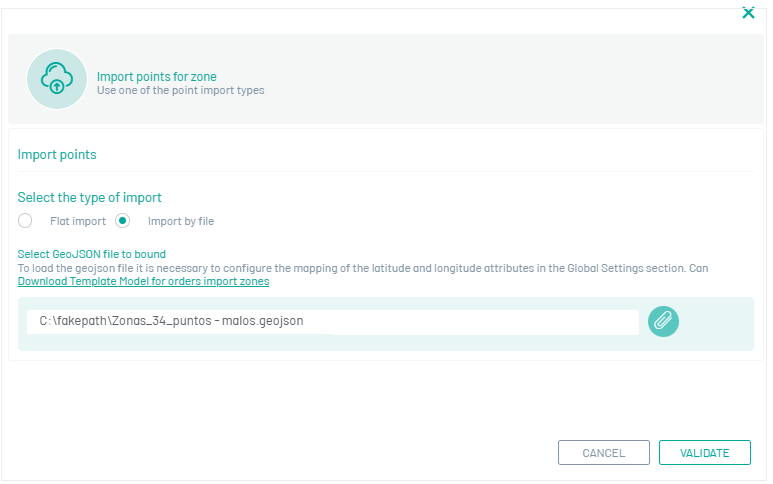
In the window Import points for the zone, go to the Import by file and download the sample template or upload a file of your own.
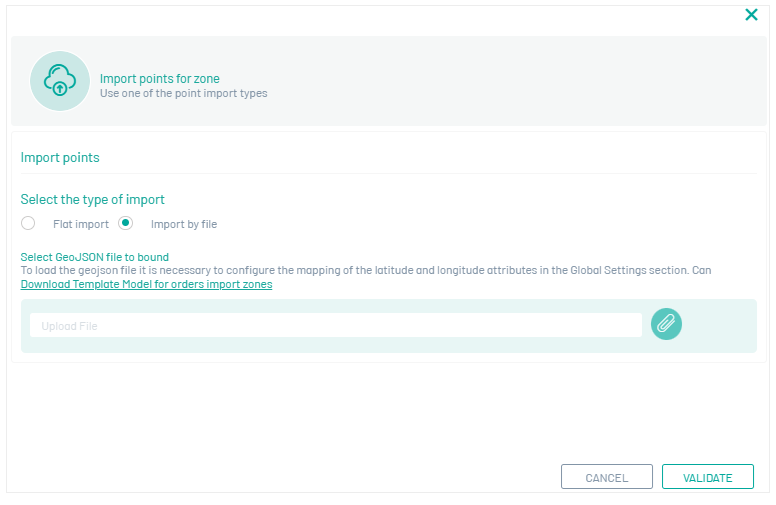
15. If you select Download Zone Import Model Template, you’ll get a .zip with an example of a GeoJSON structure.
 >
>
16. Select Upload file, choose the GeoJSON button, and click Open.
17. Click Validate to review the file before importing it.
The system will display valid and invalid points in a result window. Correct or remove invalid points (incorrect longitude or latitude) from the file and repeat validation if necessary.
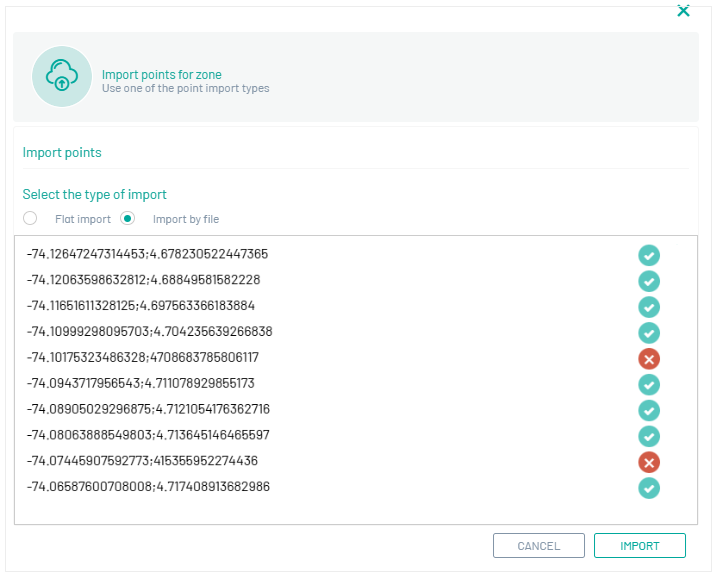
18. Click Import to finish loading points in the area.