


One model It groups several features common to the services such as: Workflows, Additional Fields, Satisfaction Survey and Service Level Agreements. Once a model is defined in Aranda FIELD SERVICE AFLS it is possible to use it within the services, in this way all the services will share the characteristics.
Create a new model
1. To Create a Model, go to the AFLS configuration console, in the Service Catalog from the main menu, select the Models. In the information view, select the New
2. In the Detail View, you can define the basic information of the model and associate a previously configured satisfaction survey.
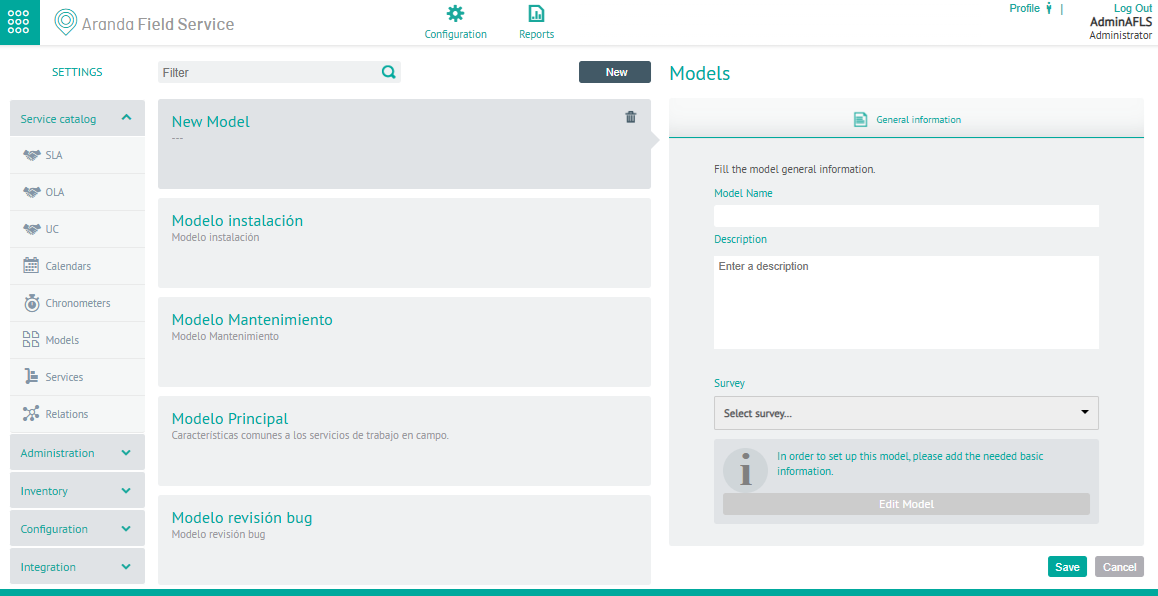
⚐ Note: The surveys that you can associate with a model must be configured in the AFLS Survey Templates.
3. When you finish configuring the Save  to confirm the changes made.
Edit Model
4. To edit a model, in the information view select the name of the record you want to edit, in the detail view, on the General information tab, select the Edit Model.
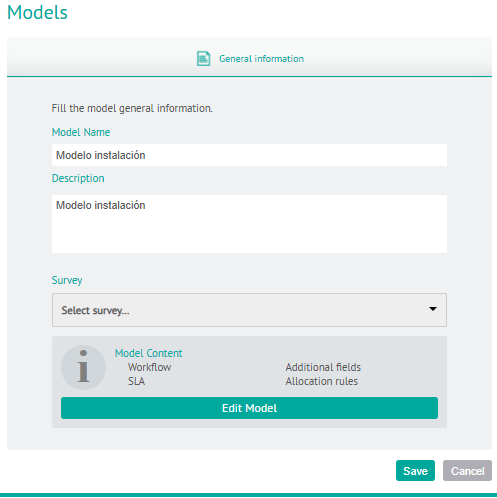
5. The model designed by the client for the management and attention of work orders is configured by defining a Workflow and Service Agreements SLA and additional Fields.
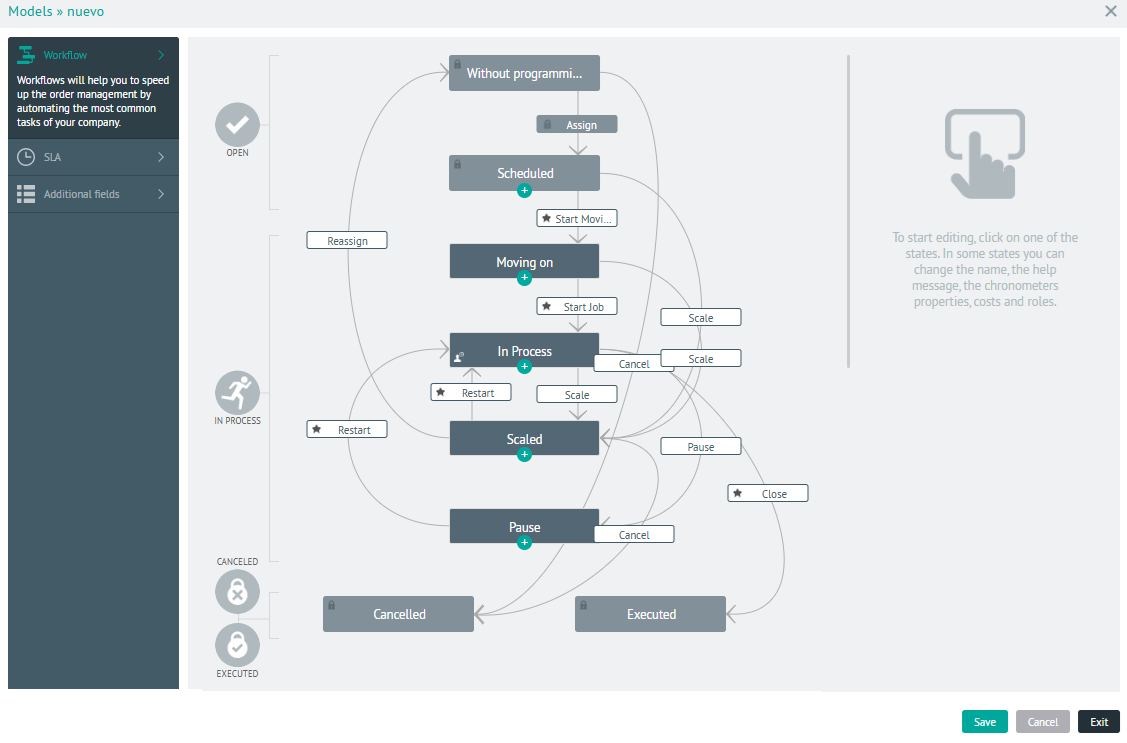
Workflow
The workflow determines the life cycle of work orders and is composed of states, sub-statuses, activities, transitions that define the process.
⚐ Note: Configuring workflows will allow you to customize the process according to the needs of executing the services and reuse automatically generated diagram elements (sub-states, transitions).
⚐ Note: Expand the information of the Workflow components.
New Sub-State
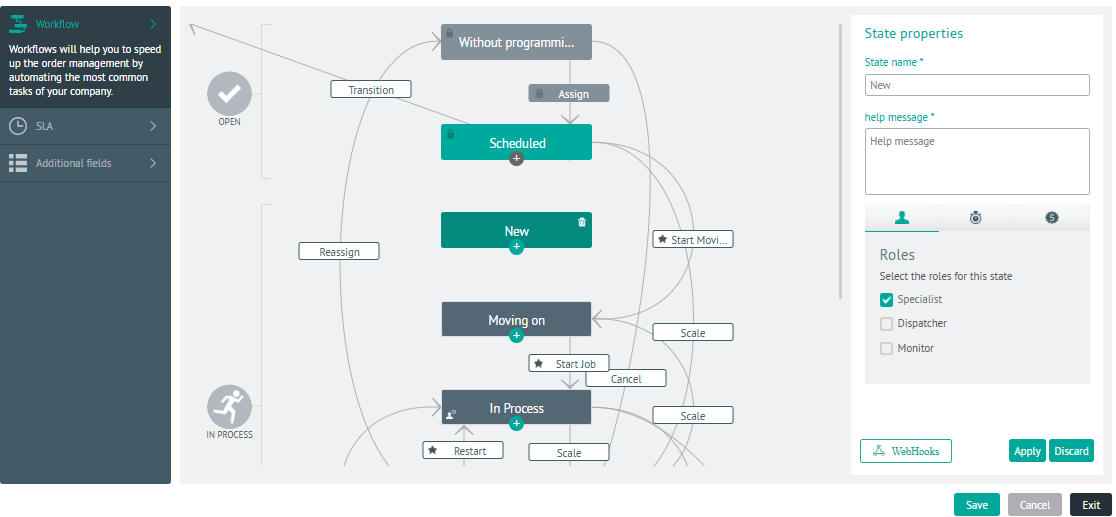
6. To create a new sub-state, from the main menu of the model, select the Workflow and in the workspace modify the default configured workflow by including new sub-statuses and transitions or select a sub-status and click on the + . The new sub-status will be created at the level immediately below.
In the sub-state properties, enter data such as:
| Fields | Description |
|---|---|
| Basic Info | This information includes the name of the state and the help message that tells users (specialists and in some cases monitors) what to do in each activity. |
| Roles | This section defines the roles (specialist, dispatcher, or monitor) of users with permissions to modify a case with respect to the workflow. |
| Timers | This section allows cases in this substate to keep track of how long it takes. As soon as a case enters this sub-state, the marked timers begin to count time. When you leave the state, the timers stop, so you can keep track of the time it takes between different activities. |
| Costs | This section allows the application to know in which states the time invested by the specialist should be counted, or the distance traveled in order to calculate the costs of execution and travel. |
| Webhooks | This option allows you to configure Webhooks, to automate workflows by sending data from one application to another. For more details see the option Configuring Webhooks. |
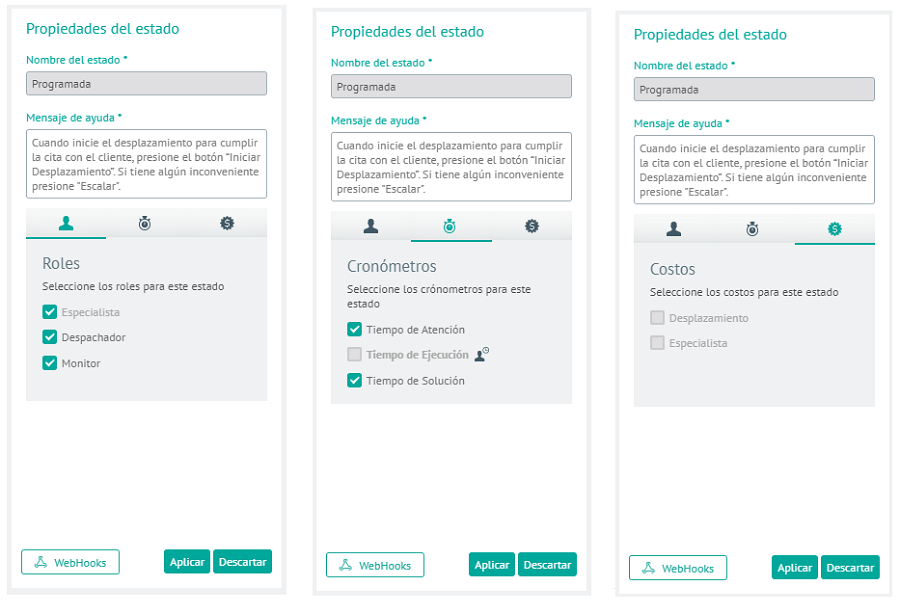
7. When finished click Apply.
New transition
Each transition of the flow is the intermediate point between two sub-states of the process.
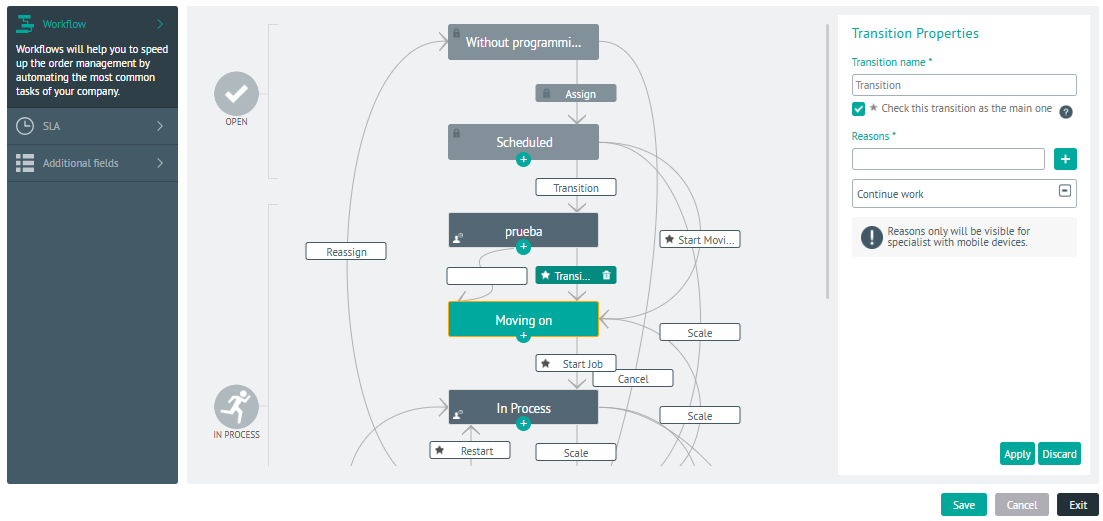
8. To create a transition, in the flow workspace select a substate, drag, and drop the cursor from the initial substate to a final substate. You can also create a transition from a preconfigured transition.
9. In the transition properties, you can modify information such as name and reasons for mobile.
10. When you finish setting up the transition, click Apply.
⚐ Note: The reason set will be requested from the field specialist when the status of a work order changes.
SLA
In the model design, you can associate pre-configured Service Agreements and customize the time agreements for the behaviors required in the model.
11. To create a new SLA from the main menu of the model, select the SLA. In the information view, you can view the configured SLAs.
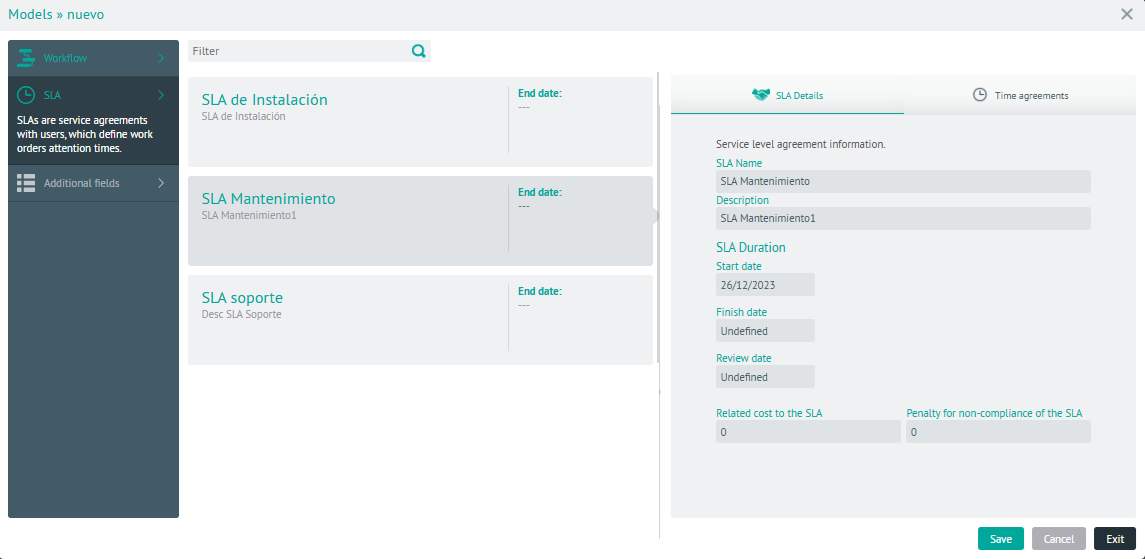
12. In the detail view of the selected SLA, you can make the agreement detail viable. On the Time Agreements Select the option Customize Time Agreements to modify the timers defined for all cases that use the model.
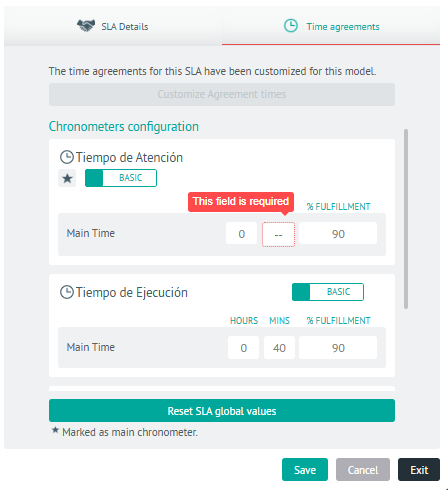
13. When you finish configuring the SLA for the model, click Save to confirm the changes made.
⚐ Note: Created cases will use the model detail, if not otherwise specified. In this section, the user will be able to reset the global SLA values, for the cases of the model.
Additional Fields
In the model design, you can associate the additional fields for each of the created work orders. Here you can define the information that must be requested for each order, define the permissions and the mandatory nature of each field.
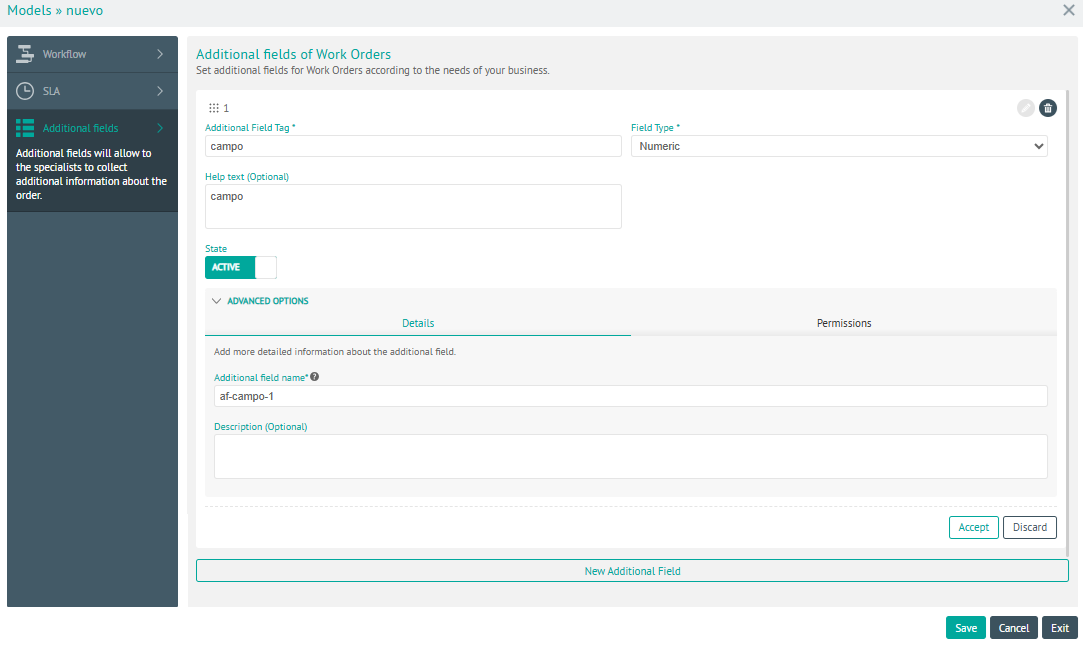
14. To create an additional field, from the main menu of the model, select the Additional Fields. In the information view, select the New Additional Field and enter the basic field information such as create the label, help text, and additional field type (plain text, paragraph, numeric, date, and options).
15. On the Details From the advanced options in the additional fields, you can configure name and description. This information corresponds to technical information that can be used later in integration with other systems.
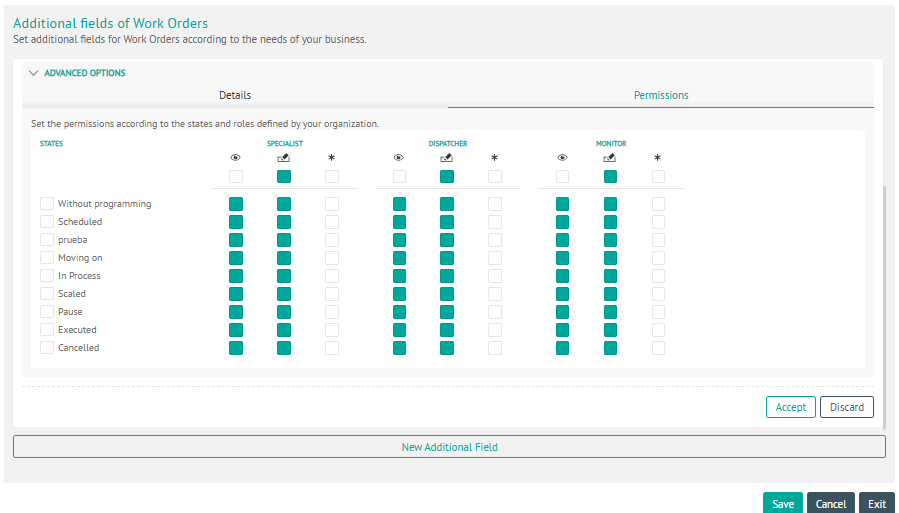
16. On the Permissions From the advanced options in the additional fields, you can define:
- Roles (Dispatcher or Web Monitor and Mobile App Specialist) with permissions to view additional field information,
- Permissions can be configured for each of the defined states.
16. When you finish setting up the additional fields for the model, click Save to confirm the changes made.
Once the common information for the models is configured, they can be associated with the organization’s services.