Add Location Manually via the Map
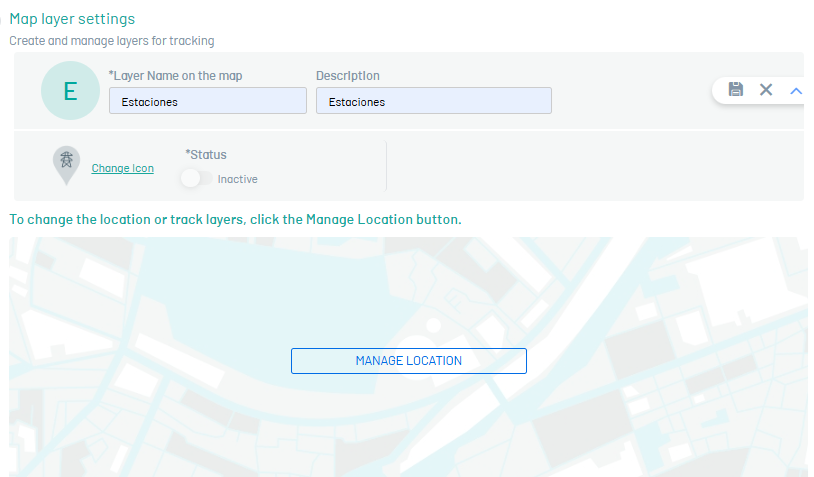
1. In the Map Layer Detail view, click the MANAGE LOCATION.
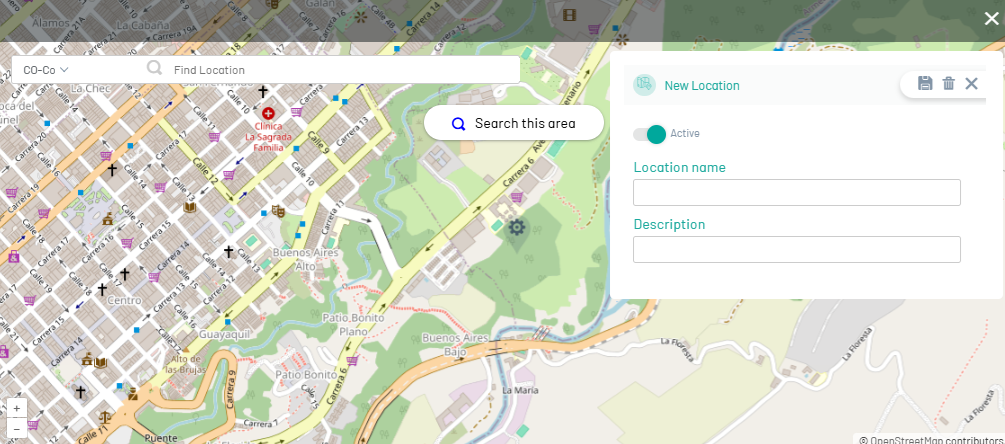
2. In the Location Management window, place the cursor on the location point marked on the map, coordinates (longitude, latitude), the window is displayed New Location where you can fill in information such as name, description and activate the status so that it is visible on the web or mobile interface.
3. When you set the location, click Save  to confirm the changes made.
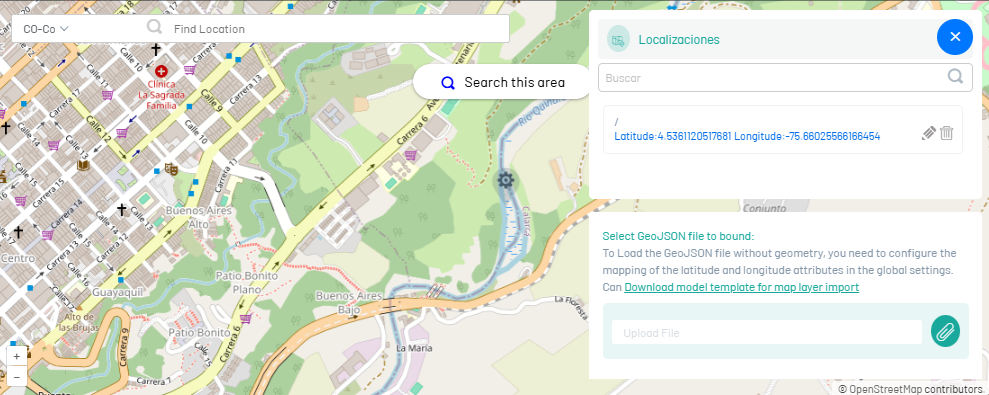
⚐ Note: If the location was added correctly it will be displayed as a point on the map and as an item within the list of locations in the Location window.
Edit or Delete Locations
4. To edit or delete a location, click the Locations icon  and in the Location window, select a record and click the Edit or Delete icon
  the associated information, as required.
Add location via the address finder
5. To add a location, in the Location Management, click on the point on the map or in the search engine, enter the address or name of the location, and make the query, to generate the reference as a new location of the layer.
6. The search result will be displayed on the map according to the coordinates provided by the map provider and the window is displayed New Location where you can fill in the necessary information for the located registration.
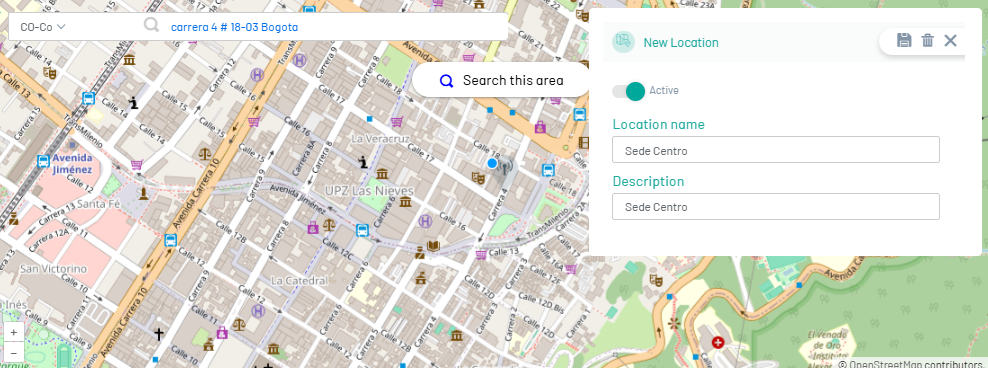
⚐ Notes: 1. If the Aranda Field Service instance has a multi-country configuration, the country on which the search will be performed will be displayed.
2. If the address entered is not found, a red box will be displayed above the search engine.
Add location via GeoJSON import
Configured GeoJSON import attributes in the AFLS Global Settings, you will be able to import locations in bulk to a layer under the World Geodetic System 1984 geographic coordinate reference system and decimal degree units.
Upload/Import File
7. In the window Manage Location, in the window Locations Click the Upload File and select the GeoJSON file.
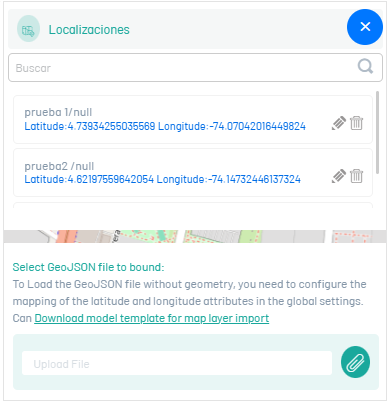
8. After uploading the file, the window is enabled Import by File and click the Import.
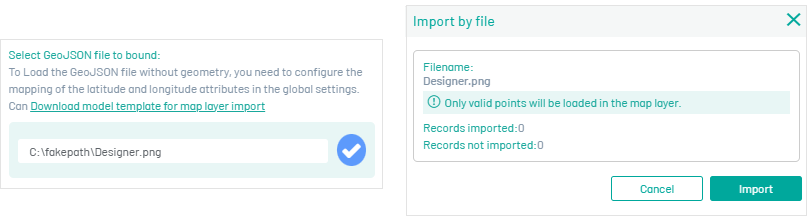
9. When the upload is complete, the system will report the points added as locations of the layer and those that are not.
Download File
16. In the window Manage Location, in the window Locations Click on the option Download model template to import map layers.
Download the file with the invalid points and verify the attributes of the GeoJSON file to be imported. Correct all locations that do not meet the minimum required parameters (name, longitude, and latitude). If necessary, upload the points reported as invalid again, as the system has successfully processed those that were validated.
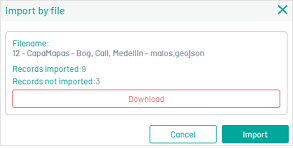
⚐ Note: The file with the invalid points should be downloaded after the upload is finished and once the system has generated the result in the pop-up window. Otherwise, it will not be possible to download it again.
Viewing Layers and Locations
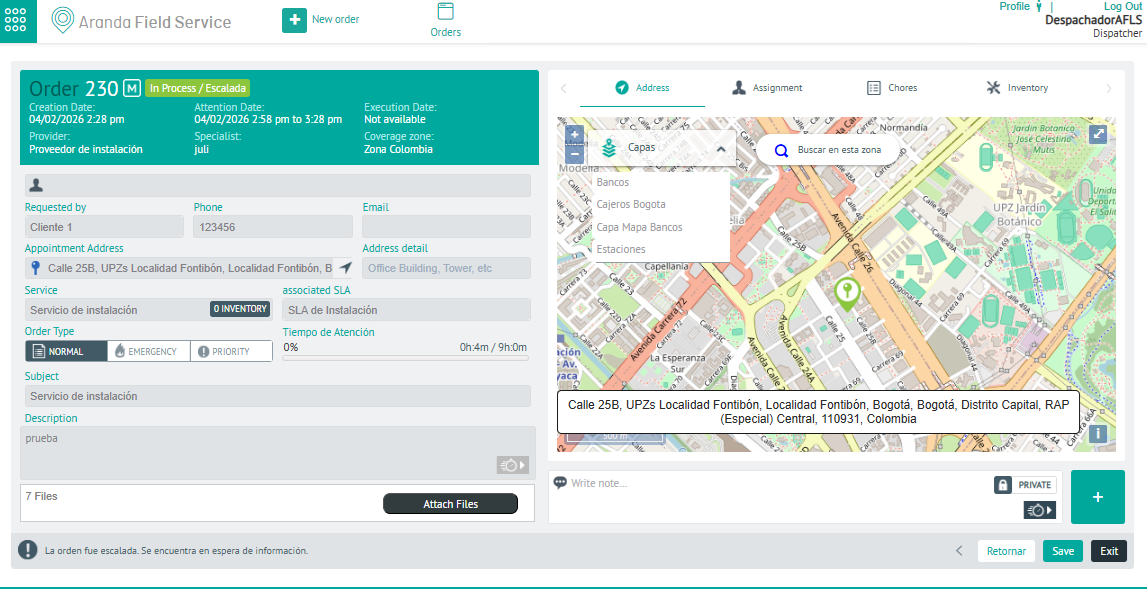
To view the layers created and active in Aranda FIELD SERVICE (AFLS), both in the maps of the web interfaces (order modules, monitoring of specialists or customers) and in the mobile application, go to the box located in the upper left corner of the map and select the desired layer.
The first points of the selected layer will be automatically displayed based on the map location. If the map is moved, you will need to click on the “Search in this area” button to make the points fit the new location.