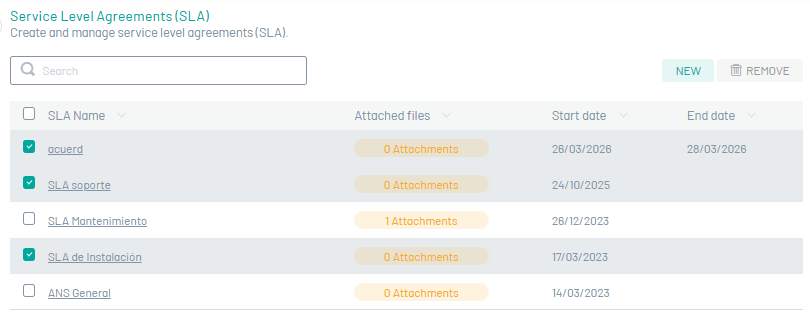
Create SLA SLAs
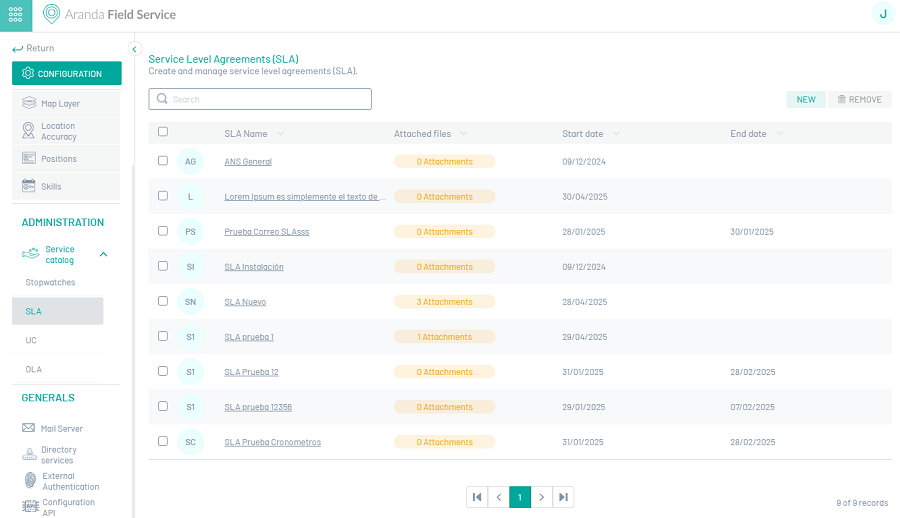
1. To create Service Level Agreements, go to the AFLS configuration console, in the section Service Catalog from the main menu, select the SLA.
2. In the information view, select the New and enter the following information:
3. In the Service Agreement Detail View, you can configure the SLA with the following fields:
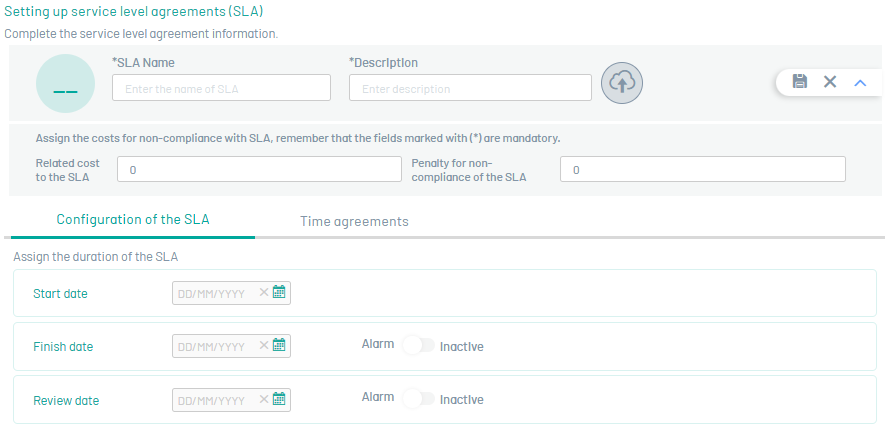
SLA Detail
| Field | Description |
|---|---|
| SLA Name | The name given to the service level agreement. |
| Description | Clear and explanatory text of the service level agreement. |
| SLA-related cost | This option allows you to set the cost related to the execution of the SLA. |
| SLA Failure to Comply Penalty | This option allows you to set the default value when the SLA expires. |
| Attachments | By selecting this button you can attach SLA files as long as they do not exceed 10 MB. 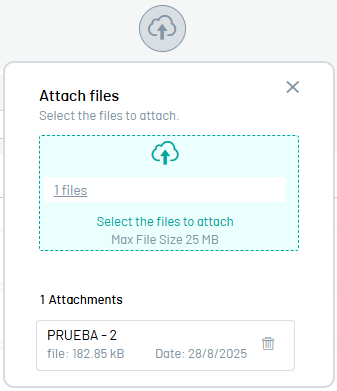 |
SLA Configuration
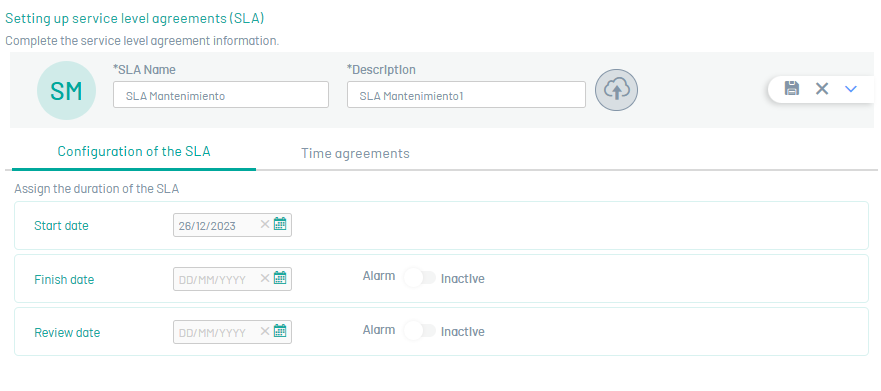
4. In the Deal Detail View, select the SLA Configuration, where you can define dates for the agreements.
| Field | Description |
|---|---|
| Start Date | This option allows you to set the SLA start date. |
| End Date | This option allows you to set the end date of the SLA, entering a date in this field enables the alarm field for the end date. |
| Date Reviewed | This option allows you to set the SLA revision date, entering a date in this field enables the alarm field for the revision date. |
⚐ Note: The user will be able to enable the sending of an alarm when the date of revision or termination of the Service Level Agreement approaches, sending administrators a notification with the respective information.
Time agreements
5. In the Deal Detail View, select the Time Agreements, where you can view, define and associate the stopwatches with the service agreement.
⚐ Note: The timer functionality for each work order is defined during the AFLS Timer Settings
Select the stopwatch(es) and click the ASSOCIATE. Add the required times (hours, minutes and the percentage of compliance).
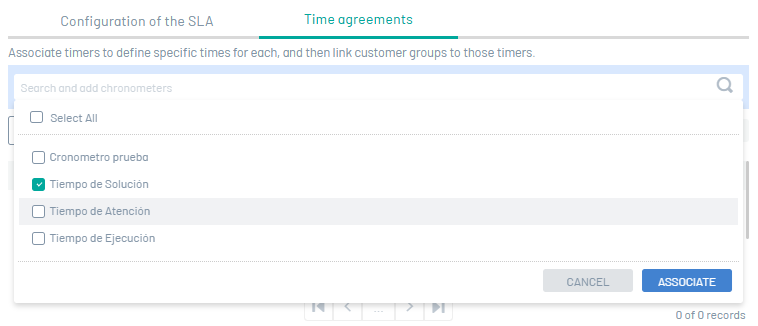
⚐ Note: All SLAs must have only one timer marked as the main and it is the one that will be displayed on the work order.
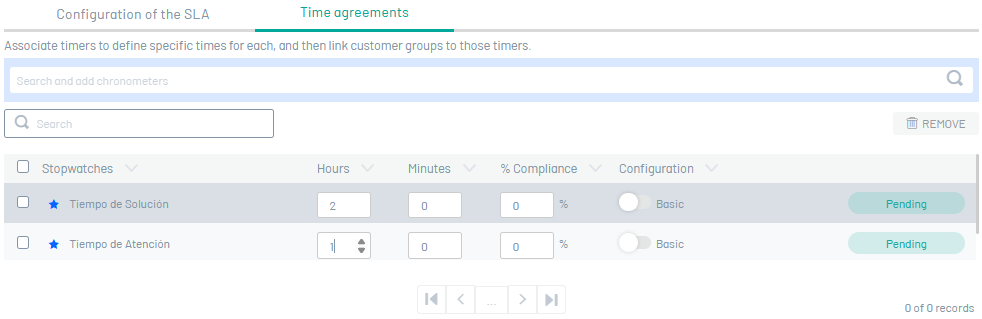
6. When you finish configuring the SLA service agreement, click Save  to confirm the changes made.
Timing Agreements/Advanced Configuration
7. When you enter the created time agreement again, the Advanced Settings and Customers Group fields are enabled on the Time Agreements tab.
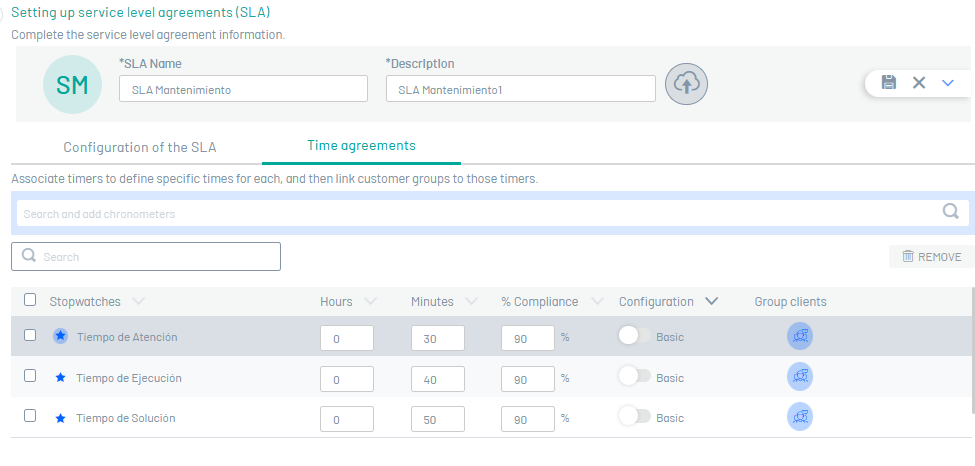
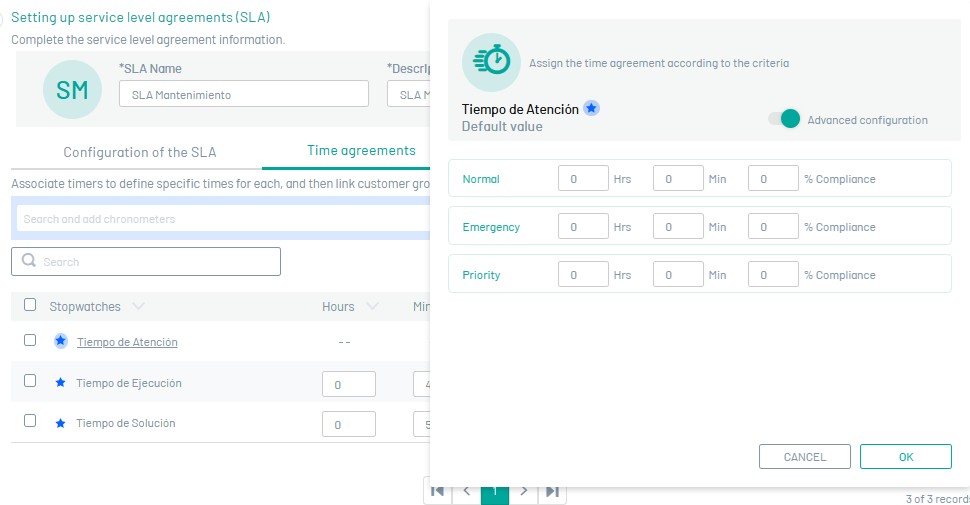
8. In the Settings column of a stopwatch, select the word Basic, the window with the name of the stopwatch is enabled, and the activation of Advanced Settings is enabled. Assign the times and percentage of compliance of the agreement and click OK
9. In the timers defined in the Time Agreements tab, you will be able to display the activation of advanced settings.
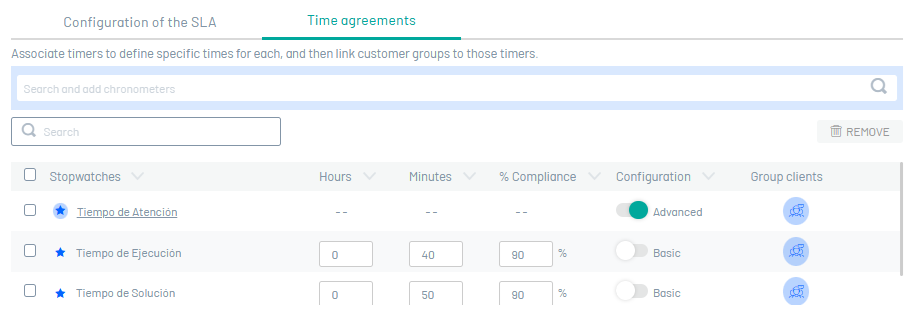
⚐ Note: If the user changes the stopwatch from basic to advanced, the values are copied to the 3 priorities Emergency, Normal and Priority. If the user changes from Advanced to Basic, the priority values are copied Normal and they continue to be mandatory.
Time Agreements/Customer Group
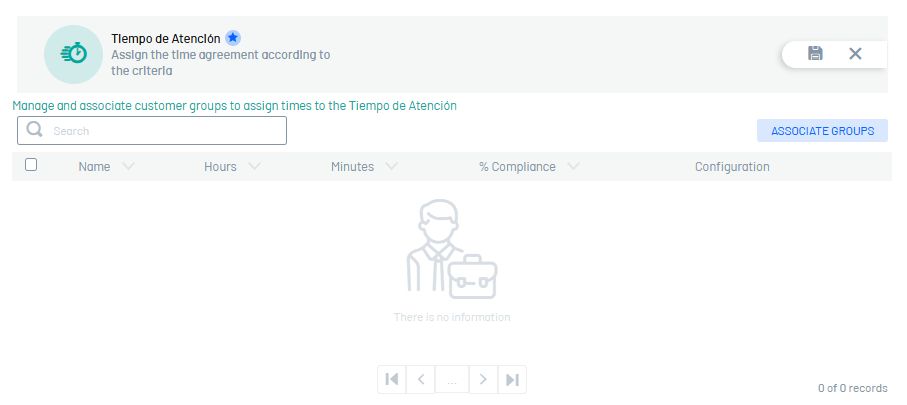
10. To associate groups with the timer defined in the service agreement, select the Customer groups  . In the window that is enabled, click the ASSOCIATE GROUPS, where you can search for and add existing groups in AFLS.
11. Select one or more groups and click the ASSOCIATE.
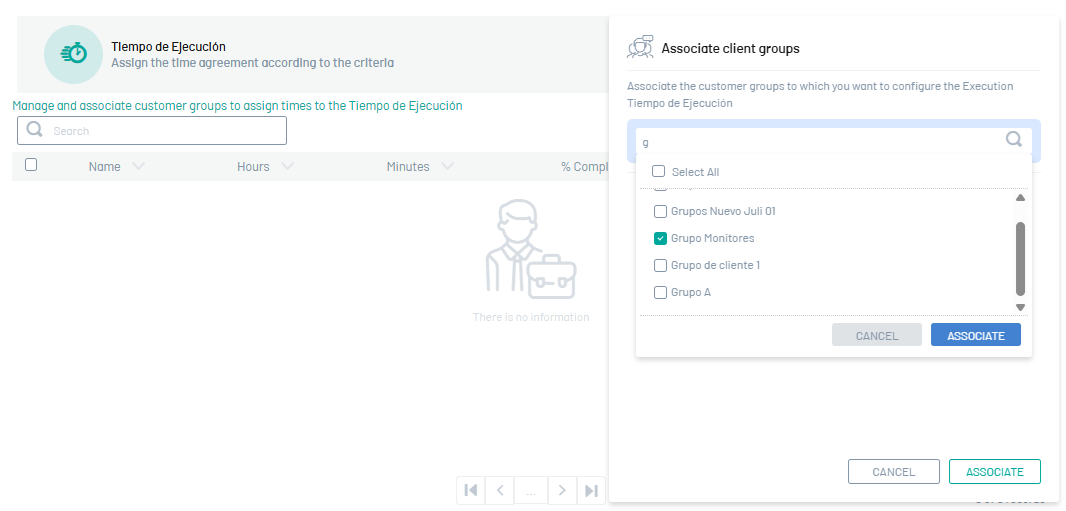
12. The customer groups associated with the timer will be displayed along with the corresponding fields to enter the hours, minutes, and percentage of compliance required. This setting will be applied when the group is linked to a customer and a work order is generated under that customer.
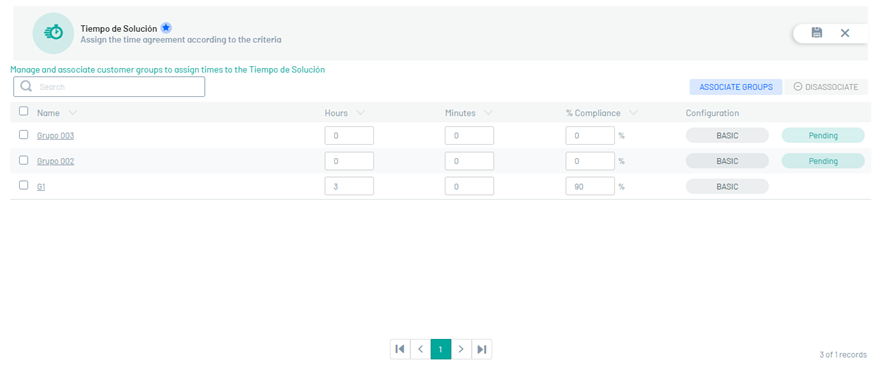
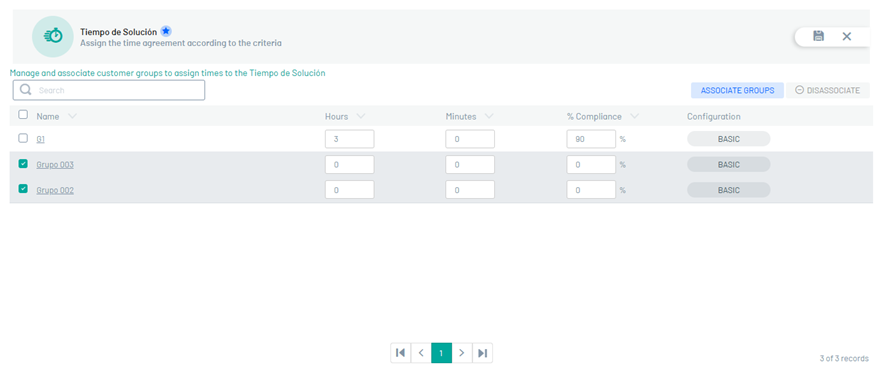
13. To delete a customer group associated with the timer, in the list of groups, select the check of one or more records and select the Disassociate to delete the associated information.
Edit SLA
14. To edit an SLA SLA agreement, in the SLA configuration list, select the name of the record to be edited; In the Detail view, you can modify the required information.
Eliminate SLA SLAs
15. To delete an SLA SLA, in the SLA configuration list, select the check for one or more records and select the ELIMINATE.