


Webhooks are a type of notification where an application or system sends real-time information whenever one or more events related to different inventory movements (inputs, outputs, allocation, assignment change, return) occur during work order management in AFLS.
Configure Inventory Webhooks
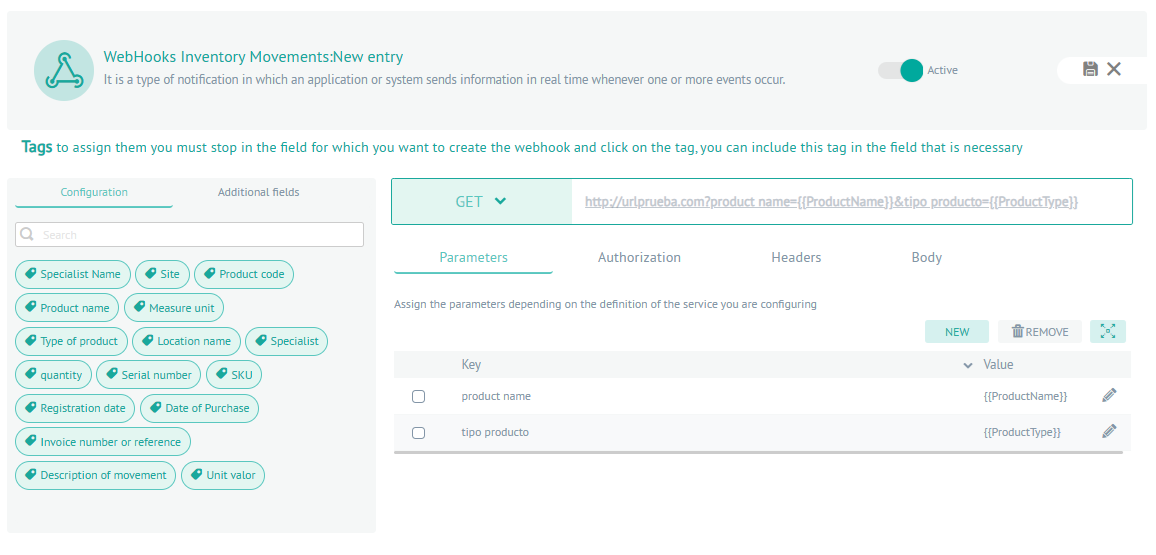
1. To set up a WebHook, go to the WebHooks view, in the Configuration from the main menu, select the WebHooks and the category Inventory.
2. In the detail view of Webhooks for inventory you can activate the category according to the inventory characteristic, to which you want to make the configuration, the available options are:
- New Entry
- New Departure
- Inventory Allocation/Change of Allocation
- Return of Inventory
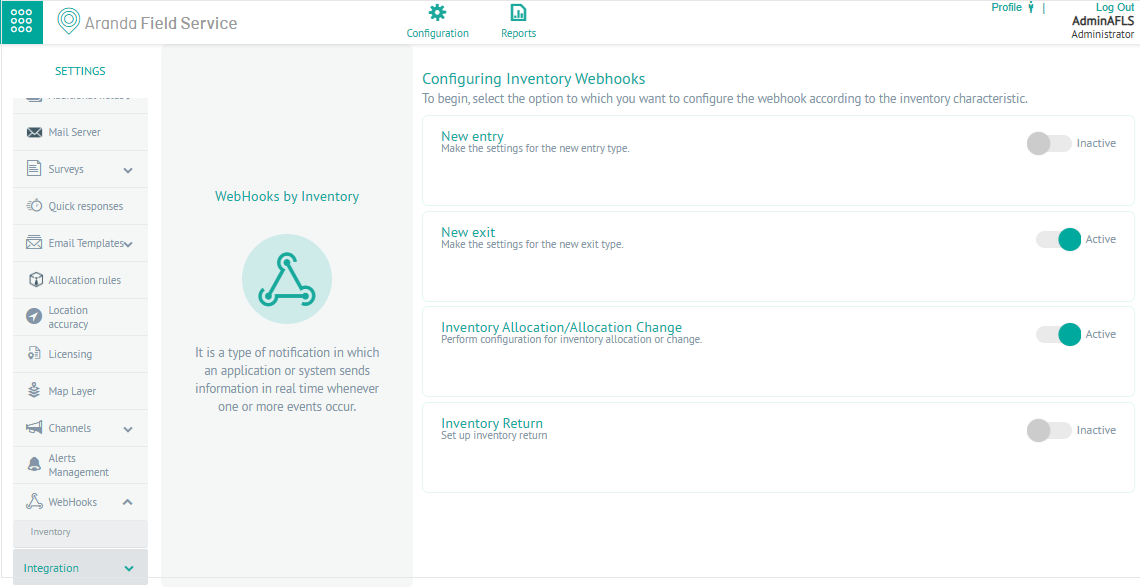
3. In the Webhooks Detail View you can configure the url and assign parameters, authorization, header and body. The components to configure the webhook are:
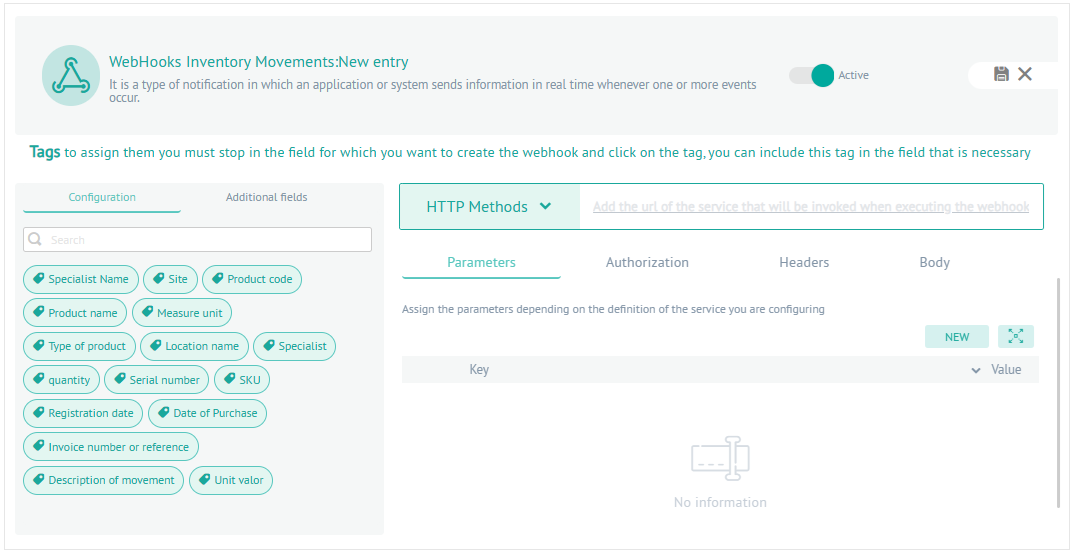
| Fields | Description | |
|---|---|---|
| Tags | These are quick texts that are populated with information from work orders or in the inventory movement. |  |
| Service Url | You can include the URL of the request that will be invoked when you run the WebHook. You can also use TAGS as parameters in the URL. | |
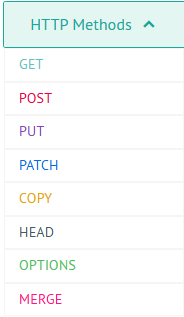
| HTTP Methods | You can set different types of requests: GET POST PUT PATCH COPY HEAD OPTIONS MERGE |
 |
| NEW | This option allows you to assign new parameters to the webhook. |  |
| Enlarge | This option allows you to expand the information of the configured parameter. |  |
| ELIMINATE | This option allows you to delete the selected parameters. |  |
4. In Webhooks Detail View, define a HTTP method and add the URL of the request that will be invoked when the WebHook is executed.
⚐ NOTE: It is possible to use tags or quick texts such as Value, unifying by concatenating in the URL the following structure: &+Key+=+{{Value}}. Example: &MeasureUnit={{Measure}}.
Assign Parameters
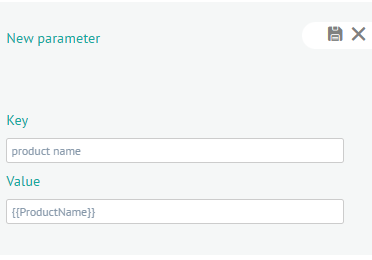
5. In the Webhooks Detail View, select the Parameters, where you can assign the necessary parameters that will be used for the request call. To enter a parameter, select the NEW and enter the data Key and Value.
⚐ NOTES:
- When selecting the New button, you can use the tags or quick texts in the view as a “Value” field and it will be displayed unified in the URL with the following structure: &+Key+=+{{Value}}. Example: &MeasureUnit={{Measure}}.
- In the case of not using tags, you will be able to view the parameters entered, they will be unified in the URL automatically with the following structure: &+Key+=+Value. Example: &Parameter1=123456.
6. To modify the parameters, click the Edit  ; The fields to make the adjustment are enabled. To save your changes, click the Close
  and the updated record will remain.
Assign Authorization
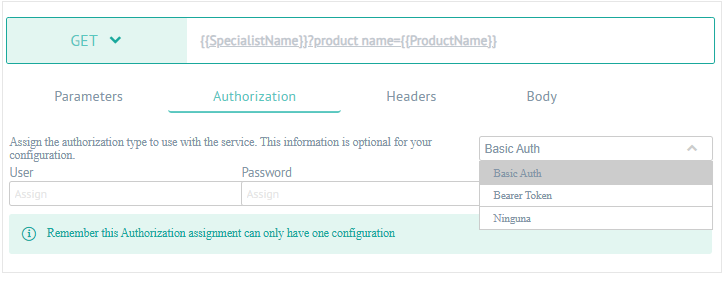
7. In the Webhooks Detail View, select the Authorization, where you can enter the necessary authorization that will be used for the call for the application.
To enter the authorization, select the option to configure in the list, the following types are displayed:
| Fields | Description |
|---|---|
| Basic Auth | In this option, the following data is requested: Username and Password. |
| Bearer Token | In this option, the following data is requested: Access Token. |
| No | In this option, you do not need to perform the authorization configuration. |
Assign Header
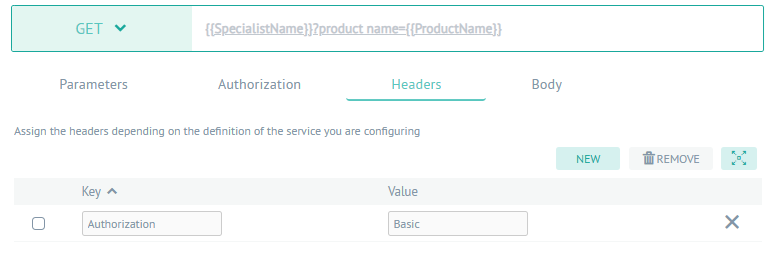
8. In the Webhooks Detail View, select the Header, where you will be able to enter the necessary headers that will be used for the call for the application.
To enter a heading, select the NEW which enables a view to enter the data of Key and Value.
Assign Body
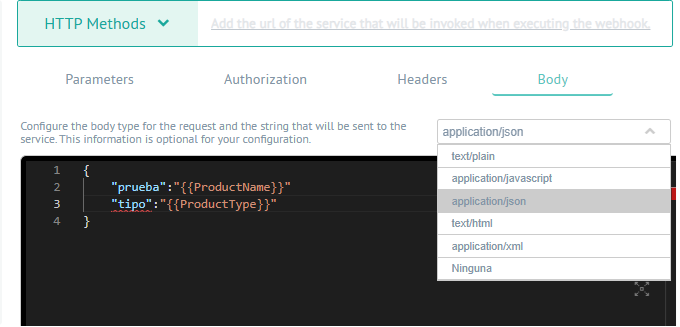
9. In the Webhooks Detail View, select the Body, where you can enter the required body that will be used for the call for the application.
To enter the body, select the option to configure in the list and you will be able to view the following types:
- text/plain
- application/javascript
- application/json
- text/html
- application/xml
- No
10. When you finish configuring inventory webhooks, click Save  to confirm the changes made.