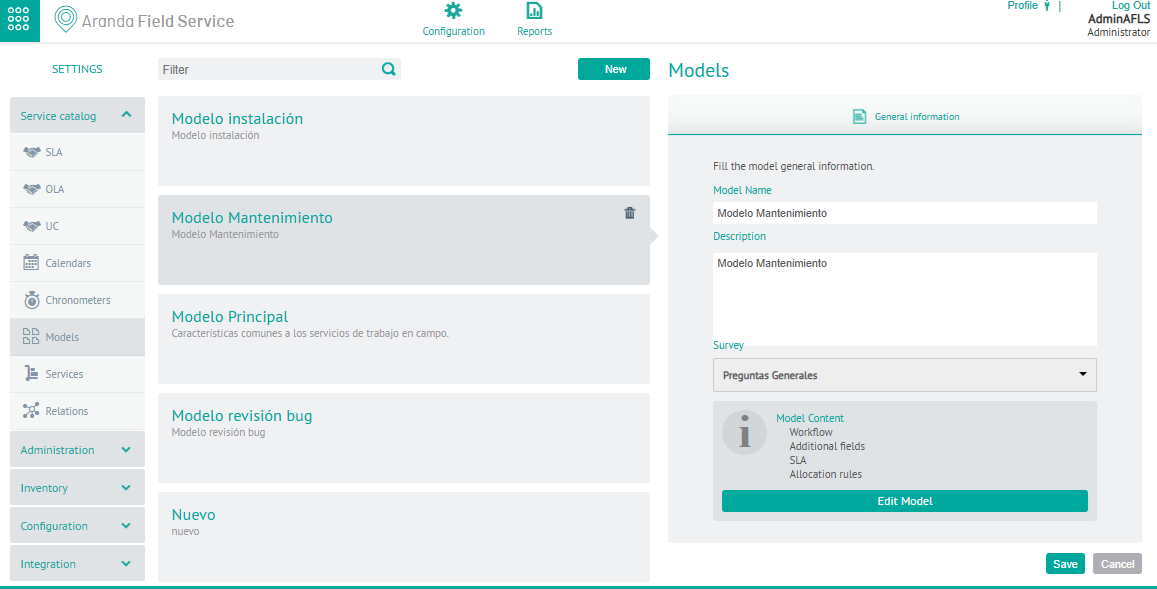
Surveys that aim to know the level of satisfaction of end users and in AFLS can be configured in 2 categories: General Settings and Survey Templates.
General Survey Settings
1. To define the general settings for surveys, go to the AFLS Configuration Console in the Configuration from the main menu, select the Surveys and the category General Settings.
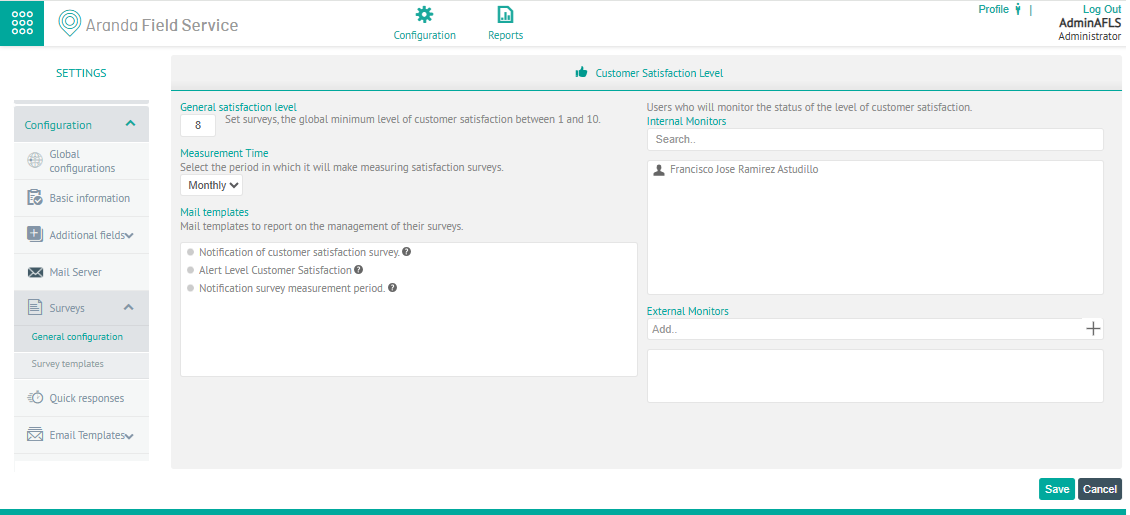
In the Customer Satisfaction Level Detail View, you can fill in the following information:
| Fields | Description |
|---|---|
| Overall Satisfaction Level | Set a satisfaction level on a scale of 1 to 10 for all survey templates. |
| Measurement Time | Sets the measurement period of the survey (Monthly, Weekly, or Daily). This measurement is used to send a report to the monitors with the weighting of the level of satisfaction for each template of all the surveys answered in that period. |
| Email templates | This option presents the templates that are used to report customer satisfaction levels (Customer Satisfaction Survey Notification, Customer Satisfaction Level Alert, and Survey Measurement Period Notification). |
| Internal and external monitors | Search for the internal monitors and add the emails from external monitors that will receive notifications with the news of the configured satisfaction levels. |
2. When you finish setting up the surveys, click Save to confirm the changes made.
Create Survey Templates
1. To define survey templates, go to the AFLS configuration console, in the Configuration from the main menu, select the Surveys and the category Survey Templates. In the information view, select the New Survey
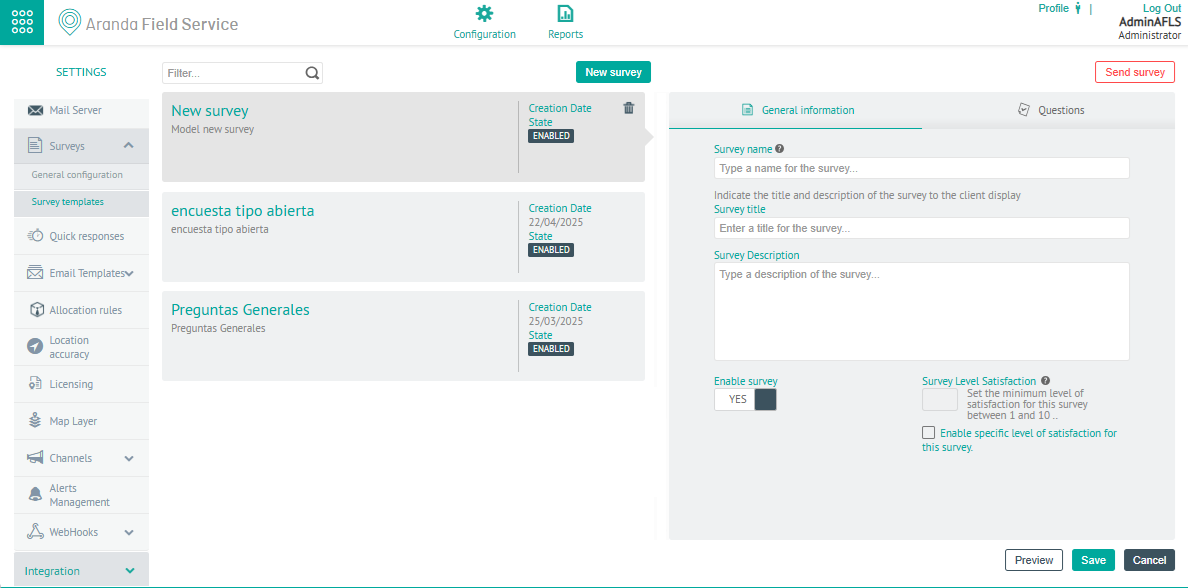
2. In the Survey Detail View, select the Overview, where you can fill in the following information:
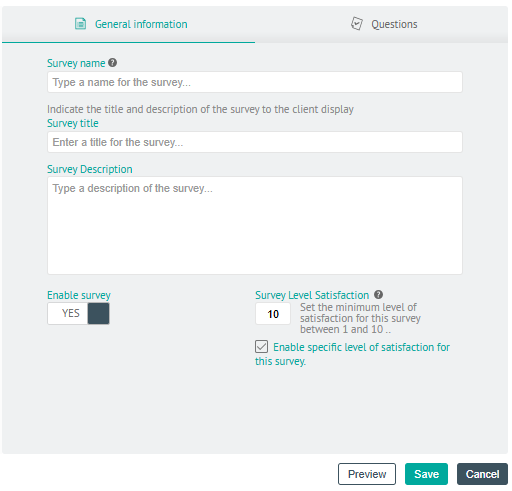
| Fields | Description |
|---|---|
| Survey Name | Name by which the survey can be searched in this module. |
| Survey Title and Description | This is the information that will be displayed to the customer when they decide to take the survey. |
| Level of satisfaction | Specific minimum level per survey template (i.e. this level of satisfaction prevails over the general one). |
| Enable Survey | This option allows you to enable the created survey. |
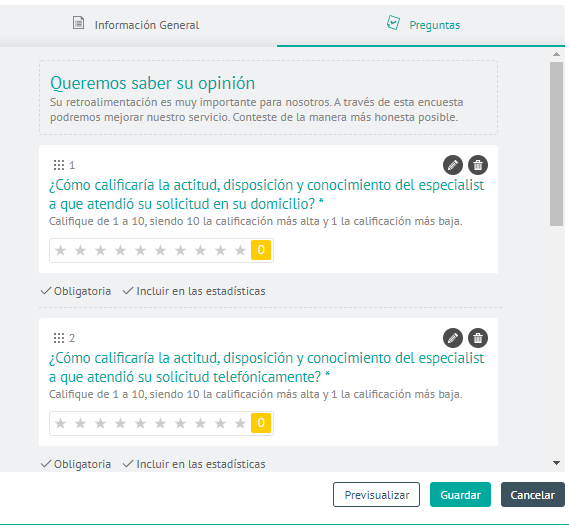
3. In the Survey Detail View, select the Questions . To add new questions, click the New question .
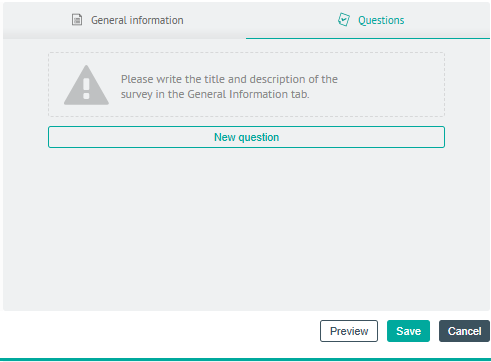
4. Set up the survey questions and fill in the following information:
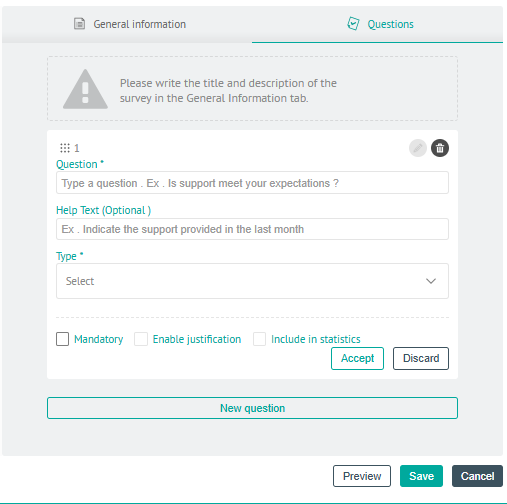
| Fields | Description |
|---|---|
| Question | Name of the survey question. |
| Help Text | Optional information to complement the question. |
| Guy | This option presents the question types that are configured for the survey: - Open: This option allows you to create an open-ended question with a free answer. - True or false: This option allows you to create a closed-ended question with a yes or no answer. - Qualification: This option allows you to include a rating to the survey - Custom: This option allows you to create a question with different criteria |
5. According to the type of question defined (Open, True or False, Rating and Custom), you can activate the following actions:
| Question Type | Mandatory | Enable Justification | Include Statistics |
|---|---|---|---|
| Open | Yes | No | No |
| True/False | Yes | Yes | No |
| Qualification | Yes | Yes | Yes |
| Custom | Yes | Yes | No |
⚐ Example: When you set up a type survey True or False and trigger the action Enable Justification, you must define a response type and characteristics for justification
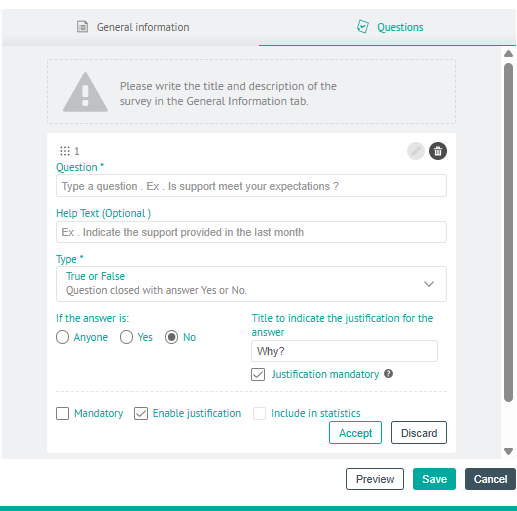
6. When you finish defining the survey questions, click Accept or Discard according to the case.
7. When you finish setting up the survey template, click Save to confirm the changes made.
Preview Surveys
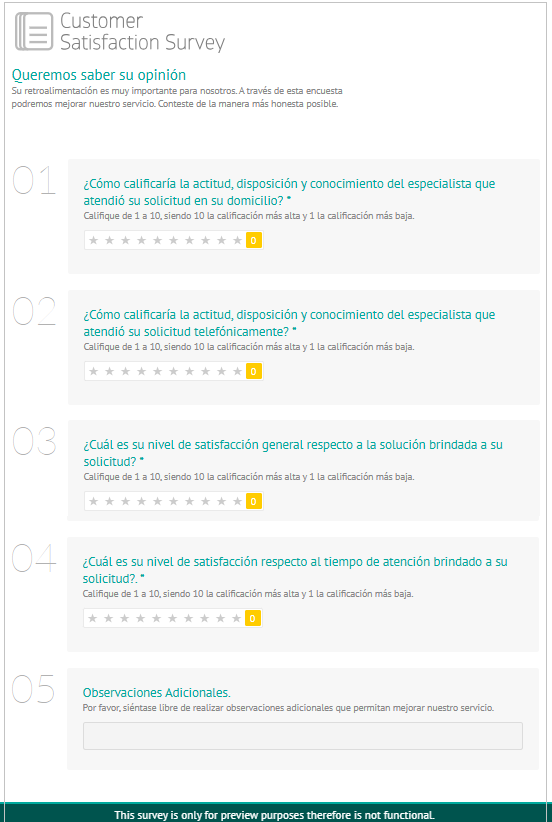
8. After configuring the questions, click on the Preview to preview the survey.
Edit/Delete Survey Questions
9. Enter the record of a created survey. In the Survey Detail View, select the Questions and in one of the questions select the Edit  to modify the associated information
⚐ Note: Only survey questions that have not been answered can be edited.
10. To delete a survey question, in the Survey Detail View, select the Questions and in one of the questions select the Eliminate to modify the associated information.
Send Surveys
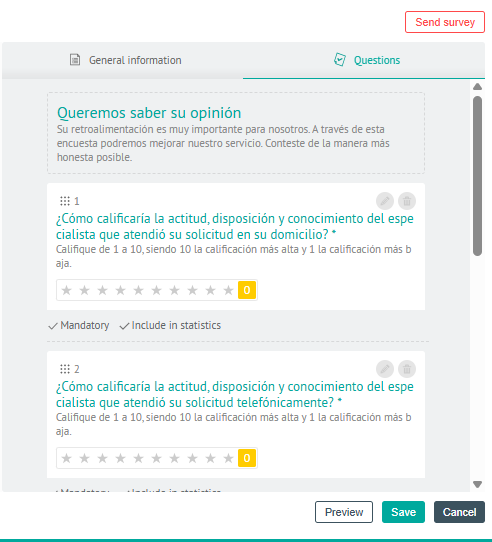
11. In the Survey Detail View header, select the Send Survey.
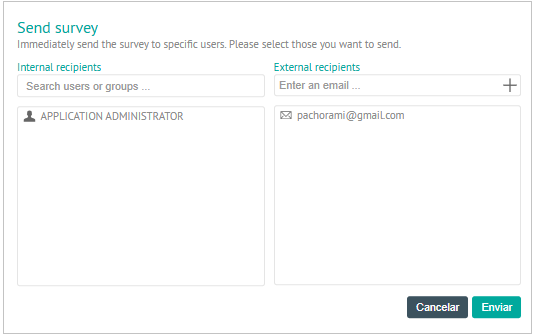
12. In the window that is enabled, find and select an internal recipient and add an email for an external recipient. When filling in the data, click on the Send.
Edit Survey Templates
13. To edit a survey template, in the detail view, select a record from the existing surveys and select the Edit icon to modify the required information.
Delete Survey Templates
14. To delete a survey template, in the survey template information view, select a record from the existing survey list and select the icon to remove the associated information.
⚐ Note: Only surveys that are not associated with a model and do not have a response can be deleted.
Model Surveys
To view a survey on a model, go to the AFLS Configuration Console in the Service Catalog from the main menu, select the Models. In the information view, select the record of a model, and in the detail view, in the Surveys field, relate the template of the created survey.